Transcription of Create a New My WorkKeys Account
1 Quick Start Guide Updated 1 Create a New My WorkKeys Account Document Purpose This document is about how to Create a new MyWorkKeys personal Account to access and manage your ACT WorkKeys National Career Readiness Certificate (ACT WorkKeys NCRC ). This document contains information for an examinee who has taken these three tests, known collectively as the ACT WorkKeys NCRC tests: ACT WorkKeys Applied Math ACT WorkKeys Graphic Literacy ACT WorkKeys Workplace Documents The level of certificate you earned Platinum, Gold, Silver, or Bronze is based on the level scores you achieved when taking those three tests. Process Overview The following table shows the overall process for creating a new Account and managing your ACT WorkKeys NCRCs. Stage Procedure 1 Creating a new, personal MyWorkKeys Account . 2 Activating and accessing your Account . 3 Creating, viewing, printing and sharing a certificate. 4 Closing MyWorkKeys session. Procedure 1: Creating a New MyWorkKeys Account Follow the steps below to Create your new, personal Account for accessing the level of certificate you earned from taking the ACT WorkKeys NCRC tests.
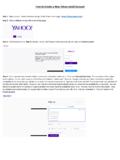
2 1. Type into your internet browser and press Enter. Result: The MyWorkKeys Home Login page displays. 2 IMPORTANT! If you received an email or report with a user ID and password, an Account has already been created for you. To view and share your certificate details, you must use this information to log in to your existing Account rather than creating a new one. Select the link on the login page for Access Pre-created Accounts for help with that. If you have any questions, please contact your test site directly, or the ACT WorkKeys Customer Service at 2. At the Login page, in the sentence that reads If you did not receive login information, you may need to Create a new Account . select the link that says Create a new Account . 3. At the Create an Account page, fill in all of the required (*) fields in all of the sections. Note: If you should select Submit before all fields are completed, or if the data is incorrect, you will receive messages at the top of the screen informing you of what specifically needs to be corrected.
3 IMPORTANT! For the system to retrieve your test scores, you must enter the following fields exactly as you listed them when registering for and taking the ACT WorkKeys tests. These are the five match criteria fields: o First Name o Last Name o Month of Birth o Day of Birth o Examinee ID The User ID and Password for this Account should not be the same User ID and Password you use to access the testing system. 4. When you are done completing the form and reading the Terms and Conditions, select Agree, then choose the Submit button. Result: A message will appear on the Registration Confirmation page stating, Your Account has been created. Please check your email for a registration confirmation email. The email will be sent to the address you provided when you created this Account . 3 Note: If you select Disagree then Submit, you ll receive this message on screen, To continue, you must agree to Terms and Conditions. Procedure 2: Activating and Accessing Your Account Immediately open the registration confirmation email message in your email Account .
4 If you do not see it, check your spam or junk folder to see if your email provider blocked your receipt of it. 1. There is a link and an activation code provided in the registration confirmation email. Enter the activation code provided in the email into the Enter Activation Code field on the Registration Confirmation page of MyWorkKeys, in the Activate Your Account section. 2. Select the Submit button. Result: You ll see the Login page with a message stating Your Account has been activated. Please log in. 3. Log in using the User ID and Password you created for your Account . a. With a successful log in, you should see the MyWorkKeys Home Page with your available certificates listed. You may skip to Procedure 3. b. But if no certificates are available, you may need to update the match criteria in the next step. 4. If applicable ( , if no certificates display), select Update Match Criteria from the navigation menu on the left side of the page.
5 5. Verify that the information displayed next is correct and entered exactly as you entered it when taking the ACT WorkKeys tests. Add information if you took any of the tests under different match criteria. For example, if you used John on one test and Johnny on another. 6. Select Agree after reading the Terms and Conditions. Then choose the Submit button. Result: You ll receive a message stating your match criteria have been updated and to select the Certificate Management navigation menu on the left side of the page. Note: If you select Disagree then Submit, you will receive this message on screen, To continue, you must agree to Terms and Conditions. 4 Procedure 3: Creating, Viewing, Printing, and Sharing a Certificate These are the actions you may take in regards to creating and managing your certificate. Creating a Certificate 1. Select Certificate Management from the navigation menu on the left side of the page. Your available certificate(s) will be displayed.
6 2. On the Create Certificate page, in the Available Certificate(s) section, under Action, select the Create Certificate button. 3. Review the Tests Included in Certificate information. You may select the View Test Details button for each test if you desire to do so. After reviewing the information, select Yes to the question, Correct Test Information? 4. Select Agree after reading the Terms and Conditions, then select the Submit button. 5 Result: You should see a message that states, Your certificate has been created. 5. Under Current Certificate(s), you should see Certificate Type, Level, Certificate ID, and Actions columns. a. Certificate Type ACT NCRC is based on the WorkKeys tests: Applied Mathematics, Locating Information, and Reading for Information. ACT WorkKeys NCRC is based on the new WorkKeys tests: Applied Math, Graphic Literacy, and Workplace Documents. b. Level Platinum Gold Silver Bronze c. Certificate ID is a unique number assigned to your certificate.
7 D. Actions These are explained more fully in sections below. View Print Share Certificate Once you have shared the certificate, the button changes to Stop Public Sharing. Viewing a Certificate Selecting the View button in the Actions column of Current Certificate(s) section will change the display from Certificate Management page to a Certificate Details page with Tests Included in Certificate section. Since you are in View mode, the buttons remaining to choose from are Print or Share Certificate. 6 Note: Anytime you use the Back button, it takes you back to the prior screen. When selecting the View Test Details button in the Actions column of the Tests Included in Certificate section, this is the type of Test Details information you will see. Note: If you haven t yet shared your certificate, it will look like this. 7 Note: If you have already shared your certificate, the PUBLIC SHARE URL appears at the top of the Test Details display.
8 This is the url to include when sending resumes or applications electronically to potential employers. Select the Back button to return to the prior, Certificate Details screen. Printing a Certificate Selecting the Print button in the Actions column of either Certificate Details page or Certificate Management page will open a pdf of the certificate. (First page, Front view) 8 (Second page, Back view) Note: Details on the second page include the benefits of earning this certificate, your level scores for each test, and the type of skills measured by each test at that skill level. It also includes information on how to Share Your ACT WorkKeys NCRC with Employers. You may Save the certificate pdf and/or Print it. When you are done saving or printing the certificate, Close the pdf browser tab. You will be returned to the page from which you selected the Print button. IMPORTANT! A paper copy of the ACT NCRC, (not the new ACT WorkKeys NCRC ), is still available to order from ACT for $20 until December 31, 2017.
9 Call ACT WorkKeys Customer Service at if you need assistance with this. 9 Sharing a Certificate ACT does not release any information until you have authorized it. You control this access through your MyWorkKeys Account . Potential employers will not be able to confirm the authenticity of your certificate details until you have shared your certificate publically. Note: Selecting the question mark (?) next to Share Certificate button results in the pop-up message, explaining what Share Certificate means. Selecting the Share Certificate button under Actions column of either Certificate Details page or Certificate Management page takes you to the Share Certificate with PUBLIC page. This page allows you to make your certificate public for potential employers to view. 10 On the Share Certificate with PUBLIC page, read the Terms and Conditions and select Agree. Then select the Submit button. Note: If you select Disagree then Submit, you will receive this message on screen, To continue, you must agree to Terms and Conditions.
10 Or if you decide that you re not ready to share your certificate yet, select the Cancel button, which returns you to the prior Certificate Management page. Note: Once you have shared the certificate, the Share Certificate button changes to Stop Public Sharing plus a Public Share url is displayed for your use. If you decide to choose the Stop Public Sharing button, you will see this Restrict Certificate from PUBLIC page. Read the Terms and Conditions, then select Agree and then Submit. The Action button will then return to Share Certificate and the Public Share url is gone. 11 How Others May Validate Your Shared Certificate There are two ways for others to access your certificate information. 1. You may provide them with the Public Share url. When they use it, they will be taken directly to a page that looks like this. There is a Print button if they desire to print the information. 2. Or you may provide them with this url: and when they use it, they will be taken to a Validate a Certificate page that looks like this.
