Transcription of CVS Design EZ Control Valve
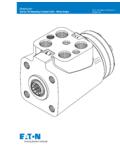
1 CVS Design EZ Control Valve Introduction This instruction manual includes installation, maintenance, and parts information for 1 through 2-inch Design EZ valves through Class 600 ratings. For instructions covering the actuator and accessories, refer to separate manuals. Only qualified personnel through training or experience should install, operate, and maintain a Design EZ Valve . If you have any questions about these instructions, contact your CVS Controls representative before proceeding. Applications and Features Excellent Pressure and Flow Control : CVS Controls Design EZ valves are globe-style with integral end connections, post guiding, and quick-change trim. Typical applications include chemical or hydrocarbon processing, as well as applications that require Control of viscous, non-lubricating or other hard-to-handle fluids. End Connection Styles are flanged Class 150, 300, and 600 raised face, ring type joint or flat face as per ASME or screwed/socket welding consistent with ASME Maximum Inlet Pressures1 for flanged connections are consistent with Class 150, 300, or 600 as per ASME Screwed connections are consistent with Class 600 as per ASME edition.
2 Material Temperature Capabilities: Optional: NACE MRO175/ISO15156-2009 Standard 316 SS Packing Box Parts . Sour Service Capability Shutoff Classifications per FCI 70-2 and IEC 60534-4; Metal Seats: Class IV is standard, Class V is optional. PTFE Composition Seats: Class VI. The CVS Controls Design EZ Flow Characteristics are equal percentage, quick opening, and linear with flow direction up through the seat ring. Instruction Manual Figure 1. Design EZ Valve with Type 667 Actuator and 4150 Controller. 3900-101 Street Edmonton, Alberta, Canada, T6E-0A5 Phone: 780-437-3055 Fax: 780-436-5461 3516 114 Ave SE Calgary, Alberta, Canada, T2Z-3V6 Phone: 403-250-1416 Fax: 403-291-9487 Web Site: mail: Weights: 1- Inch Valve : 11 kg (25 pounds)1- 1/2 Inch Valve : 18 kg (40 pounds)2- Inch Valve : 36 kg (80 pounds) pressure/temperature limits in this manual and any applicable standard or code limitation for Valve should not be Sudden release of pressure may result personal injury or equipment damage if the Valve assembly is installed where service conditions could exceed the limits on the nameplates.
3 Provide a relief Valve for overpressure protection as required by government or accepted industry codes and good engineering practices to avoid such injury or damage. CAUTION Upon ordering, the Valve configuration and construction materials were selected to meet particular pressure, temperature, pressure drop, and controlled fluid conditions. to installation of the Valve , inspect it andany associated equipment for damage and anyforeign material. Ensure the Valve interior isclean, that pipelines are free of foreign material,and that the Valve is oriented so that pipelineflow is in the same direction as the arrow on theside of the installation of the Design EZ controlvalve is with the actuator vertical above thevalve; however it may be installed in anyorientation unless limited by seismic positions may result in uneven Valve plugand seat ring retainer wear, and improperoperation. With some applications, the actuatormay also need to be supported when not in avertical position.
4 For more information, contactyour CVS Controls accepted piping and welding practiceswhen installing the Valve in the line. During thewelding procedure internal elastomeric partsmay stay in place. For flanged valves , use asuitable gasket between the Valve body flangeand pipeline : Post weld heat treating may be required depending on Valve body materials used. It is recommended that all trim components be removed if post weld heat treating is to be performed to prevent damage to internal elastomeric and plastic parts, as well as internal metal parts. Shrunk-fit pieces and threaded connections may also loosen. Contact your CVS representative for more information. a leak-off bonnet construction, remove thepipe plugs (key 14) to hook up the a three- Valve bypass around the controlvalve assembly if continuous operation isrequired during inspection or to the actuator mounting procedure in theappropriate instruction manual if the actuatorand Valve are shipped injury could result from packing leakage.
5 Valve packing was tightened prior to shipment; however, the packing might require some readjustment to meet specific service conditions. 2 Maintenance Design EZ Valve components are subject to normal wear and must be inspected and replaced on a regular scheduled basis. Severe service conditions may require shorter inspection and maintenance intervals. This section includes instructions for packing lubrication, packing maintenance, and trim maintenance. Prior to performing any maintenance operations: 1. Disconnect any operating lines providing air pressure, electric power, or a Control signal to the actuator. Ensure the actuator cannot suddenly open or close the Valve . 2. Use bypass valves or completely shut off the process to isolate the Valve from process pressure. Relieve process pressure from both sides of the Valve . Drain the process media from both sides of the Valve . 3. Vent the pneumatic actuator loading pressure and relieve any actuator spring pre-compression. 4.
6 Use lock-out procedures to be sure that the above measures stay in effect. The Valve packing box may contain process fluids that are pressurized, even when the Valve has been removed from the pipeline. Process fluids may spray out under pressure when removing the packing hardware or packing rings, or when loosening the packing box pipe plug. Should a gasket seal be disturbed by removing or shifting gasketed parts, install a new gasket upon reassembly. Packing Lubrication An optional lubricator or lubricator/isolating Valve (figure 2) is available for PTFE/composition or other packings that require lubrication. It will be installed in an optional tapped hole in the bonnet. Use a good quality silicon-based lubricant. Packing used in oxygen service or in processes with temperatures over 260 C (500 F) do not require lubrication. To operate the lubricator, turn the cap screw clockwise to force the lubricant into the packing box. The lubricator/isolating Valve must first be opened and then closed after lubrication is completed.
7 Figure 2: Optional Packing Lubricator, and Lubricator Isolating Valve Figure 3: PTFE V-Ring Packing Arrangements for Plain and Extension Bonnets 3 Packing Maintenance This section covers PTFE V-ring packing as used in plain and extension bonnets. Unless otherwise indicated, key numbers refer to figure 3 for PTFE V-ring packing. For spring-loaded single PTFE V-ring packing, the spring (key 8, figure 3) maintains a sealing force on the packing. If leakage is noted around the packing follower (key 13, figure 3), check to be sure the shoulder on the packing follower is touching the bonnet. If the shoulder is not touching the bonnet, tighten the packing flange nuts (key 5, figure 11), until the shoulder is against the bonnet. If leakage cannot be stopped in this manner, proceed to the replacing packing procedure. If there is unacceptable packing leakage with other than spring-loaded packing, first try to limit the leakage and establish a stem seal by tightening the packing flange nuts.
8 If the packing is relatively new and tight on the stem, and if tightening the packing flange nuts does not stop the leakage, the Valve stem may be worn or nicked so that a seal cannot be made. The surface finish of a Valve stem is critical for making a good packing seal. If the leakage comes from the outside diameter of the packing, the leakage may be caused by nicks or scratches around the packing box wall. If performing any of the following procedures, inspect the Valve stem and packing box wall for nicks and scratches. Replacing Packing The following section covers packing replacement as used in plain and extension bonnets. Refer to figure 3 for PTFE V-ring packing. 1. Isolate the Control Valve from the line pressure and release pressure from both sides of the Valve body. Drain the process media from both sides of the Valve . If using a power actuator, also shut off all pressure lines to the power actuator, and release all pressure from the actuator. Use lock-out procedures to be sure that the above measures stay in effect while you work on the equipment.
9 Observe the warning at the start of the Maintenance section. 2. Disconnect the operating lines from the actuator and any leak-off piping from the bonnet. Disconnect the stem connector and then remove the actuator from the Valve by unscrewing the yoke locknut (key 15, figure 11). Loosen the bonnet by following the instructions in the next step to avoid personal injury or property damage. Do not remove a stuck bonnet by pulling on it with equipment that can stretch or store energy in any other manner. The sudden release of stored energy can cause uncontrolled movement of the bonnet. The following step also provides additional assurance that the Valve body fluid pressure has been relieved. 3. Hex nuts (key 16, figure 12) attach the bonnet to the Valve . Loosen these nuts or cap screws approximately 3 mm (1/8 inch). Then loosen the body-to-bonnet gasketed joint by either rocking the bonnet or prying between the bonnet and Valve body. Work the prying tool around the bonnet until the bonnet loosens.
10 4. Loosen the packing flange nuts (key 5, figure 11) so that the packing is not tight on the Valve stem. Remove any travel indicator parts and stem locknuts from the Valve stem threads. When lifting the bonnet, temporarily install a Valve stem locknut on the Valve stem. Avoid damaging the seating surface caused by the Valve plug and stem assembly dropping from the bonnet after being lifted part way out. This locknut will prevent the Valve plug and stem assembly from dropping out of the bonnet. 5. Completely remove the cap screws (not shown) or hex nuts (key 16, figure 12) that bolt the bonnet and Valve body together and carefully lift the bonnet off. 6. Remove the locknut and separate the Valve plug and stem from the bonnet. Set the parts on a protective surface to prevent damage to gasket or seating surfaces. 4 Replacing Packing Continued, 7. Remove the bonnet gasket (key 10, figure 12) and cover the opening in the Valve to protect the gasket surface and to prevent foreign material from getting into the Valve body cavity.