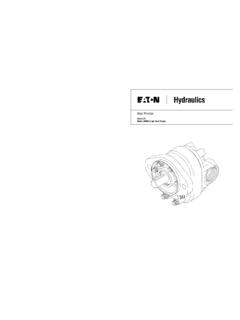
Transcription of DeltaMotors - Eaton
1 Delta 9/19/07 11:40 AM Page 1232244212018171615131112111024149787654 3212 Eaton Char-LynnDeltaMotorsPartsandRepairManual C-MOLO-TS003-ESeptember2007 PartsTable of ContentsParts2 Parts 9/19/07 11:40 AM Page 23 Eaton HEAD LENGTHWIDTHLENGTHcm3/rin3/rSCREW mminchGEROLER mminch DRIVE mminch15987016-001 1 Grease Seal25986832-001 1 Bearing Shell34999949-001 1 Housing45986912-001 3O-ring56943-0001 Back-up Washer69057-0121 Shaft Seal74999849-001 2 Bearing Race85986825-001 1 Thrust Bearing94999967-002 1 Output Shaft10 1 Drive11 5990003-001 2 Back-up Ring12 112530-0371O-ring13 5987176-001 1 Valve Spring14 14416-0014 Dowel Pin15
2 4999900-001 1 Balancing Ring16 4999904-001 1 Valve17 5990407-001 1 Bearing18 4998396-001 1 Thrust Bearing20 4999898-001 1 Valve Plate21 1 Gerolor Assembly22 5986586-001 1 End Cap23 7 Hex Head Screw14163-0011 Nut, Slotted (Not Shown)14392-0061 Key (Not Shown)14628-012 Slinger Seal9900436-000 Seal Kit-Contains Parts Indicatedby + 9900437-000 Seal Kit with Seal Guard-ContainsParts Indicated by = =, +=, +=, +=, +=, +=, +=, +=REF PART DESCRIPTIONT ools Required1. Screw driver2. 9/16 Socket Wrench3. Torque Wrench4.
3 Shell BearingTool no. 6062535. Grease SealTool no. 6062546. Main SealTool no. 600421-27. Press8. Shaft Bullet no. 6062569. Loctite 27710. Inside BearingToolno. 60625211. Hammer12. Modified Key13. Modified Cotter Pin 9/19/07 11:40 AM Page 34 Eaton Char-LynnDeltaMotorsPartsandRepairManual C-MOLO-TS003-ESeptember2007 DisassemblyStep 1 Cleanliness is extremelyimportant when repairinghydraulic motors. Work in aclean area. Before disconnectingthe hydraulic motor, thoroughlyclean the exterior. Removemotor from application anddrain the oil from the motorbefore Note:All sealsshould be replaced when themotor is disassembled.
4 Frontshell bearing should be replacedonly when shaft is to 2 Remove the seven bolts anddisassemble the motor in avertical position as shown. Asthe dowel pins are glued in dur-ing assembly, they may or maynot come 3 Examine condition of bearingin the valve plate. Replace thebearing only if signs of wearand/or contamination are necessary remove the bearingfrom valve plate by tapping itwith a hammer and a 9/19/07 11:40 AM Page 45 Eaton Char-LynnDeltaMotorsPartsandRepairManual C-MOLO-TS003-ESeptember2007 DisassemblyStep 4 Remove grease seal by wedg-ing it out with a the shell bearing byprying the bearing cage the rollers and insertkey (.)
5 25 key stock, long,45 recess) horizontally inbetween the races. Press thekey to remove the bearing fromthe 5 Insert flat point of a modifiedcotter pin puller (with tip groundto a flat point) between housingand brass backup. Wiggle upand down to begin to dislodgethe seal and work the pointdeeper in. Work all the wayround the seal. Some locationswork better than others, someseals come out easier 6 Check all mating the chance of leakage,replace any parts that havescratches or burrs. Wash allmetal parts in clean them dry with pressurizedair.
6 Do not wipe parts dry withpaper towels or cloth, as lint ina hydraulic system will 9/19/07 11:40 AM Page 56 Eaton Char-LynnDeltaMotorsPartsandRepairManual C-MOLO-TS003-ESeptember2007 Step 1 Position the housing in thevertical position on a cleansmooth surface, use shell bearingtool No. 606253 and press theshell bearing into position in lettering on thebearing race denotes the sideto be contacted by the 2 Lubricate the grease seal withMobilux EP 111 and press it intoposition in the housing with toolNo. 3 Flip housing. Install back-upwasher into interior bore of thehousing.
7 Lubricate the shaftseal lip with Mobilux EP 111,place on assembly tool and press it into theinterior bore of the 9/19/07 11:40 AM Page 67 Eaton Char-LynnDeltaMotorsPartsandRepairManual C-MOLO-TS003-ESeptember2007 ReassemblyStep 4 Place a bearing race, then athrust bearing, and then thesecond bearing race into interiorbore of the housing. Place shaftbullet No. 606256 over outputend of shaft and install into thebearing 5 Install four dowel pins into theblind holes on the balancingring using sufficient Loctite 277to hold the pins.
8 Install onebackup ring, then the o-ringonto the balance ring. Installthe wave spring with sufficientpetroleum jelly to keep it 9/19/07 11:40 AM Page 78 Eaton Char-LynnDeltaMotorsPartsandRepairManual C-MOLO-TS003-ESeptember2007 ReassemblyStep 6 Install the second backup ringinto the housing. Invert thebalance ring and place into thehousing making sure to alignthe dowel pins with the holesin the Note:Press on thebalance ring and verify that itsprings back when ensures that the ring hasnot been 7 Install the valve into the housingwith the shaft notch lining upwith the longest tang of thevalve.
9 Insert button end of thedrive into the shaft and markthe spline tooth that lines upwith the notch in the tooth is critical in thetiming of the 8 Insert the thrust bushing in thevalve plate aligning its bearing into valve platewithTool No. 606252 with thelettering on the bearing contactingthe tool. Place valve plateassembly into the housingaligning the bolt 9/19/07 11:40 AM Page 89 Eaton Char-LynnDeltaMotorsPartsandRepairManual C-MOLO-TS003-ESeptember2007 ReassemblyCWCWCCWCCWBABAStep 9 Install two greased seals intothe Geroler.
10 Install theGeroler onto the drive withsplined end away from thehousing. Align star according torotation preference as outlinedin the timing is given StandardTimingAlign the marked spline of thedrive with star pro-duces CCW rotation when theA port is ReverseTimingAlign the marked spline of thedrive with star pro-duces CW rotation when the Aport is HeadScrewEnd CapGerolorAssemblyO-ringO-ringTimingMark TimingMarkStandardTimingReverseTimingSte p 10 Place the end cap on theGeroler and align the boltholes. Lubricate and insertseven bolts and torque them to500 50 lbf-in (42 4 lbf-ft, 56 5Nm) in a crisscross 9/19/07 11:40 AM Page 9 2007 Eaton CorporationAll Rights ReservedPrinted in USAD ocument No.