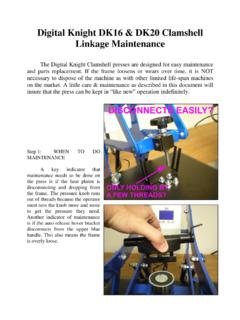
Transcription of Digital Knight Digital Mug Press
1 Digital Knight Digital Mug Press Version 2-11. 1. Contents 3. Setup & 4. Normal 5. Normal Operating 5. Setting 5. Setting 6. Pre- Press 6. Setting 7. Important Pressure 7. Additional Green 8. Replacement Green 8. Guidelines, Tips & 9. ERR 10. Over-Temp 10. Programmable 11. How Presets 11. Loading a 11. Editing/Programming a 12. A Walkthrough Tutorial for using 13. User 14. Entering the user menus & 14. Fahrenheit / 14. Timer Counter 14. Recorded Pressings (User Odometer).. 15. Pressure 15. Pressure 15. Temperature Drop 15. Keypad 16. 16. Finished Warning 17. Prepress 17. Prepress 18. Operator 18. Parts / Maintenance / 19. Replacement 19. 19. Wiring 20. 21. Troubleshooting (cont.).. 22. Limited 23. 2. Introduction Congratulations on your purchase of the DK3 mug Press ! This heat Press machine has many exciting features, all of which are meant to help make your heat transfer pressing endeavors as successful and easy as possible.
2 Please take the time now to thoroughly read through this manual to become acquainted with them. It will explain some key features, concepts and methods that will save much time and effort in using this Press and in your heat pressing applications. Throughout this manual, many areas and components of this machine will be referred to by specific names. Please refer to the illustrations below in order to become familiar with some of the terminology used in this manual. Handle Timer Tilt Sensor Clamp / Linkage Quick Release Pin Pressure Knob Controller Heater Band Power Inlet On/Off Switch Base Default Operating Mode of Controller Temperature F/ C Indicator Ready/Heating Indicator Open/Timing/Done Ind. Time Pressure Bar Graph TEMP key PRG key Up/Down Arrow keys 3. Setup & Suggestions Locate the Press on a firm, sturdy work surface.
3 Non-skid rubber matting is especially helpful to keep the Press from sliding on the worksurface. The height of the bench/work space the Press is located on would be ideally 27 to 32 high. The higher the Press , the more difficult to close/lock. Attach the power cord from the rear to the backside of the controller. There is a power inlet on the back panel of the control box for the power cord. Make sure the power cord can not be pulled on. Make sure there is no tension on the inlet socket that the power cord plugs into The Press can be left in the opened or closed position. There is no difference in heating/performance. At certain pressure settings, the handle may rest in the closed position. This is not a problem. 4. Normal Operation Normal Operating Mode The normal operating mode of the Press will display the current actual Temperature at the top of the screen and the time setting or elapsed time below the temperature.
4 The right side the screen will indicate the heating status by stating HEATING, READY, both of those words, or none at all, depending on if it is cooling down or heating up to the set temperature. READY is shown only if the current temperature is within 5 degrees of the set point temperature. The right side of the screen will also indicate the timing status by stating OPEN, TIMING or DONE. The DONE indicator may remain on in some cases until the Press is opened back up. The pressure bar graph digits at the bottom of the screen are not used on the DK3. Setting Temperature From the normal operating mode, simply Press the TEMP key to set the temperature. The flashing 3-digit number is the temperature setting (not the actual current temp). Use the Arrow Keys to set the desired temperature. Hold them down to increase rapidly, Press both together to set it to 350 F.
5 Press TEMP again to lock in the setting. 5. Setting Time From the normal operating mode, simply use the Arrow Keys ONLY to set the time. Do not touch the PRG key. Hold down either the Up or Down arrow key for more than 2 seconds and the time will increase rapidly. Press BOTH Arrow Keys and the time will reset to 00 seconds. Pre- Press Timer There is a second timer available for use, called the Pre- Press Timer . This feature is useful if a multiple-step process is performed. For example: If a product must be pre-pressed for 5 seconds before a main pressing cycle of 20 seconds, the Prepress timer can be set for 5 secs, and the main timer for 20. When the operator closes the Press , the 5-sec time counts down. When the operator opens the Press , the time setting switches to 20 seconds. The word PREPRESS will be displayed next to the pre- Press time setting when it is active.
6 To set the pre- Press time, simply use the Arrow Keys to set the time. If PREPRESS is not displayed next to the time, quickly close and then open the Press to switch to the prepress time. To turn ON the prepress timer feature, enter the User Options Menus (see page 15) and go to the PPR setting and turn it ON. (see page 17). 6. Setting Pressure The DK3 is fully adjustable to accommodate various size mugs. To decrease the pressure, allowing for larger diameter mugs, or to make the tension lighter, turn the pressure knob to the right, clockwise. The heater band will rise away from the front of the Press . The allen screw will enter into the plunger shaft deeper. To increase the pressure, allowing for smaller diameter mugs, or to make the tension tighter, turn the pressure knob to the left, clockwise. The heater band will come closer to the front of the Press .
7 The allen screw will come out of plunger shaft further. Important Pressure Notes The clamp must lock in place for a successful transfer. Do not simply close the handle in a resting position. The handle must lock and clamp down so that there is significant pressure on the mug. If the clamp assembly can not be locked, then the pressure knob must be adjusted. Do not over tighten the pressure. If it requires a lot of force to close the Press onto the mug, the black adjustment knob or mug handle can break. The handle should be closable with one hand of the operator when properly lubricated. Sublimation inks do not require much pressure for a good transfer. However - many styles of imprintable mugs are not straight, especially at the top & bottom of the mug. For this reason, heavier pressure helps Press the transfer right up against the entire surface of the mug.
8 Set the pressure adjustment so that there is a firm clamping force. This will insure good contact, and great results. When the Press is hot, and after much use, the pressure assembly may be difficult to adjust. An ALLEN KEY has been included to allow for easy adjustment. 7. Additional Green Pads For mugs or cylinder shaped items less than approximately 3 in diameter, an additional 1/16 or 1/8 green heat conductive pad may be required. Wrap this additional pad around the smaller diameter mug to make up for the difference in size. Additional time may be needed for pressing to make up for heat loss through the extra padding. Replacement Green Pads The green pads on the heater will regularly wear and need replacement. Contact the factory for replacement pads. Make sure you indicate which pad thickness your version Press uses: either 1/16 or 1/8 thick green heat conductive padding.
9 Some mugs and users can achieve several hundred mugs or more from a single pad, where other applications and users need to replace the pad more often. As a general rule of thumb, the heavier the pressure, and the wider range of mugs/cylinders pressed in the Press , the more often the pad needs replacing. The straighter and more consistent the mug size used in the Press , the longer the pad life. It is normally time to change the green pad when light spots begin appearing where normally good results appeared prior, and obvious indents, chips, cuts, and sagging of the pad occur. 8. Guidelines, Tips & Settings Set the DK3 to 400 F for 5 minutes to begin, and try 30 seconds less on subsequent mugs if good results are achieved. Always use a plain paper cover sheet OR teflon liner over the entire mug surface on top of the transfer to protect the mug surface.
10 For some offset transfers, high energy sublimation inks, hard mug coatings or full bleed handle to handle transfers, it may be necessary to increase the time to minutes or more. ALWAYS TRIM the cover sheet down to within the flat surface of the mug. Allowing papers/cover material to overlap the edges of the mug will cause wrinkling and white lines in the image. If the results are not acceptable, or you are using laser transfer papers or other type of transfer media, contact your transfer ink or paper supplier for recommended guidelines. Please note that when pressing mugs, it is perfectly normal to have a significant drop of 30+ in temperature during the first part of the cycle due to the mug absorbing a large amount of heat. One recommendation for increasing production and decreasing pressing time is to use a pre-heating oven, such as a small toaster oven or other countertop batch heater.