Transcription of DIM-V3 THIS LATEST MANUAL VERSION SUPERSEDES ALL …
1 INSTALLATION & OPERATIONALMANUALM anufactured by SWCORP5701 NW 35th AvenueMiami, Florida 33142 DON T WAIT! REGISTER NOW!Register your product within 90 days to ensure your bathtub is recognized as an official purchase and is eligible for warranty coverage. Mail in the completed registry card to 5701 NW 35th Ave Miami, FL 33142 or register online at Registration Card Name .. Address ..City .. State .. Zip ..Phone .. Email ..Date of Order or Purchase # .. SKU or Model # ..Installer s Name .. Phone ..I have read the Owner s Guide carefully and understand and agree that any installation, operation or maintenance of the bathtub must be done strictly in accordance with instructions and guidelines contained in the owner s MANUAL and installation Date ..CUT ALONGDOTTED THIS LATEST MANUAL VERSION SUPERSEDES ALL PREVIOUS INSTRUCTIONS & OWNER S MANUAL (Refer to individual model sheets for specifications)BEFORE BEGINNING INSTALLATION, CHECK THE FOLLOWING ITEMSAND READ THE INSTRUCTIONS CAREFULLY.
2 CHECK ENTIRE UNIT FOR CONCEALED DAMAGE. If there is any damage, DO NOT INSTALL! Shipping damages must be reported to the carrier immediately. All damage must be discovered and reported prior to installation in order to have it covered under the warranty! DAMAGE MUST BE REPORTED WITHIN 5 BUSINESS DAYS OF DELIVERY! COMPARE COLOR OF UNIT WITH OTHER FIXTURES. If color is not sufficiently compatible with fixtures, DO NOT INSTALL!PLANNING THE INSTALLATION1. Make certain the floor structure is level and adequate to support installation. See floor loading in tub Building codes require that a panel(s) be constructed to allow ample clearance for plumbing repairs and pump service or removal. (Please refer to your local codes for regulations.)3. Using the tub itself, or installation drawings, measure and mark locations for waste pipe , water supply , wiring runs, and service SAFETY INSTRUCTIONSRead and follow all instructions and save these !
3 Examine all plumbing for damage and water test before final installation. If damage has occurred, call our Technical Service Department at (305) ! Alterations or modifications of the plumbing system without expressed written authorization will invalidate all warranty ! Installation must comply with current local and state building, plumbing, and electrical ! It is the responsibility of the installer or owner to determine code requirements prior to ! Connections should be made by licensed plumbers and INSTRUCTIONS:* Do Not lift by plumbing at any time! Lift by the tub deck.* Tub must be supported by the subfloor and bedding, not by the tub lip.* Run pump and test all functions and plumbing prior to finishing installation.* Run pump only when water in tub is two inches over modifications to the plumbing system, including the pump, will void the warranty and AND FOLLOW ALL INSTRUCTIONS1.
4 DANGER: To reduce the risk of injury, do not permit children to use this unit unless they are closely supervised at all Use this unit only for its intended use as described in this MANUAL . Do not use attachments not recommended by the Never drop or insert any object into any Do not operate this unit without the guard over the suction The unit must be connected only to a supply circuit that is protected by a Ground-Fault Circuit Interrupter (GFCI). Such a GFCI should be provided by the installer and should be tested on a routine basis. To test the GFCI push the test button. The GFCI should interrupt power. Push the reset button. The power should be restored. If the GFCI fails to operate in this manner, there is a ground current flowing indicating the possibility of an electrical shock. Do not use this unit. Disconnect the unit and have the problem corrected by a qualified service representative before A green colored terminal (or a wire connector marked `G , `GR , `GROUND , or `GROUNDING ) is provided within the terminal compartment.
5 To reduce the risk of electrical shock. connect this terminal or connector to the grounding terminal of your electrical service or supply panel with a continuous green insulated copper wire equivalent in size to the circuit conductors supplying the equipment. but no smaller than AWE ( )7. A pressure wire connector on your bath is provided on the exterior of the terminal box within this unit to permit connection of a No. 8 AWE ( ) solid copper bonding conductor between this unit and all electric equipment and exposed metal in the vicinity, as needed to comply with local SAVE THESE TUB FOR CONCEALED COLOR COMPATIBILITY WITH OTHER TO INSURE THAT THE BATH HAS THE PROPER WILL NOT BE HELD RESPONSIBLE FOR TUBDAMAGE OR COLOR COMPATIBILITY PROBLEMS AFTER WHIRLPOOL IS WILL NOT BE HELD RESPONSIBLE FOR COSTOF INSTALLATION OR REPAIR IF AN INCORRECT TUB IS INSTRUCTIONS BEFORE STARTING tub surface is made of marine grade acrylic.
6 The substructure is a composite laminate constructed of fire retardant wired for 110 Volt 20 Amps. Ground-Fault Circuit Interrupter (GFCI) is required. The 20 Amp GFCI breaker must not supply any other circuits or devices. If and electric heater is equiped an additional dedicated 15 amp breaker is required. An access panel must be installed to permit pump unit must be connected only to a supply circuit that is protected by a Ground-Fault Circut Interrupter (GFCI). Such a GFCI should be provided by the installer and should be tested on a routine test the GFCI push the test button. The GFCI should interrupt power. Push the reset button. The power should be restored. If the GFCI fails to operate in this manner, there is a ground current flowing indicating the possibility of an electrical shock. (See schematic on Pg. 5)ELECTRICAL ROUGH-INWARNING: When using electrical products basic precautions should always be followed including the following: Rough-in wiring to equipment on a Ground-Fault Circuit Interrupter (GFCI).
7 The GFCI circuit breaker must not supply any other devices or circuits. An access panel must be installed to permit pump : Failure to follow instructions exposes users to risk of electrical shock or ROUGH-INThe bath waste pipe protrudes below the base approximately one inch. Provide supply pipe , rough-in waste and vent per local : On some models, the pump may exceed beyond the perimeter of the tub. If you have such a model, please make allowance during installation. See Page WASTE AND OVERFLOWRead instructions enclosed with bath waste drain for proper setting and fitting . Water tight installation of the drain is the installer s responsibility. The waste and overflow is not included with the tubs unless purchased as an option. if not purchased with the tub, you must supply and install an the unit prior to installation is the responsibility of the installer or building contractor who acts on behalf of the user.
8 They are responsible for ensuring the unit is free of defect or damage. In the event of a problem, the unit must not be installed. SWCORP is not responsible for failures or damage that could have been discovered, repaired, or avoided by proper inspection and testing prior to OF TUBUse a section of the box, cut to size, and place in the bottom of the tub. When possible, keep the box cover over the tub. These steps will help protect the tub from abrasion or damage during : If installing a skirt with removable panel, read in-structions for the skirt prior to rough-in. The instructions are lo-cated in the box with the TUB IN PLACEThe tub needs to be set in mortar or plaster to level tub and pre-vent shifting after installation. Apply mortar to the floor area that makes contact with the tub base. Set tub in opening and push on bottom of tub to secure in mortar.
9 TUB MUST NOT HANG FROM LIP OF TUB! Do not allow tub lip and edges bear any weight of the tub. Do not fill tub with water until mortar has hardened. Seal all joints with sanitary InstallationSet tub in place and level. Install leveling strips to the under side of tub lip Do not hang tub by leveling strips. Set tub in mortar and allow to finishing with your choice of material, make sure access entries are available to the pump, bath waste pipe , and plumbing fixtures. Finish as desired and seal around tub, preferably with sanitary PUMP SYSTEMA fter tub is installed and ready to use, remove all construction debris and clean the pump and : During construction, we suggest that you cover tub to avoid use as trash IS THE INSTALLERS RESPONSIBILITY TOSUPPLY ACCESS TO PUMP AND Once the tub is leveled, the tub must be supported or stabilized with plaster or mortar.
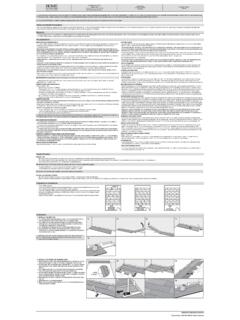
10 If the tub has a supporting base, then mortar is not For Caulking, we recommend 100% sanitary silicone rather than For quieter operation, you may choose to insulate the : ALL TUBS ARE FACTORY TESTED FOR PROPER WATERTIGHT OPERATION. However, the tub must be filled with water to check for leaks that may have resulted from handling, before finishing the tub installation. SWCORP is not responsible for any defects that could have been discovered, repaired or avoided by following this testing and inspection NOTESINSTALLATION4 INSTALLING ONE-PIECE SKIRTIMPORTANT - Read these instructions prior to roughing in bath tub. Fasten 3 wooden blocks to the floor (see Fig. 1).Taking into consideration the shape of the skirt, which should result in a plumb position to the tub, perpendicular to the floor (see Fig. 2). If the skirt needs to be trimmed at bottom, or from the side, you can do so by cutting with a circular saw (carbide or diamond tipped).