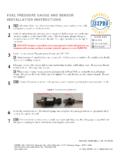
Transcription of EVAPORATOR COIL INSTALLATION INSTRUCTIONS
1 EVAPORATOR COIL INSTALLATION INSTRUCTIONSEVAPORATOR COIL SAFETYT able of ContentsEVAPORATOR COIL SAFETY ..1 INSTALLATION REQUIREMENTS ..2 Tools and Parts ..2 System Requirements ..2 Drain Requirements ..2 INSTALLATION INSTRUCTIONS ..2 Inspect Shipment ..2 Prepare EVAPORATOR Coils ..3 Verify Orifice Size ..3 Assemble Distributor/Orifice ..3 Install EVAPORATOR Coil ..4 Install Auxiliary Drain Pan ..5 Install Condensate Drains ..5 Connect Refrigerant Lines ..6 ASSISTANCE OR SERVICE ..6 Accessories ..6 WARRANTY ..7065638101 You can be killed or seriously injured if you don'timmediately follow can be killed or seriously injured if you don'tfollow safety messages will tell you what the potential hazard is, tell you how to reduce the chance of injury, and tell youwhat canhappen if the INSTRUCTIONS are not safety and the safety of others are very have provided many important safety messages in this manual and on your appliance.
2 Always read and obey allsafety is the safety alert symbol alerts you to potential hazards that can kill or hurt you and safety messages will follow the safety alert symbol and either the word DANGER or WARNING. These words mean:The California Safe Drinking Water and Toxic Enforcement Act requires the Governor of California to publish a list of substances known to the State of California to cause cancer, birth defects, or other reproductive harm, and requires businesses to warn of potential exposure to such substances. WARNING: This product contains a chemical known to the State of California to cause cancer, birth defects, or other reproductive appliance can cause low-level exposure to one of the substances listed: formaldehyde.
3 2 INSTALLATION REQUIREMENTST hese INSTRUCTIONS are intended as a general guide only and do not supersede any national or local codes in any way. Compliance with all local, state, or national codes pertaining to this type of equipment should be determined prior to this entire instruction manual, as well as the INSTRUCTIONS supplied in separate equipment, before starting the models are designed for indoor INSTALLATION the conditioned air plenum, ducts and air filters (not provided) in accordance with NFPA 90B Standard for the INSTALLATION of Warm Air Heating and Air-Conditioning Systems (latest edition).
4 Air Filters must be listed as Class 2 furnace air and PartsAssemble the required tools and parts before starting Needed:Parts Needed:Check local codes. Read this entire instruction manual, and check existing drain configuration before purchasing parts. Field fabricated auxiliary drain pan (in some installations)Parts Supplied: EVAPORATOR coil may be provided as a separate coil or mounted in a duct RequirementsIMPORTANT: The blower and duct system must be properly sized in order to provide adequate cooling and heating performance. For proper cooling operation, the airflow through the indoor coil should be between 350 - 450 CFM per ton of cooling capacity (or 350 - 450 CFM per 12,000 BTU/H) based on the rating of the outdoor unit.
5 All air passing over the EVAPORATOR coil must be filtered. EVAPORATOR coils are matched to specific outdoor units to obtain an ARI rating. The orifice installed on each EVAPORATOR coil is chosen for the BTU/H capacity of the coil. The factory installed orifice size is stamped on the orifice body, and is identified with a label on the orifice extension stub. The orifice size must match the size called for on the refrigerant charging table found on the outdoor unit. A selection of replacement orifices is available from the RequirementsWhen the EVAPORATOR coil is installed in an attic, above a finished ceiling, or in any location where condensate overflow would result in property damage, the installer must provide an auxiliary drain pan in addition to the primary and secondary drains.
6 The auxiliary drain pan must be connected to a drainage system separate from the primary condensate Requirements All vertical mount models come from the factory with right and left front drain connections. Multiposition models come from the factory with right and left front drain connections for vertical installations and left front drain connections when installed in the horizontal position. Minimum in. copper or PVC drain lines are : Check local codes before connecting drain lines to an existing drainage system. A field-fabricated auxiliary drain pan, with a drainpipe to the outside of the building, is required in all installations over a finished living space or in any area that may be damaged by overflow from the main drain pan.
7 In some localities, local codes may require an auxiliary drain pan for any horizontal INSTRUCTIONSI nspect the unit rating plate to confirm specifications are as receipt of equipment, carefully inspect it for possible shipping damage. Take special care to examine the unit inside the carton if the carton is damage is found, it should be noted on the carrier s freight bill. Damage claims should be filed with the carrier immediately. Claims of shortages should be filed with the seller within 5 : If any damages are discovered and reported to the carrier, do not install the unit, because your claim might be denied.
8 To r c h Tape measure Flat-blade screwdriver in. Nut driver in. Open end wrench LevelExcessive Weight HazardUse two or more people to move and install EVAPORATOR to do so can result in back or other EVAPORATOR CoilsIMPORTANT: This EVAPORATOR coil was manufactured containing a dry air precharge of 10 psi. Slowly remove the rubber line seal plugs to relieve the dry air precharge pressure. Before INSTALLATION , carefully wash the coil finned areas with a mild soap solution to remove shipping and handling EVAPORATOR CoilCased EVAPORATOR CoilVerify Orifice SizeIMPORTANT: The proper orifice size is dependent on indoor coil/outdoor unit combination and application.
9 Consult the outdoor unit information to determine if the indoor unit has the correct orifice brass hex nut from distributor/orifice line seal plug from the orifice and remove shipping strap from orifice extension stub. Remove orifice extension stub from the ring seal to the stub end of the orifice extension stub as Extension Stub - Before removal of shipping strapOrifice Extension Stub - After removal of shipping the brass hex nut over the orifice extension a change in orifice is required, remove the factory-installed orifice with an orifice extractor the proper orifice into the fitting, seal end first.
10 Make sure the orifice is free to move in the the brass hex nut and orifice extension stub onto the distributor/orifice assembly as : Overtightening the brass hex nut will crush the gasket and might result in a system leak or stuck of all packaging and unused Suction line header2. Line seal plug3. Orifice extension stub4. Distributor/Orifice assembly5. Drain pan6. Primary drain connections7. Drain plugs8. Secondary drain connection1234567861. Orifice extension stub2. Remove shipping strap3. Ring seal1. Orifice extension stub2. Ring seal1. Distributor fitting2. Mounting flange3. Piston orifice4.