Transcription of FIRST LEGO League Table
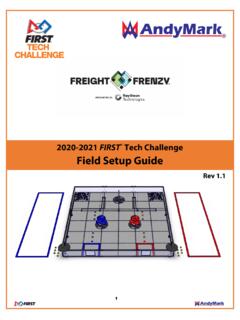
1 1 FIRST LEGO League Table ----------------------------------- ---------------------------------------- ---------------------------------------- ---------- ----------------------------------- The field is where the Robot Game takes place. It consists of a field mat, on a Table , with mission models arranged on top. The field mat and the LEGO pieces for building the mission models are part of your Field Setup Kit. The instructions for building the mission models are at The instructions for how to build the Table are below.
2 The instructions for how to arrange and set up everything on the Table are at CONSTRUCTION The Robot Game takes place on a specially designed Table , so you ll need to build one to practice on if you don t already have access to one. With safety, weight, height, and cost in mind, a simple design is offered here, but as long as your surface is smooth, and your border walls are sized and located properly, how you build the understructure is up to you. The construction is simple, but does require some wood-working skills.
3 At a tournament, two tables are placed back to back, but you only operate on one Table , so you only need to build one Table to practice on. We ll call your practice Table a half- Table . Most challenges have a shared mission model, which rests partly on your Table , and partly on the other team s Table . So in addition to building your Table , you ll need to build a tiny portion of a second Table , so both halves of the shared model are supported. We ll call this added section the dummy section. Here are the instructions for building one half- Table , plus a dummy section: Materials Material Quantity Field Setup Kit (mission model LEGO elements, mat, CD, Dual Lock ) 1 sanded plywood (or other very smooth board) 96 X 48 X at least 3/8 (2438mm X 1219mm X 10mm) 1 two-by-three, 8 (2438mm) [actual cross-section = 1-1/2 X 2-1/2 (38mm X 64mm)] 6 flat black paint 1 pt.
4 (1/2 L) coarse drywall screws, 2-1/2 (64mm) 1/2 lb. (1/4 kg) saw horses, about 24 (610mm) high and 36 (914mm) wide 2 Parts Part Make From Dimensions Paint Quantity Table surface (A) plywood 96 X 48 (2438mm X 1219mm) no 1 long border wall (B) two-by-three 96 (2438mm) yes 3 short border wall (C) two-by-three 45 (1143mm) yes 2 stiffener (D) two-by-three 48 (1219mm) no 4 saw horse purchase H 24 W 36 (610mm) (914mm) no 2 Assembly Step 1 - Determine which face of the plywood (A) is least smooth, and consider that the bottom face.
5 On the bottom face, locate, clamp, and screw on the stiffeners (D) (about every 18 or 457mm). Be sure screw head tops are flush. Sand any splinters. Step 2 - On the top face of the plywood, locate, clamp, and screw on the border walls (B,C) around the top perimeter. The wall-to-wall dimensions must measure 93 1/8 by 45 1/8 (2362 3mm by 1143 3mm). The height of B and C must measure 3 1/2 (77 13mm). Note the use of the plus or minus symbol. This means themaximum allowable height is three and a half inches (ninety millimeters) and the minimum height is two and a halfinches (sixty-four millimeters).
6 All border walls must be the same height as each other on any and all tables at a tournament. Border heights at a tournament may be different than those on your practice Step 3 - With the help of another person, place this Table top on short saw horses (or milk crates, or anything else short and solid). FIELD MAT PLACEMENT Step 1 - Vacuum the Table top. Even the tiniest particle under the mat can give the robot trouble. After vacuuming, run your hand over the surface and sand or file down any protruding imperfections you find.
7 Then vacuum again. Step 2 - On the vacuumed surface (never unroll the mat in an area where it could pick up particles), unroll the mat so the image is up and its north edge is near the north/double border wall (note the location of the double wall in each Table sketch below). Step 3 - The mat is smaller than the playing surface by design. Slide and align it so that there is no gap between the south edge of the mat and the south border wall. Center the mat in the east-west direction (look for equal gaps at left and right).
8 Step 4 - With help from others, pull the mat at opposite ends and massage out any waviness away from the center and re-check the requirement of Step 3. It is expected that some waviness will persist, but that should relax over time. Some teams use a hair dryer to speed the relaxation of the waviness. PRACTICE ( HALF Table ) TOURNAMENT ( FULL Table ) Step 5 - For a competition setup, the north edge of the two mats must be separated by 3-1/2 1/4 (90 6mm). Note the use of the plus or minus symbol. After rounding, this means the maximum allowable separation is three and three quarter inches (ninety-five millimeters) and the minimum separation is three and a quarter inches (eighty three millimeters).
9