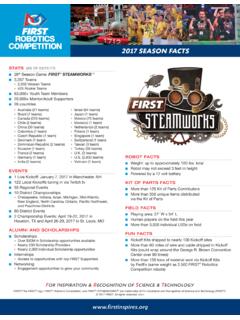
Transcription of Part 1 - FIRST
1 2023-2024 FIRST Tech Challenge Basic Bot Guide for TETRIX- Part 1 2 | FIRST Tech Challenge Basic Bot Guide for TETRIX- Part 1 Revision 1: Sponsor Thank You Thank you to our generous sponsor for your continued support of the FIRST Tech Challenge! FIRST Tech Challenge Basic Bot Guide for TETRIX- Part 1 | 3 Gracious Professionalism - Doing your best work while treating others with respect and kindness - It s what makes FIRST , FIRST . Revision History Revision Date Description 1 6/28/2023 Initial Release Contents Contents .. 3 Introduction .. 5 What is FIRST Tech Challenge? .. 5 Gracious Professionalism .. 5 Introduction to this Guide .. 6 About this Guide .. 6 Parts .. 6 Tips and Tricks .. 6 Computer Aided Design (CAD) .. 6 CAD Coloring Legend .. 6 Frame .. 7 Step 1: Build the Left Rail .. 7 Step 2: Build the Right Rail.
2 8 Step 3: Connect the Left and Right 9 Step 4: Add Structural Support Brackets .. 10 Step 5: Add the Structural Support Plate .. 11 Step 6: Build Left Electronics Plate .. 12 Step 7: Attach Left Electronics Plate to Frame .. 13 Step 8: Build Right Electronics Plate .. 14 Step 9: Attach Right Electronics Plate to Frame .. 15 Drive Motors and Drive Wheels .. 16 Step 1: Add Drive Wheel Motor Mounts .. 16 Step 2: Add Drive Motors .. 17 Step 3: Secure Drive Motors .. 18 Step 4: Secure Drive Motor Wires .. 19 Step 5: Add Motor Hubs .. 20 Step 6: Add Drive Wheels .. 21 Caster Wheels .. 22 Step 1: Build the Omni Wheel Assembly x2 .. 22 Step 2: Add Bronze Bushings to the Omni Wheel Assemblies .. 23 Step 3: Add the Omni Wheel Assemblies to the Frame Chassis .. 24 Control Hub .. 26 4 | FIRST Tech Challenge Basic Bot Guide for TETRIX- Part 1 Revision 1: Step 1: Add the REV Robotics Control Hub.
3 26 Step 2: Add the Left Drive Motor Power Cable .. 28 Step 3: Add the Right Drive Motor Power Cable .. 29 Power Switch .. 30 Step 1: Add the Switch .. 30 Step 2: Connect the Switch to the Motor and Sensor Controller .. 31 Battery .. 32 Step 1: Add the Battery .. 32 Step 2: Connect the Battery to the Switch .. 33 Final Steps .. 34 What s Next? .. 34 Resources .. 34 Appendix A Resources .. 35 Game Forum Q&A .. 35 Volunteer Forum .. 35 FIRST Tech Challenge Game Manuals .. 35 FIRST Headquarters Pre-Event Support .. 35 FIRST Websites .. 35 FIRST Tech Challenge Social Media .. 35 Feedback .. 35 FIRST Tech Challenge Basic Bot Guide for TETRIX- Part 1 | 5 Gracious Professionalism - Doing your best work while treating others with respect and kindness - It s what makes FIRST , FIRST . Introduction What is FIRST Tech Challenge? FIRST Tech Challenge is a student-centered program that focuses on giving students a unique and stimulating experience.
4 Each year, teams engage in a new game where they design, build, test, and program autonomous and driver operated robots that must perform a series of tasks. Participants and alumni of FIRST programs gain access to education and career discovery opportunities, connections to exclusive scholarships and employers, and a place in the FIRST community for life. To learn more about FIRST Tech Challenge and other FIRST Programs, visit Gracious Professionalism FIRST uses this term to describe our programs intent. Gracious Professionalism is a way of doing things that encourages high-quality work, emphasizes the value of others, and respects individuals and the community. Watch Dr. Woodie Flowers explain Gracious Professionalism in this short video. 6 | FIRST Tech Challenge Basic Bot Guide for TETRIX- Part 1 Revision 1: Introduction to this Guide About this Guide The Basic Bot Guide is intended for teams looking for a step-by-step instructional guide to learn how to build a basic chassis and structure of the robot.
5 Each season there is a new release of this guide, previously called the Push Bot Guide , this version the Basic Bot Guide for TETRIX Part 1 has been created to use 2021-2022 season s TETRIX kit of parts. Parts TETRIX FTC Competition Set o Tools included with the TETRIX FTC Competition Set Electronics Modules and Sensors set Control & Communication Set 1 or 2 o (Optional) Only the tools included in the FTC Competition Set will be needed to build the chassis. The screws and nuts are a standard size and having more tools may allow more students to participate at the same time. o (Optional) A ruler is not needed to build this robot, but it is necessary to make sure that the robot is competition ready Tips and Tricks Organize and separate out all of the parts you will need to build the drivetrain before you get started. Keep extra parts in separate bags for use later or as replacements.
6 Make sure that set screws are installed in every axle hub, motor hub, and axle collar. Refer to the legend provided in the Kit of Parts, if any parts are unfamiliar. Make sure that all assemblies areperpendicular (90 angles). It is hard to drive a crooked robot straight! The drive wheels are powered by two DC motors located on the back of the robot, which are relatively heavy. This weight is needed to help the wheels grip the surface better. Omni wheels should be located on the front of the robot, which allows the robot to turn more easily. The omni wheels rollers slide sideways with very little friction. Unless otherwise noted, the top image in each step shows the necessary parts; the lower image shows the completed assembly. Place all completed sub assemblies aside in a plastic container. Computer Aided Design (CAD) The drawings in this document were generated using Creo Parametric Computer Aided Design (CAD) software.
7 O By designing on the computer FIRST with CAD, the design can be tested to ensure everything will work together before actual construction. The Creo software is available for free to FIRST teams for use in designing robots. The CAD drawings color code the screws to help identify them (see table below). CAD Coloring Legend Pitsco Part Number Part Color 39098 5/16" socket head cap screw red 39094 keps nut blue 39111 3/8 button head cap screw green 39097 1/2 socket head cap screw yellow 39195 motor mount screw orange FIRST Tech Challenge Basic Bot Guide for TETRIX- Part 1 | 7 Gracious Professionalism - Doing your best work while treating others with respect and kindness - It s what makes FIRST , FIRST . Frame Step 1: Build the Left Rail Parts Needed: 39067- 160 mm channel (1) 39068 - 288 mm channel (1) 39098 - 5/16" socket head cap screw (4) 39094 - keps nut (4) Figure 1- Unassembled view Figure 2- Assembled view 8 | FIRST Tech Challenge Basic Bot Guide for TETRIX- Part 1 Revision 1: Step 2: Build the Right Rail Parts Needed: 39068 - 288 mm channel (1) 39067 - 160 mm channel (1) 39098 - 5/16" socket head cap screws (4) 39094 - keps nuts (4) Figure 3- Unassembled view Figure 4- Assembled View FIRST Tech Challenge Basic Bot Guide for TETRIX- Part 1 | 9 Gracious Professionalism - Doing your best work while treating others with respect and kindness - It s what makes FIRST , FIRST .
8 Step 3: Connect the Left and Right Rails Parts Needed: 39070 - 288 mm flat bar (1) 39097 - 1/2" socket head cap screws (4) 39094 - keps nuts (4) Figure 5- Unassembled view Figure 6- Assembled View 10 | FIRST Tech Challenge Basic Bot Guide for TETRIX- Part 1 Revision 1: Step 4: Add Structural Support Brackets Parts Needed: 39281 - inside corner bracket (2) 39098 - 5/16" socket head cap screws (6) 39094 - keps nuts (6) Figure 7- Unassembled view Figure 8- Assembled view FIRST Tech Challenge Basic Bot Guide for TETRIX- Part 1 | 11 Gracious Professionalism - Doing your best work while treating others with respect and kindness - It s what makes FIRST , FIRST . Step 5: Add the Structural Support Plate Parts Needed: 39073 - flat building plate (1) 39098 - 5/16" socket head cap screws (4) 39094 - keps nuts (4) Figure 9- Unassembled view Figure 10- Assembled view Helpful Hints Make sure that all pieces are correctly alignedby looking at the robot from above and ensuring the left and right rails are parallel and the cross braces form right angles with them.
9 Once the frame is square, make sure that all the frame s bolts are tight. It is hard to drive a crooked robot straight! 12 | FIRST Tech Challenge Basic Bot Guide for TETRIX- Part 1 Revision 1: Step 6: Build Left Electronics Plate Parts Needed: 39073 flat building plate (1) 39097 socket head cap screws (2) (yellow) 39107 32 mm stand-off post (2) 39098 5/16 socket head cap screws (2) (red) 38009 battery clip (1) [inside the electronics kit] Acrylic switch plate (part of REV-31-1387) Figure 11- Unassembled View Figure 12- Assembled view FIRST Tech Challenge Basic Bot Guide for TETRIX- Part 1 | 13 Gracious Professionalism - Doing your best work while treating others with respect and kindness - It s what makes FIRST , FIRST . Step 7: Attach Left Electronics Plate to Frame Parts Needed: 39097 socket head cap screws (2) 39094 keps nuts (2) Figure 13- Unassembled view Figure 14- Assembled view Helpful Hint The plate does NOT attach to the frame at the clip/structural support plate.
10 14 | FIRST Tech Challenge Basic Bot Guide for TETRIX- Part 1 Revision 1: Step 8: Build Right Electronics Plate Parts Needed: 39073 flat building plate (1) 39107 32 mm stand-off post (2) 39098 5/16 socket head cap screws (4) 38009 battery clip (1) [inside the electronics kit] Figure 15- Unassembled view Figure 16- Assembled view FIRST Tech Challenge Basic Bot Guide for TETRIX- Part 1 | 15 Gracious Professionalism - Doing your best work while treating others with respect and kindness - It s what makes FIRST , FIRST . Step 9: Attach Right Electronics Plate to Frame Parts Needed: 39097 socket head cap screws (2) 39094 keps nuts (2) Figure 17- Unassembled view Figure 18- Assembled view Helpful Hint The plate does NOT attach to the frame at the clip/structural support plate. 16 | FIRST Tech Challenge Basic Bot Guide for TETRIX- Part 1 Revision 1: Drive Motors and Drive Wheels Step 1: Add Drive Wheel Motor Mounts Parts Needed: 39089 motor mounts (2) With included bolts (4) And included nuts (4) Figure 19- Unassembled View Figure 20- Assembled View from below the robot Figure 21- Assembled view from above the robot Helpful Hint Do not tighten the motor mount bolts that control the clamp ( , the gap on one side of the mount) until the motors have been inserted (next step).