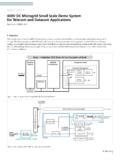
Transcription of FPA Printed Circuit Board Layout Guidelines - Vicor
1 AN:005 Page 1 IntroductionFactorized Power with VI Chips enables system density to keep pace with technology by providing Layout flexibility and high power density. More importantly, VI Chips allow a power conversion system to be factorized or separated into its constituent functions. A small, dense and efficient VTM current Mulitplier is deployed at the Point-of-Load, minimizing the high current within a Board and performing the voltage transformation and isolation functions of a power system. The regulation function is performed by the PRM Regulator which can be located away from the VTM in a less space-constrained area of the motherboard, or on another Board altogether.
2 Since there are many advantages to the Layout flexibility afforded by Factorized Power and VI Chips, some basic Guidelines should be utilized when designing a system with these power Importance of Board LayoutBoard Layout is crucial to the success of any application, both from the perspective of the power supply and the actual load. A good Layout optimizes the overall system performance. A poor Layout may result in power supply instability, low efficiency, noise or data corruption throughout the system. Improper design of high- current connections may result in unexpected Board heating resistive losses. It may also result in parasitic spikes which occur during transient loading.
3 Routing power control signals is frequently one of the most overlooked aspects of system design much care is taken with respect to proper Layout of sensitive digital and analog signals for most system components while the critical signals interfacing with the power system are typically routed based on convenience, not proper design Guidelines . Finally, Electromagnetic Interference (EMI) can degrade the performance of an otherwise well designed system. While there is no proven methodology to eliminating EMI from a power system, there are several Guidelines for reducing EMI which will be DC Impedance Layout at the Point of LoadIdeal Layout of copper planes at the point of load is dependent upon the type of loading being applied.
4 There are essentially two types of high- current , low-voltage load configurations: a) single device high- current load (Figure 1) and b) multiple devices powered by a single low-voltage rail (Figure 2). APPLICATION NOTE | AN:005 FPA Printed Circuit Board Layout GuidelinesPaul YeamanPrincipal Product Line Engineer VI Chip Strategic AccountsContents PageIntroduction 1 The Importance of Board Layout 1 Low DC Impedance Layout at the Point of Load 1 Low AC Impedance L ayout at the Point of Load 4 PRM VTM Layout 5 PRM Control Signals: OS, SC, CD 5 PRM Control Signal: PR 6 PRM, VTM and BCM Control Signal: PC 6 PRM / VTM Interconnect Signal: VC 7 PRM / VTM Power Interconnect 7 Layout for EMI Minimization 8 Conclusion 10 AN.
5 005 Page 2 For typical low-voltage, high- current applications DC impedance and AC impedance (inductance)must be DC impedance in a Board Layout requires an analysis using squares to determine the geometry and the impedance of the square of 1oz copper will have a resistance of between parallel edges, regardless of square dimension (Figure 3). It is important to note that the current must originate and flow evenly from edge to edge of the square. If the geometry of the source or load is such that current would not flow evenly from edge to edge of the square, the square geometry must be reduced in size (Figure 4).Figure 1 Single Device High current LoadFigure 2 Multiple Devices Powered from Single Low Voltage m edge m edge m edge toedgeCurrent m edge m edge m edge toedgeCurrent FlowSource6 LoadFigure 3 A Square will have the Same Edge to Edge Impedance Regardless of SizeFigure 4 current Flow Through a Plane Broken Into Squares AN:005 Page 3 There are five steps to determining the DC Board loss for a single high current microprocessor load:1.
6 Determine the current path between source and load. If the source and load are connected by a trace, the current path is the trace path (Figure 5). If the source and load are connected by a plane, the current will take the shortest path (Figure 6). As illustrated in Figure 6, the current path may end up with a fan-shaped characteristic if the source and sink geometries have different sizes. Also keep in mind that the positive and negative current paths may be routed Break the current path up into a number of squares of integral size. As illustrated in Figure 5, if the trace width is 20mils, the current path can be broken up into a series of 20mil squares for the length of the trace.
7 If the current path is through a plane as shown in Figure 6, the shape should be re-constituted using an array of squares that are small enough to reasonably represent its original Calculate the total number of squares. Per the connection shown in Figure 5, this would be the sum of the squares in the current path. For Figure 6, parallel squares would be summed as the reciprocal of the number of squares in parallel. For example, two squares in parallel would count as a half square, four squares in parallel would count as a quarter square, Calculate the resistance of the current path. Using the rule that a square of 1oz copper is , multiply this by the calculated number of squares for the total resistance.
8 If there is more than 1oz total copper, this number decreases proportionally. Likewise if there is less than 1oz total copper, this number should increase FlowLoad20 mil traceLoadSourceSourceCurrent FlowLoad20 mil traceLoadSourceFigure 5 A Trace Path is Easily Broken Down Into Squares Figure 6 current Flow Through a Plane AN:005 Page 45. Multiply this number by the maximum current squared to calculate the distribution loss in watts for this current path. Steps 1-5 should be repeated for each current carrying segment between source and load. If there are multiple points of load (for example one VI Chip is powering five or six devices in different locations), steps 1 5 should be performed separately for common current paths (using total current ) and unique current paths (using the current flowing to the particular device).
9 This is illustrated in Figure AC Impedance L ayout at the Point of LoadThe AC impedance of the path from the output of the VTM to the point of load is critical in applications where a good transient response is required. The leading edge of the transient response is determined by Equation this equation, IL represents the load current and L represents the inductance between the source and the limit this inductance, source and return currents should flow as close to each other as possible to maximize cancellation of the respective magnetic fields. Inductance is primarily a function of loop area the greater the area between the source and return currents, the less cancellation of flux and the greater the overall inductance (Figure 8).
10 Source X Load 2 3 Load 1+2 Load 1 3 load 1 6 Load 2 5 Load 3 Load 3 Source +Source Source +Source Source +Source Load +Load Load +Load High InductanceLower InductanceLowest InductanceLoad Load ++ Layer 1 Layer 2 Figure 8 Minimizing Loop Area Lowers AC ImpedanceSource X Load 2 3 Load 1+2 Load 1 3 load 1 6 Load 2 5 Load 3 Load 3 Source +Source Source +Source Source +Source Load +Load Load +Load High InductanceLower InductanceLowest InductanceLoad Load ++ Layer 1 Layer 2 Figure 7 current Flow to Multiple Load Points; Three Squares Carrying current to Load 1 and 2, Three Additional Squares Carry current Exclusively to Load 1, Six Additional Squares Carry current Exclusively to Load 2 and Five Squares Carry current to Load 3 VTRANS = L dIL dt(1) AN:005 Page 5 The VTM package design limits parasitic inductance (Figure 9) by alternating pads of source (+VOUT) and return ( VOUT).