Transcription of HamSphere 4.0 INTERFACE ADAPTER Users Manual
1 HamSphere INTERFACE ADAPTER Users Manual 1. Introduction 2. Assigning keys 3. Assigned values 4. Assigning Com Port signals 5. Load and Save files 6. Pitfalls 7. List Assigned functions 8. HamSphere Plugin/Function list 9. Com Code list 10. Key Code list 11. Antenna list 1. Introduction Thank you for purchasing the versatile INTERFACE ADAPTER plugin for HamSphere The purpose of the module is to tie Keyboard Keys to different functions in the HamSphere transceiver and plugins. It also has a fully fledged RS232 INTERFACE / ADAPTER making connection to external hardware possible. The schematic view of the HamSphere external interfacing. A table called Registered Functions is held in the transceiver s memory. Each Plugin can register its functionality for external access in the table. The INTERFACE ADAPTER can then read the table and access the functions and tie these to either keys or com port signals.
2 By clicking the key you can easily find the wanted functionality and set its parameters. All settings are automatically saved in the rig s memory, but you can also export a so called Key setting file that can be distributed to other HamSphere Users for fast implementation. 2. Assigning keys Start by clicking Assign and it will bring up the Function assign window. You can now click any key you want to use. Here as an example we click the F12 key and the Input selector automatically identifies the key and selects it: Next step is to select a function from the function list. Here we select IHS6 which is PTT. IHS stands for (Internal HamSphere System) and means that you are requesting a standardized function in the HamSphere subsystem. Click OK to save. Now you have assigned F12 to trigger PTT when pressed. 3. Assigning Values Some functions require values to be set.
3 As an example we will assign the minus key to step 10 Hz. Just bring up the Assign window and click the minus key on the keyboard. The system automatically finds the key in the list (VK_SUBTRACT). Then browse down to the IHS9 Increment/decrement QR/TX QRG and enter a value of -10. Then click OK. Now whenever/wherever you click the Minus key, the transceiver will tune 10 Hz down. You can also assign static values such as Set Speaker Off by assigning 0 to ISH7 Set Volume. The example below we have assigned the F11 key to set the volume off. 4. Assigning Com Port signals There are many USB-Serial interfaces available in the market. The INTERFACE cable or dongle is primarily what is called a "USB-UART Bridge". It will create a Virtual COM Port on your system. Since most modern computers do not feature hardware legacy serial port interfaces (COM ports) anymore, the only alternative is to use the USB port on the machine to emulate a COM port.
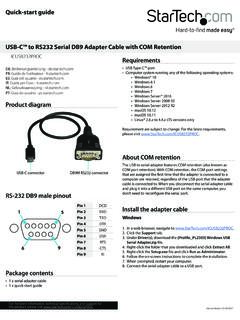
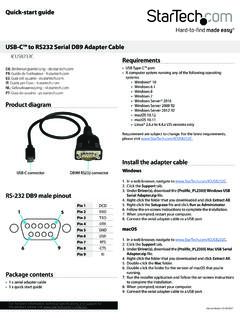
4 An INTERFACE cable/dongle essentially has a special chip in it that performs the required USB to UART INTERFACE conversion. Some of the popular chips used are FTDI FT232R/RL, Prolific pl2303 /XA/XHA/TA/TB/EA/RA/SA, SiLabs CP21xx series or Microchip MC2200, etc. Other than this, another chip is required for converting UART TTL levels to RS232 Serial Port protocol standards. For this, the most popular and widely used chip is Maxim MAX232 or MAX3232. Unlike TTL, the RS232 has +/-12V logic levels. However commercially available cheap RS232 implementations often may not have +/-12V but as low as +/-3V logic levels. In our use with the CW plugin, these levels do not really matter. We have tested and validated the plugin compatibility with cables and interfaces using all the above mentioned chips. Our INTERFACE ADAPTER plugin works perfectly. The DB9 RS232 INTERFACE consists of 9 pin male connector on the USB-Serial cable.
5 The cable behaves like a native hardware COM port INTERFACE of the computer (DTE - Data Terminal Equipment). There are 2 data pins called RxD and TxD for transmitting and receiving serial data over RS232. There is also 1 ground pin. Rest of the pins are for controlling communication over the serial data link and are called "Flow Control" pins These pins are DCD, DTR, DSR, RTS, CTS and RI. We need not go into details of these Flow Control pins. BEWARE of the following selection pitfalls: 1) We find several USB-Serial cables in the market that do not faithfully implement the Flow Control logic. They may work fine with many of your computer serial port applications but they won't work with our plugin. They are only suitable for Xon/Xoff software flow control serial communication applications. 2) Two flow control pins DCD (Data Carrier Detector) and RI (Ring Indicator) are now treated as legacy functions and are not really needed even for proper hardware flow control.
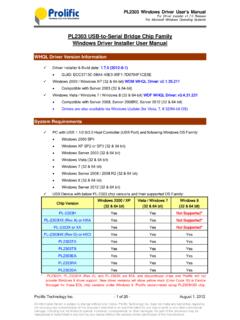
6 They were only needed during the days of PPP dial-up internet modems. Since that is all history, many of these cables do not implement these pins However, our plugin requires RI pin to function, please ensure that the cable you buy has RI (pin #9) implemented. You need not bother about DCD (pin #1). 3) If your cable/dongle is built using the Prolific pl2303 chip, you must ensure that it comes from a proper source. We are putting out this warning because there are many clones of this chip that are made in China. These imitations do not perform well. In worst case, they may not even be supported by the original Microsoft signed drivers. They will throw up a Yellow mark and Error Code 10 on the driver under Device Manager. 4) The Prolific chip is very popular and the market is flooded with cables based on these chips. Those who run windows 8 , please note that cables made using pl2303 /H/HX/XA/HXA do not support your operating system.
7 However they are good up to windows 7 (32bit and 64bit), but PL3203/H does not even support windows 7 64 All newer pl2303 versions TA/TB/EA/RA/SA are good for all windows versions. Most of the cables will automatically install Virtual Serial Port drivers on your computer transparently, if the windows Update is active and you are connected to the Internet. Some of them may however require driver installation. This is a trivial task. You may be provided with a driver CD along with the cable or can download it from the chip manufacturer's website. Lastly, please remember to add pull-up resistors (In this case pull-down) as specified by drawing below. This is necessary because of the nature of CMOS/NMOS input logic. If you fail to use the pull-up resistors then the voltage at the input pins will float up and down due to charge accumulation or dissipation resulting in false keying and tone generation by the plugin.
8 Floating input pins are never permitted in CMOS circuits unlike TTL, where an open input always means high logic level. In our case we feed the Paddle/Key with positive voltage from RTS (Request To Send) and pull the inputs to Ground by two kohm resistors. RS232 Text provided by Basu (VU2 NSB) Installation of the USB driver Most USB adapters install their own driver by default. Normally you do not need to do any work for this. But as stated in the description, there are quite a few bad USB adapters out there that may not install correctly. Here is an example of A BAD Prolific PL3202 cable This is what is should look like. A GOOD Prolific PL3202 cable The USB RS232 is usually sold as a cable seen below. But there are many variants with ready 9-pin connections. You can use a 9-pin patch terminal to connect your CW Key or other equipment.
9 Assigning Com Port signals Click ASSIGN on the INTERFACE ADAPTER and select a COM PORT signal such as the CTS signal (COM_CTS). If you have the CW Keyer plugin installed (INT010) it will turn up as [INT010A] Set Left Paddle in the Function selector. Simply select that and press OK. Now your left paddle key is connected to the CW Keyer left paddle function = IAMBIC Dits. Then do the same for the COM_DSR and assign that to the right paddle = IAMBIC Dash. If you use a straight key you can select either of the left or right paddle inputs. 5. Load and Save files The INTERFACE ADAPTER can save a load separate Keyboard / Com port setting files. This is most useful for pre-made CAT- INTERFACE settings or operators sharing Keyboard settings. Operators can easily set up a suitable keyboard layout for the HamSphere transceiver and distribute their settings to other operators etc.
10 Click SET button on the INTERFACE ADAPTER . When loading files the system looks that the file extension or to determine what function to load. 6. Pitfalls The INTERFACE ADAPTER uses a so called Global Key Handler . This means that even if you have HamSphere running in the background it will listen for keyboard input. Some operators may find keying the transmitter with the space key very useful. The problem is however that the space key is used everywhere in the computer today. It is used in anything from writing emails, checking facebook or writing a document. We therefore strongly suggest that you assign keys that are not usually used in common text applications such as F1-F12, keypad, function keys etc. In the current version of the INTERFACE ADAPTER it only supports F1-F12. But in later version we will implement CTRL+F1-F12 and ALT+F1-F12 which will enable a lot more suitable keys.
