Transcription of INSTALLATION INSTRUCTIONS - Bobrick Inc.
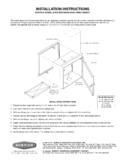
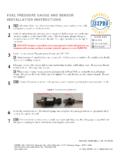
1 UlyssesINSTALLATION INSTRUCTIONSBOBRICK ShOweR SeAT MODeLS B-517 AND 518 Figure 1 Figure 2 INSTALLATION to wall. Secure unit to wall at points indicated by an S, with the two mounting Flanges located at top and the Baseplate and Guide Bracket below. The bottom of the Support Tube must be positioned within the Baseplate and Guide Bracket before they are secured to wall. * mounting height of shower seat must comply with local building Install mounting Flanges to wall. A. Locate seat horizontally on wall to comply with local building codes. B. Use mounting Flanges as templates to mark holes.
2 1) Check to make sure seat surface is horizontal and mounting Flanges are flat against wall. 2) Make sure holes marked for mounting Flanges align with wall backing. C. Drill holes for mounting Flange fasteners and secure mounting Flanges to wall with appropriate fasteners. D. Check to see if seat moves freely from horizontal to vertical NOTeS 1) For stud wall construction, install backing (not furnished by Bobrick ) (see Figure 2). Backing must be provided before the finished shower wall is applied. Secure with #14 x 2-1/2" ( x 65mm) stainless steel mounting screws furnished by manufacturer.
3 2) For prefabricated shower stalls, adequate backing must be provided by the shower stall manufacturer (see Figure 2). Secure with #14 x 2-1/2" ( x 65mm) stainless steel mounting screws furnished by manufacturer. Bobrick offers a mounting kit for installing shower seats. For additional mounting kits please order 252-30. One mounting kit is required for each flange. 3) For concrete walls, provide fiber plugs or expansion shields for use with furnished screws, or provide 1/4" (6mm) toggle bolts or expansion bolts. Wall anchors not furnished by Bobrick .
4 2. Install Baseplate with Spring and Guide Bracket to wall. A. Support seat in level horizontal position. B. Locate Guide Bracket on wall with bottom center of Support Tube resting on bottom of Guide Bracket (see Figure 2). C. Mark holes on wall using Guide Bracket as a template. D. Drill holes in wall for appropriate fasteners (see Figure 3). Install fasteners. E. Place Baseplate on wall with curled spring at top aligning holes in Baseplate with fasteners. F. Place Guide Bracket over Support Tube and fasten to ..Left-Hand Seat ShownUniversal/Accessible DesignRecommendedMounting Height*17'' to 19''430 to 485mmSSSBase Platewith Spring at TopSupport BracketGuide BracketFinish Face of Floor9-3/8''240mm22-1/4''565mm6-1/16''15 5mm7-1/4''185mm1-7/16''35mm5-1/2''140mmF inish Face of Wall22-11/16''575mmSMountingFlange (2)Concealed wall backingto comply withlocal building codes,not furnishedby Bobrick .
5 *Consult local building codes16-3/16''410mm6-11/16''170mm21-1/4' '540mm13-1/4''340mm16-7/16''420mm19-1/2' '495mm32-7/8''835mm14-3/4''375mm2-1/4'' Circle1-1/8''30mmSSSS2-1/4''55mmIn the : Bobrick wAShROOM eQUIPMeNT, Commerce Drive, Clifton Park, New York 12065-1350 Tel: (518) 877-7444 FAX: 518-877-502911611 Hart Street, North Hollywood, California 91605-5882 Tel: (818) 982-9600 FAX: 818-503-1102or email: Canada: Bobrick wAShROOM eQUIPMeNT COMPANY45 Rolark Drive, Scarborough, Ontario M1R 3B1 FAX: 877-423-8555 2013 by Bobrick Washroom Equipment, No. 517-269 Revised 8/09/13 Printed in Install Safety Plate to wallSafety Plate is to be mounted on wall near Shower Seat in order to properly advise users of the Seat's weight restrictions.
6 Correct INSTALLATION of the Safety Plate will ensure that the Shower Seat meets affix Safety Plate to wall on either side of the Shower Seat at a minimum height of 30" (760mm). If mounted above Seat, the Plate must be high enough so that it is not covered when Seat is on the up position. mounting screws (4) are recommended, but double-sided tape on rear of Plate may be used for very smooth, non-porous WARNING: Shower seats are no stronger than the anchors and walls to which they are attached and must be firmly secured in order to support the loads for which they are intended.
7 Consult and comply with local building codes. To avoid potential injur y, the building owner or maintenance personnel should remove the shower seat from ser vice if the shower seat is not adequately secured to the wall. Unit shall support static loads of up to 360 lbs (163 kg) when properly installed and used. To avoid potential seat malfunction, DO NOT use seat if weight exceeds 360 lbs (163 kg).4. Test Raise and lower seat to make sure seat moves When seat is raised parallel to the wall, it will remain in this position until lowered (see Figure 2).C. Examine seat, fasteners, mounting Flanges, Baseplate, and Guide Bracket to make sure there are no loose :Shower seat folds up against wall when not in use.
8 The spring at the top of the Baseplate holds seat in upright position until released by pulling the top of the seat away from the wall. mounting Flanges and Guide Bracket allow for varying mounting heights and leave the floor clear for easy cleaning. Bobrick shower seats, when properly installed, have sufficient strength to support 400 lbs, complying with accessible design guidelines (including ADAAG in ).Figure 3 NOTe: Bushings (2) are not furnished by WallFastenerRecommendedHole Sizefor Screw7/32'' Flange (2)BaseplateDrywall(1/2'' Thick)Tile(1/4'' Thick)GuideBracketApply SiliconeAround Bushings andAll Fasteners to SealBushing(Stainless Steel) '' Inside DiameterProtrudes 1/16'' Minimum Above Tile(2 Required at Bottom of Bracket)