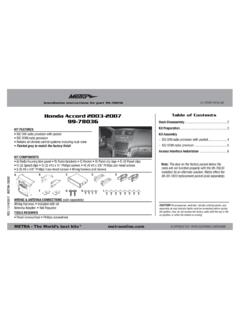
Transcription of Installation instructions for part 99-3303
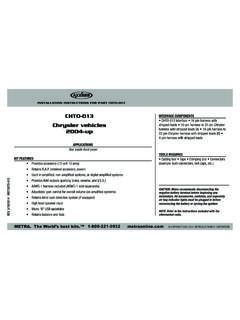
1 METRA. The World s best kits. COPYRIGHT 2004-2015 METRA ELECTRONICS CORPORATION REV. 10/1/2015 INST99-3303 Installation instructions for part 99-3303 CAUTION! Metra recommends disconnecting the negative bat-tery terminal before beginning any Installation , unless the vehicle manufacturer recommends against so. Please check with your local Dealership for more information. All accessories, switches, climate controls panels, and especially air bag indicator lights must be con-nected before reconnecting the battery or cycling the ignition. Also, do not remove the factory radio with the key in the on position, or the vehicle running. It would be best to remove the key from the ignition and then wait a few seconds before removing the factory radio.
2 DIN radio provision with driver information center (DIC) ISO DIN radio provision with driver information center (DIC) Painted to match factory dash A) Radio housing B) ISO brackets C) ISO trim plate D) (9) DIN spacer E) Wire harnessKIT FEATURESKIT COMPONENTSWIRING & ANTENNA CONNECTIONS (sold separately)Wiring Harness: IncludedAntenna Adapter: 40-GM10 Phillips screwdriver 7mm socket wrench Cutting tool (Cobalt only) Wire cutters Wire strippersTOOLS REQUIREDC hevrolet/Pontiac DIC Interface 2004-200999-3303 Dash Disassembly Chevrolet Malibu/Malibu Maxx 2004-2007 ..2-3 Chevrolet Malibu Classic 2008 ..2-3 Chevrolet Cobalt (with OnStar) 2005-2006 ..5 Pontiac G6 2005-2008 ..4 Pontiac G6 (5th digit of VIN must be a G, H, or M) 2009.
3 4 Kit Assembly DIN radio provision with driver information center (DIC) ..6 ISO DIN radio provision with driver information center (DIC) ..6 Final Assembly ..7 Operation of the 99-3303 ..8 Table of ContentsBCADE99-33032 Applications1. Unclip and remove the wood grain/painted trim pieces from both sides of steering wheel. (Figure A)2. Unclip and remove the side panel from the driver s side of the dash with the door open and remove (2) 7mm screws. (Figure B)3. Remove (2) 7mm screws from the bottom edge of the panel below the steering wheel. Unclip the panel and let hang (not necessary to completely remove the panel). (Figure C)4. Unclip and remove the wood grain/painted trim pieces from above glove box.
4 (Figure D) Continued on the next page(Figure B)(Figure D)Dash Disassembly(Figure A)(Figure C)CHEVROLETC obalt (with OnStar) 2005-2006 Malibu Classic 2008 Malibu/Malibu Maxx 2004-2007 PONTIACG6 (5th digit of VIN must be a G, H, or M) 2009G6 2005-2008 Chevrolet Malibu/Malibu Maxx 2004-2007 Malibu Classic 200899-3303 Dash Disassembly(Figure E)(Figure G)(Figure F)(Figure H)5. Unclip and remove the side panel from the driver s side of the dash with the door open, and remove (2) 7mm screws from behind the panel. (Figure E)6. Remove (2) 7mm screws from the bottom of the glove box. Open the box and squeeze the sides together to open it further, and then remove the remaining (4) 7mm screws.
5 Unclip the black vent cover under the glove box, then unclip and remove entire glove box assembly. (Figure F)7. Unclip and remove the trim panel surrounding the radio and climate controls. (Figure G)8. Remove (4) 7mm screws from the radio, and (2) 7mm screws from the climate control to remove the radio. (Figure H) Continue to kit assembly3 Chevrolet Malibu/Malibu Maxx 2004-2007 Malibu Classic 200899-33034 Dash DisassemblyPontiac G6 2005-2008/G6 (5th digit of VIN must be a J, K, or L) 2009(Figure A)(Figure C)(Figure B)(Figure D)Top View1. Open the glove box and remove (6) 7mm screws from the outer the edge, and then unclip and remove. (Figure A)2. Remove (4) 7mm screws from the panel below the steering column, and then unclip and remove.
6 (Figure B)3. Unclip and remove the center panel surrounding the radio and climate controls, and then remove. (Figure C)4. Remove (4) 7mm screws securing the radio, and then remove. (Figure D) Continue to kit assembly99-33035 Dash DisassemblyChevrolet Cobalt (with OnStar) 2005-2006(Figure A)(Figure C)(Figure E)(Figure F)(Figure B)(Figure D)1. Unclip and remove the trim panel from above the glove box. (Figure A)2. Unclip the upper edge of the panel below the steering column and let hang. Note: It is not necessary to remove the panel. (Figure B)3. Unclip and remove the small trim panel to the right of the ignition switch. (Figure C)4. Unclip and remove the trim panel surrounding the radio and climate controls.
7 (Figure D)5. Remove (4) 7mm screws securing the radio and then remove. (Figure E)6. Cut and remove top mounting tabs on each side of the radio housing. (Figure F) Continue to kit assemblyCut thetwo topholes off99-33036 Kit AssemblyDIN radio provision with driver information center (DIC) 1. Remove the metal DIN sleeve from the aftermarket Slide the sleeve in the radio housing and secure by bending the metal locking tabs down. Note: A DIN spacer has been provided for applications where depth is an issue. If using the spacer, attach it to the sleeve before sliding it into the radio housing. (Figure A)3. Slide the radio back into the sleeve until it clicks in. (Figure B)4. Locate the factory wiring harness and antenna connector in the dash and complete all necessary connections to the radio.
8 Metra recommends using the proper mating adapter from Metra or AXXESS. Re-connect the negative battery terminal and test the radio for proper operation.)5. Reassemble the dash in reverse order of disassembly. Continue to final assemblyISO DIN radio provision with driver information center (DIC)1. Remove the metal DIN sleeve and trim ring from the aftermarket Secure the ISO brackets to the radio using the screws supplied with the radio. (Figure A)3. Slide the radio into the radio housing until it snaps into place. (Figure B)4. Snap the ISO trim plate onto the front of the radio housing. (Figure B)5. Locate the factory wiring harness and antenna connector in the dash and complete all necessary connections to the radio.
9 Metra recommends using the proper mating adapter from Metra or AXXESS. Re-connect the negative battery terminal and test the radio for proper operation.)5. Reassemble the dash in reverse order of disassembly. Continue to final assembly(Figure A)(Figure B)Right Side Clip(Figure B)(Figure A)99-33037 Final AssemblyFrom the 99-3303 wiring harness to the aftermarket radio: Connect the Black wire to the ground wire. Connect the Yellow wire to the battery wire. Connect the Red wire to the accessory wire. Connect the Blue/White wire to the amp turn-on wire. Note: This wire must be connected for the interface to function. Connect the White wire to the left front positive speaker output. Connect the White/Black wire to the left front negative speaker output.
10 Connect the Gray wire to the right front positive speaker output. Connect the Gray/Black wire to the right front negative speaker output. Connect the Green wire to the left rear positive speaker output. Connect the Green/Black wire to the left rear negative speaker output. Connect the Purple wire to the right rear positive speaker output. Connect the Purple/Black wire to the right rear negative speaker output. Connect the 99-3303 wiring harness into the connectors on the back of the radio housing, and then into the vehicle. Note: For models without OnStar, disregard the 12-pin connector. With all connections completed, reconnect the negative battery terminal. Attention: If the 99-3303 ever loses power, the following step will have to be performed again.