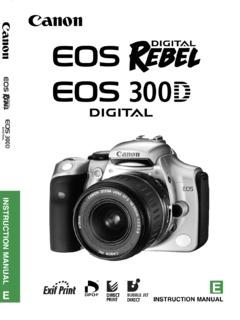
Transcription of INSTRUCTION MANUAL INSTRUCTION MANUAL - …
1 INSTRUCTION MANUAL . E. INSTRUCTION . E MANUAL . Thank you for purchasing a Canon product. The EOS 40D is a high-performance, digital SLR camera featuring a fine-detail CMOS sensor with effective megapixels, DIGIC III, high-precision and high-speed 9-point AF (all cross-type points), and high-speed fps continuous shooting. The camera is highly responsive to any shooting situation at anytime, provides many features for demanding shoots, and expands shooting possibilities with system accessories. It also incorporates a Self Cleaning Sensor Unit called the EOS. Integrated Cleaning System to remove dust on the sensor. Take a few test shots to familiarize yourself with the camera With a digital camera, you can immediately view the image you have captured.
2 While reading this MANUAL , take a few test shots and see how they come out. You can then better understand the camera. To avoid botched pictures and accidents, read the Safety Warnings ( ,11) and Handling Precautions ( ,13). Test the Camera Before Using and Liability After shooting, playback and check whether the image has been properly recorded. If the camera or CF card is faulty and the images cannot be recorded or downloaded to the personal computer, Canon cannot be held liable for any loss or inconvenience caused. Copyrights Copyright laws in your country may prohibit the use of your recorded images of people and certain subjects for anything but private enjoyment.
3 Also be aware that certain public performances, exhibitions, etc., may prohibit photography even for private enjoyment. 2. Item Check List Before starting, check that all the following items have been included with your camera. If anything is missing, contact your dealer. The accessories included can also be checked on the System Map ( ). Camera: EOS 40D. (includes eyecup, body cap, and installed battery for the date/time clock). Lens: EF-S18-55mm IS or EF-S17-85mm IS USM. * Lens kit only. * The lens included in the lens kit may differ from the above. The respective lens INSTRUCTION MANUAL will be included. Power source: Battery Pack BP-511A (with protective cover).
4 Charger: Battery Charger CG-580/CB-5L. * CG-580 or CB-5L is included. Power cord * For CB-5L. 2 cables Interface Cable IFC-200U. Video Cable VC-100. Strap: EW-100 DGR (with eyepiece cover). 2 CD-ROMs EOS DIGITAL Solution Disk (bundled software). Software INSTRUCTION MANUAL (PDF). Pocket Guide Quick start guide to shooting. EOS 40D INSTRUCTION MANUAL (this booklet). CD-ROM Guide Guide to the bundled software and Software INSTRUCTION MANUAL . Camera Warranty Card Lens Warranty Card *Lens kit only. * Be careful not to lose any of the above items. * No CF card (for recording images) is included. Please purchase it separately. 3. Conventions Used in this MANUAL Icons in this MANUAL <6> indicates the Main Dial.
5 <5> indicates the Quick Control Dial. <9> indicates the Multi-controller. <0> indicates the SET button. 0, 9 or 8 indicates that the respective function remains active for 4 sec., 6 sec., or 16 sec. respectively after you let go of the button. In this MANUAL , the icons and markings indicating the camera's buttons, dials, and settings correspond to the icons and markings on the camera and on the LCD monitor. The <3> icon indicates a function which can be changed by pressing the <M> button and changing the setting. The M icon on the upper right of the page indicates that the function is available only in the Creative Zone modes ( ). For more information, reference page numbers are provided in parentheses (p.)
6 **). In this MANUAL , camera is ready to shoot (shooting-ready) refers to the condition where the camera is turned on and no menu or image is displayed on the LCD monitor. The camera can thereby shoot immediately. About the Symbols : Tip or advice for better shooting. : Problem-solving advice. : Warning to prevent shooting problems. : Supplemental information. Basic Assumptions All operations explained in this MANUAL assume that the power switch is already set to <1> or <J>. ( ). <5> operations explained in this MANUAL assume that the power switch is already set to <J>. It is assumed that all the menu settings and Custom Functions are set to the default.
7 For explanatory purposes, the instructions show the camera attached with an EF-S17-85mm IS USM lens. 4. Contents Introduction Item Check List ..3. Conventions Used in this Index to Features ..8 1. Handling Precautions ..12. Quick Start 2. 1 Getting Started 23. Recharging the Battery ..24. Installing and Removing the Battery ..26 3. Installing and Removing the CF Card ..28. Mounting and Detaching a Lens ..30. Basic 4. Menu Menu Settings ..38. Before You Setting the Interface Language ..41 5. Setting the Date and Time ..41. Set the power-off time/Auto power Formatting the CF Card ..42 6. Resetting Camera Settings ..44. 2 Basic Shooting 45.
8 Fully Automatic Shooting ..46. 7. Full Auto Techniques ..48. Shooting Shooting 8. Shooting Shooting Moving Shooting Portraits at Night ..53. 9. Disabling 3 Image Settings 55. Setting the Image-recording 10. Setting the ISO Speed ..59. Selecting a Picture Style ..61. Customizing the Picture Style ..63 11. Registering the Picture Setting the White Custom White Balance ..68. Setting the Color Temperature ..69 12. White Balance Correction ..70. File Numbering Methods ..72. Setting the Color Space ..74. 5. Contents 4 Setting the AF and Drive Modes 75. Selecting the AF Mode .. 76. Selecting the AF Point .. 78. When Autofocus 80. MANUAL Focusing.
9 80. Selecting the Drive Mode .. 81. Self-timer Operation .. 82. 5 Advanced Operations 83. Program AE .. 84. Shutter-Priority 86. Aperture-Priority 88. Depth-of-Field 89. MANUAL Exposure .. 90. Automatic Depth-of-Field AE .. 91. Selecting the Metering 92. Setting Exposure Compensation .. 93. Auto Exposure Bracketing (AEB) .. 94. AE Lock .. 95. Bulb Exposures .. 96. Mirror 98. Using the Built-in 99. Flash Control .. 103. External Speedlites .. 105. 6 Live View Shooting 107. Live View Shooting .. 108. 7 Image Playback 115. Image Playback .. 116. Shooting Information Display ..117. Index Display/Jump Display ..119. Magnified View .. 120. Rotating an Image.
10 120. Auto Playback .. 121. Viewing the Images on TV .. 122. Protecting Images .. 123. Erasing Images .. 124. Changing Image Playback 125. Setting the LCD Monitor Brightness .. 125. Setting the Image Review Time .. 125. Auto Rotate of Vertical 126. 6. Contents 8 Sensor Cleaning 127. Automatic Sensor Appending Dust Delete MANUAL Sensor 1. 9 Direct Printing from the Camera/Digital Print Order Format 133. Preparing to Print ..134 2. Printing ..136. Trimming the Image ..141. Digital Print Order Format (DPOF)..143. Direct Printing with DPOF ..146. 3. 10 Transferring Images to a Personal Computer 147. Transferring Images to a Personal Computer.