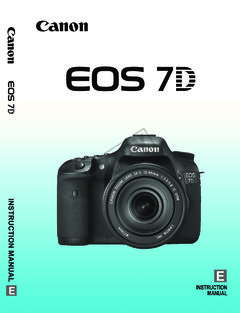
Transcription of INSTRUCTION MANUAL INSTRUCTION MANUAL
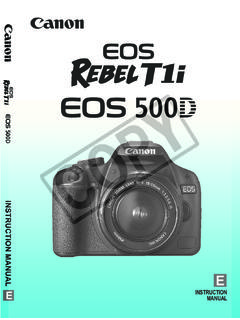
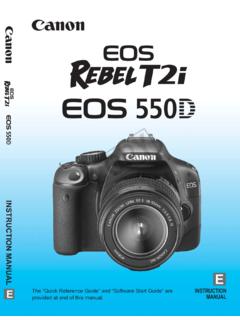
1 PY. C O. INSTRUCTION MANUAL . E. INSTRUCTION . E The Quick Reference Guide and Software Start Guide are provided at end of this MANUAL . MANUAL . Introduction The EOS REBEL T2i/EOS 550D is a high-performance, digital single- lens reflex camera featuring a fine-detail CMOS sensor with effective megapixels, DIGIC 4, high-precision and high-speed 9-point AF, approx. fps continuous shooting, Live View shooting, and Full HD (Full High-Definition) movie shooting. The camera is highly responsive for shooting at anytime, provides many functions fitted for advanced shooting, and offers many other features.
2 Take Test Shots to Familiarize Yourself with the Camera With a digital camera, you can immediately view the image you have captured. While reading this MANUAL , take a few test shots and see how they come out. You can then better understand the camera. To avoid botched pictures and accidents, first read the Safety Warnings ( , 234) and Handling Precautions ( ,13). PY. Testing the Camera Before Use and Liability After shooting, playback and check whether the images have been O. properly recorded. If the camera or memory card is faulty and the C. images cannot be recorded or downloaded to a computer, Canon cannot be held liable for any loss or inconvenience caused.
3 Copyrights Copyright laws in your country may prohibit the use of your recorded images of people and certain subjects for anything but private enjoyment. Also be aware that certain public performances, exhibitions, etc., may prohibit photography even for private enjoyment. This camera is compatible with SD memory cards, SDHC memory cards, and SDXC memory cards. This MANUAL will refer to all these cards as just card.. * The camera does not come with a card for recording images. Please purchase it separately. 2. Item Check List Before starting, check that all the following items have been included with your camera.
4 If anything is missing, contact your dealer. Battery Pack Battery Charger Camera LP-E8 LC-E8/LC-E8E*. (with eyecup and body cap) (with protective cover). Wide Strap EW-100DB III. PY. Interface cable Stereo AV Cable AVC-DC400ST. EOS DIGITAL. C O. Software INSTRUCTION Camera Solution Disk MANUAL INSTRUCTION MANUAL (Software) (this booklet). * Battery Charger LC-E8 or LC-E8E is provided. (The LC-E8E comes with a power cord.). If you purchased a Lens Kit, check that the lens is included. Depending on the Lens Kit type, the lens INSTRUCTION MANUAL might also be included. Be careful not to lose any of the above items.
5 3. Conventions Used in this MANUAL Icons in this MANUAL <6> : Indicates the Main Dial. <V> <U> : Indicates the <S> cross keys. <0> : Indicates the setting button. 0, 9, 7, 8 : Indicates that the respective function remains active for 4 sec., 6 sec., 10 sec., or 16 sec. respectively after you let go of the button. * In this MANUAL , the icons and markings indicating the camera's buttons, dials, and settings correspond to the icons and markings on the camera and on the LCD monitor. 3 : Indicates a function which can be changed by pressing the <M> button and changing the setting.
6 Y. M : When shown on the upper right of the page, it indicates that the P. function is available only in the Creative Zone modes ( ). O. (p.**) : Reference page numbers for more information. C. : Tip or advice for better shooting. : Problem-solving advice. : Warning to prevent shooting problems. : Supplemental information. Basic Assumptions All operations explained in this MANUAL assume that the power switch has already been set to <1> ( ). It is assumed that all the menu settings and Custom Functions are set to the default. For explanatory purposes, the instructions show the camera attached with an EF-S18-55mm IS lens.
7 4. Chapters For first-time DSLR users, Chapters 1 and 2 explain the camera's basic operations and shooting procedures. Introduction 2. Camera basics . 1 Getting Started 23. Basic Shooting and Image Playback 2 Fully automatic shooting for different subjects. 45. Creative Shooting 3 Basic shooting features for specific types of subjects. 59. Y. Advanced Shooting 4 77. P. Advanced shooting features. 5. 6 Shooting Movies C O. Shooting with the LCD Monitor (Live View Shooting) 107. 123. Handy Features 7 Convenient menu-based functions. 137. 8 Image Playback 155. 9 Printing Images 175.
8 10 Customizing the Camera 189. 11 Reference 201. End Pages: Quick Reference Guide and Software Start Guide 243. 5. Contents Introduction 2. Item Check 3. Conventions Used in this MANUAL .. 4. Chapters .. 5. Contents at a 10. Handling Precautions .. 12. Quick Start Guide .. 14. Nomenclature .. 16. 1 Getting Started 23. Charging the Battery .. 24. Installing and Removing the 26. Turning on the Power .. 27. Y. Setting the Date and 29. P. Selecting the Interface 30. Installing and Removing the SD Card .. 31. O. Attaching and Detaching a Lens .. 33. C. About the Lens Image 35.
9 Basic Operation .. 36. Q Using the Quick Control Screen .. 38. 3 Menu Operations .. 40. Formatting the 42. Switching the LCD Monitor Display .. 44. 2 Basic Shooting and Image Playback 45. 1 Fully Automatic 46. 1 Full Auto 48. 7 Disabling 49. 2 Shooting 50. 3 Shooting 51. 4 Shooting Close-ups .. 52. 5 Shooting Moving 53. 6 Shooting Portraits at Night .. 54. C Creative Auto Shooting .. 55. x Image 58. 6. Contents 3 Creative Shooting 59. d: Program Z: Changing the ISO Speed ..62. D Using the Built-in Flash ..64. E: Changing the AF Mode ..66. S Selecting the AF Point ..68. MF: MANUAL Focusing.
10 69. i Continuous Shooting ..70. j Using the Self-timer ..71. Setting the Image-recording A Selecting a Picture Style ..75. 4 Advanced Shooting 77. s: Action Shots ..78. PY. f: Changing the Depth of Field ..80. Depth of Field Preview ..82. O. a: MANUAL C. 8: Automatic Depth-of-Field q Changing the Metering Oy Setting Exposure Auto Exposure A Customizing a Picture Style ..91. A Registering a Picture Setting the Color Space ..96. A AE Lock ..97. A FE B: Setting the White Balance ..99. 2 White Balance Auto Lighting Lens Peripheral Illumination Correction ..104. Preventing Camera Shake.