Transcription of IRISPen Air - IRISLINK.COM
1 Smart Wireless Pen Scannerfor Windows, Mac, Android and iOSPen ScannerIRISPen Air 7 Table of Contents 1. Introduction .. 2 2. Installation .. 3 3. Getting started with the IRISP entm .. 4 4. Scanning .. 6 Important Scanning Tips .. 6 Ways of Scanning .. 6 Scan Settings .. 7 Closing the IRISPen application .. 9 Powering off the IRISPen .. 9 Scanning inside the IRISPen Application .. 9 5. Activation .. 10 6. Configuration .. 11 Scanning tab .. 11 Software tab .. 12 7. Troubleshooting .. 13 8. Specifications .. 14 9. 15 This Quick User Guide helps you get started with the IRISPen AirTM 7. Please read this guide before operating this scanner and its software. All information is subject to change without prior notice. Table of Contents 1. Introduction 2. Installation 3. Getting started with the IRISPenTM 4. Scanning 5. Activation 6.
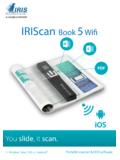
2 Configuration 7. Troubleshooting 8. Specifications 9. Compliance IRISPen AIR 7 - Quick User Guide11. Introduction IRISPen AirTM 7 is a Smart wireless pen scanner that allows you to scan lines of text into any text-compatible application. With the IRISPenTM you can also scan table lines and small images such as logos, signatures and mathematical formulas. Thanks to ' OCR technology (Optical Character Recognition) IRISPen AirTM 7 recognizes 130 languages, barcodes and CMC7 fonts. You can also have the application automatically translate the scanned text and read it out loud. IRISPen AirTM 7 is compatible with Windows PCs, Mac OS X computers, iOS and Android devices. It can be connected to your computer via Bluetooth ( ) or USB cable. Note that with IRISPen AirTM 7 you scan one line at a time. IRISPen AIR 7 - Quick User Guide22.
3 Installation Important: Make sure you have the required administration rights on your computer to do the installation. Make sure the IRISPenTM is disconnected before you install the software. The IRISPenTM application must be downloaded from the website. 1. Open your Internet browser and go to 2. Scroll down to IRISPenTM. 3. Select your Operating System. 4. Click Download to download the software. 5. Go to the location where you downloaded the software, and run the IRISPenTM installation file (.exe for Windows and .mpk for Mac OS). 6. Follow the on-screen instructions. Note: the installation may take some time. 7. Click Finish to complete the installation. IRISPen AIR 7 - Quick User Guide33. Getting started with the IRISP entm Before you begin: Charge the IRISPenTM for 5 hours. To do so, plug it into a computer using the provided USB cable and power on the computer, or plug the IRISPenTM into a power outlet.
4 The green battery led blinks slowly when the battery is being charged. When the battery led stays on, the battery is fully charged. Note: the battery life in usage is about 4 hours. When the battery is almost dead, the battery led starts blinking fast. The recharge time is about hours. Note that the battery status is also indicated inside the IRISPenTM app. Step 1: Start the IRISPenTM application and connect the IRISPenTM Double-click the IRISPenTM shortcut on the Desktop. When you start the IRISPenTM for the first time and you have not connected the pen yet, a Wizard is launched to help you doing so. The IRISPen AirTM 7 can be connected in two ways: via the provided USB cable or via Bluetooth. Windows PC Mac OS IRISPen AIR 7 - Quick User Guide4 Follow the instructions of the connecting Wizard. To play the Wizard again later, go to Troubleshooting > Connect Important Notes: On Windows PC: insert the provided dongle into a free USB ( ) port.
5 On Mac OS it is recommended to use the embedded Bluetooth of the OS. Note that the IRISPen AirTM 7 supports Bluetooth and higher. It is not compatible with older versions of Bluetooth. Press the scanning tip for 3 seconds to power on the pen. The blue Bluetooth led blinks slowly while the pen is being paired to your computer. The pairing does not require a password. The pairing may take some time to complete. When the Bluetooth connection has been established the blue led stays on. Warning: in case the IRISPenTM is connected but you don't see it on your device, make sure it is not connected to another device nearby. See the Troubleshooting section if necessary. When you connect the IRISPenTM for the first time, the IRISPenTM Tour is started automatically. Step 2: Follow the IRISPenTM Tour Go trough the different steps, and click Next after each step.
6 Watch the Tutorial. Note: to watch the Tutorial again later, go to Settings > Help & Support > Take the Tour. Select the Scanning hand, Interface language and Input language. Note: to change the settings afterwards, see the topic Configuration. Practice your scanning and try the different scanning options, such as scanning to a Word processor, scanning and translating text, scanning and reading text aloud. When the Tour is finished, click Done. Note: when the IRISPenTM is inactive for 12 minutes (at full battery charge), it auto powers off. IRISPen AIR 7 - Quick User Guide54. Scanning In this section we explain the different scanning possibilities of the IRISPenTM. Before you begin, make sure the IRISPenTM is powered on and connected correctly. If not, it says Disconnected in the application screen. Important Scanning Tips Bear in mind the following scanning tips that help improve the scanning quality: Hold the pen upright to scan text.
7 Do not scan in a 45 degree angle or less. Make sure both sharp ends of the scanner tip always touch the page during scanning. Scan one line of text at a time. Make sure the line is approximately in the middle of the two scanner tips. Avoid scanning too slowly. Slide the IRISPenTM smoothly, in a fluid motion. Avoid applying excessive pressure. Otherwise, the scanning may result in jerky, uneven motions. The scanning tips are reachable any time from the application screen or from the > Scanning Tips Ways of Scanning There are two ways of scanning: inside the IRISPenTM application and directly to other applications. The IRISPenTM interface is displayed. Notice that the pen icon is selected. This means you scan inside the IRISPenTM application. To scan directly to another application, click the sheet icon. Then open the application to which you want to scan and mouse click inside it.
8 Your text/images will be inserted at the cursor position when you scan. IRISPen AIR 7 - Quick User Guide6 Tip: when scanning to another application, you can minimize the IRISPenTM interface by clicking the left arrow. The interface then looks as follows on the left side of your screen:. Scan Settings A number of scan settings are available. Click the Settings icon to access them . Scan Type Select the Scan Type. IRISPenTM is able to scan the following types: Text When scanning Text to an application, IRISPenTM by default adds a space after each scan and adds new scans on the same line in your application until the line is full. To start a scan on a new line, click and slide the IRISPenTM over a line of text. At the end of the line, click again with the IRISPenTM. The cursor now moves to the line below. To modify the default settings, see the topic Configuration.
9 Image The Image option comes in handy to scan logos, signatures or mathematical formulas for instance. Numbers When your documents contain numbers only, it recommended to activate the Numbers option. Table The Table option is handy to scan text to Spreadsheet applications: open a spreadsheet application and mouse click inside it. Click and slide the IRISPenTM over a table line. The content is filled in in different cells in the application. Barcode The Barcode option is only available in the Windows version. To scan a barcode, click and slide the IRISPenTM horizontally or diagonally over the barcode. IRISPen AIR 7 - Quick User Guide7 Language Select the Language of the documents you will be scanning. IRISPen AirTM 7 recognizes 130 languages. IRISPenTM also supports vertical text in Japanese. The vertically written languages are marked with a "Vert.
10 ". To recognize a combination of alphabetic and numeric characters only , select Alphanumeric from the language list. With IRISPenTM you can also scan the so-called MICR lines you find at the bottom of cheques. To do so, select CMC7 from the language list. To translate the scanned text, select the Translate to option and select the language into which the text must be translated. Warning: make sure your computer is connected to the internet to use this feature. Note: when scanning to another application, the text is immediately translated and the original text is not shown. When scanning inside the IRISPenTM application you see both the original and the translated text. Read aloud To have the text read aloud after scanning, select Read aloud. The text will be read in the voice you select in the Configuration settings. Warning: make sure your computer is connected to the internet to use this feature.