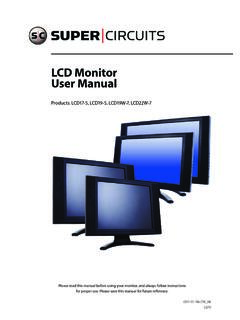
Transcription of LCD Monitor User Manual - Supercircuits
1 LCD Monitor user ManualProducts: LCD17-5, LCD19-5 Please read this Manual before using your Monitor , and always follow instructions for proper use. Please save this Manual for future reference. OF ELECTRIC SHOCK. DO NOT reduce the risk of electric shock, do not remove cover (or back). No user serviceable parts inside. Refer servicing to qualified service !This Monitor is equipped with a power plug with ground. Use only with a grounded electrical outlet. Always follow the instructions in the installation guide when applying power. Fire and equipment damage can occur if power is applied incorrectly. CAUTION Operate this Monitor only in environments where the temperature and humidity is within the recommended range. Operation outside the recommended range may cause electric shock and shorten the life of the product. CAUTION The slots on the back of the Monitor are provided for ventilation.
2 Do not cover these slots or obstruct the airflow around or through the Do not place the Monitor in locations where liquids can be splashed on it. Avoid touching or scratching the LCD Disconnect the power cord and all other cables from this Monitor if the following conditions exist: The power cord is frayed or damaged The machine has been dropped or the enclosure is damaged When the Monitor doesn t function normally If liquid has been spilled into the interior of monitorRefer repair to qualified service Monitor user ManualLEGAL NOTICE Supercircuits products are designed to meet safety and performance standards with the use of specific Supercircuits authorized accessories. Supercircuits disclaims liability associated with the use of non- Supercircuits authorized recording, transmission, or broadcast of any person s voice without their consent or a court order is strictly prohibited by makes no representations concerning the legality of certain product applications such as the making, transmission, or recording of video and/or audio signals of others without their knowledge and/or consent.
3 We encourage you to check and comply with all applicable local, state, and federal laws and regulations before engaging in any form of surveillance or any transmission of radio trademarks and trade names may be used in this document to refer to either the entities claiming the marks and names or their products. Supercircuits , Inc. disclaims any proprietary interest in trademarks and trade names other than its part of this document may be reproduced or distributed in any form or by any means without the express written permission of Supercircuits , Inc. 2010 Supercircuits , Inc. All rights N. Mopac Expressway, Building 300, Austin, TX 78759 Sales/Support: | Fax: OF CONTENTST able of ContentsSECTION 1 Introduction..11 ..1 SECTION 2 ..2 SECTION 3 ..63 ..63 ..73 ..83 ..8 SECTION 4 Specifications..16 SECTION 5 Troubleshooting..181 LCD Monitor user ManualSECTION 1: INTRODUCTION SECTION 1 IntroductionThis video Monitor has a rugged metal construction and displays sharp and brilliant video by utilizing an active TFT LCD matrix.
4 The high contrast ratio generates sharp, crisp lines and images. Also, the fast response time gives superior clarity for moving images, eliminating ghosting . Key features include: Built-in BNC, RCA, DVI, S-Video and VGA inputs Built in audio speakers High resolution of 1280 x 1024 pixel display Includes easy connection instructions and a 6 foot VGA What s in the boxYour Monitor includes the following: LCD Monitor and base user Manual Power cord, 6 VGA cable, audio cable with stereo mini-jack connectors Stereo mini-jack (male) to RCA (male) adapter Remote control and AAA batteries (2) 2: INSTALLATION AND SETUP SECTION 2 Installation and SetupTo install the Monitor : 1. Remove the components from the packaging and inspect them for damage. If the Monitor is damaged in any way, return it to your supplier for replacement. 2. Find the Monitor assembly and base.
5 Use the screw provided to attach the base to the Monitor support bracket. The screw may be attached to the underside of the Monitor support bracket or in the base. BaseBracketScrew3. Find the remote control and batteries, and install the batteries in the remote control. 4. Attach the video source to the Monitor input that provides the best video quality. This Monitor connects directly to five types of video interfaces: HDMI, VGA, S-Video, composite video, and BNC. The HDMI, VGA, S-video, and composite video connectors are located on the lower back side of the Monitor . 3 LCD Monitor user ManualSECTION 2: INSTALLATION AND SETUPI nputs on the lower back side of Monitor BNC connectors are located on the back left side of the Monitor underneath the back cover. Remove the cover by carefully pulling the lower edge of the cover away from the Monitor . Back coverPull here to remove coverMonitor back coverRemoving the cover opens access to the BNC input and output connectors and their associated audio jacks.
6 2: INSTALLATION AND SETUPI nputs on the back left side of the monitor5. If necessary, configure the DVR to enable video (and audio) to the video output you are using. Refer to the documentation provided with the video sourcing device. 6. Connect the audio output from the video source to the audio connector(s) associated with the Monitor video input port you are using. 7. If necessary, connect the Monitor video output (BNC) and audio output (RCA) to a video input device. (See photo above.)8. Attach the power cable to the Monitor and plug it in to a grounded power outlet. 9. Press the POWER button to power on the Monitor . The POWER button is located in the control panel on the right side of the Monitor . 5 LCD Monitor user ManualSECTION 2: INSTALLATION AND SETUP SOURCEMove up in menuMove down in menuMove right in menu or volume upMove left in menu or volume downMENU (open/close)PowerAudio outputControl panel10.
7 Press the SOURCE button on the Monitor control and use the p and q buttons to highlight the video interface you are using. Press the MENU button on the Monitor control panel to select the highlighted interface. An indication will appear confirming your interface selection. NOTEIf the video source is connected to the Monitor s composite video input (RCA video connector), select AV for the source. If you are using the VGA input, select PC as the source. 3: BASIC OPERATIONSECTION 3 Basic Using the remote controlMonitor functions that can be performed on the control panel can also be done with the remote control. The buttons on the remote control are described below. PowerMuteNumeric buttonsMENUS mart SF1 Smart PSOURCEV olume upVolume downCursor buttonsProgram listChannel +Channel OK16:9 ReturnTimerInfoColorP/NAudioNOTEThe function of buttons on the remote control depend on the display source selected.
8 For instance, if the video input source selected is PC, the Monitor will ignore the numeric buttons and other buttons unrelated to that input source. Table 1. Remote control button functionsButtonFunctionPower Turn on or standbyInfo Display system information Mute Silence audioTimer Time setting button7 LCD Monitor user ManualSECTION 3: BASIC OPERATIONB uttonFunctionNumeric buttons (0 9) Enter number buttonsProgram list Scan or set program listF1 Select F1 function CursorUp or down cursor button: function select; left or right cursor button: add or reduceOK Confirm selectionCH +/ Add or delete channel numberVOL +/ Sound volume up (+) or down ( ) buttonsMenu Display menuSourceDisplay source selection menuSMART S Intelligent sound mode selectionSMART P Intelligent video mode selection. Select from PERSONAL, SOFT, ADVANCED, or STANDARD preset video image adjustmentsReturnReturn to previous channel Smart image Intelligent image mode select16:9 Switch between Full, ZOOM, ZOOM2, NORMAL, or PANORAMA infoReturn to previous channel TimerSet sleep timer to 15, 30, 45, or 60 minutesColorSelect color tone: NORMAL, WARM, COOLP/NNot Power OnThe Monitor can be powered on in two ways: Press the button on the on the Monitor control panel.
9 Press the Power button on the remote Standby modeWhen the Monitor is not in use, press the Power button on the remote control to put the Monitor in standby mode. When the Monitor is in standby, the front panel power LED is red. 3: BASIC OPERATIONNOTEThe Monitor will change to standby mode if it is powered on and there is no signal input for 5 minutes, or when the preset time to turn off is reached. Selecting an input source Press SOURCE on either the remote control or the Monitor to open the INPUT SOURCE pop-up window. Then press the up, p, or down, q, cursor keys on remote control or on the Monitor to select the video input interface. Input interfaces are AV (composite video input), BNC, S-VIDEO, PC (VGA input), and HDMI. Press the OK button on the remote control or MENU button on the control panel to switch to the highlighted video input. An on-screen confirmation will appear.
10 Working with on-screen menusPress MENU on the remote control or on the Monitor control panel to open the Monitor configuration menus. Initially, the Monitor displays the PICTURE menu screen. Options listed on the menu screens will differ from those shown herein depending on the selected video source. 9 LCD Monitor user ManualSECTION 3: BASIC OPERATIONPICTURE menu1. Press the left, t, or right, u, cursor keys on the remote control, or the + or buttons on the Monitor control panel to select one of four menu screens: PICTURE, SOUND, ADVANCED, or SYSTEM. 2. Press the down, q, cursor keys on the remote control or the button on the Monitor control panel to change settings on the menu screen you selected, press MENU again to close the menu screen. PICTURE menuUse the PICTURE menu to adjust the image contrast, brightness, and other attributes of the image displayed on the screen.
