Transcription of LOVE BIRD SCOOTER - Discover My Mobility
1 love bird SCOOTER User Manual Content 1601 Pacific Coast Hwy Hermosa Beach CA, 90254 4/2012 - 2 - FEATURE GUIDE ..3 SAFETY EMI Tiller Angle Adjustment ( )..8 Seat Slide & Swivel Adjustment ( )..8 Reclining Seat( )..8 SCOOTER TILLER CONTROLS ( A&B&C) ..9 Speed Battery Level Thumb/Finger Level ..9 On/Off Key Switch ..9 Hazard Electromagnetic FREE WHEEL ..10 Getting Starting SCOOTER EXTRA GUIDELINES IN THE CONTROL OF YOUR ..12 Grass and BATTERIES AND BATTERY ..12 Battery Wheels & General SCOOTER .
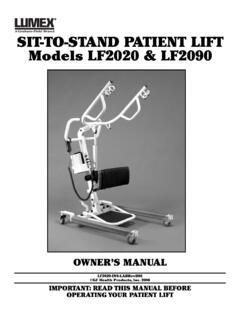
2 13 TROUBLESHOOTING ..13 Circuit ..13 Check TECHNICAL ..14 QUARTERLY ..15 INTRODUCTION Congratulations on your purchase of the All Weather SCOOTER . Your SCOOTER incorporates the latest innovative designs patented and only available on the All Weather SCOOTER . Your SCOOTER may be used in both indoors and outdoors. Direct drive transaxles and electromagnetic brakes give a safe and efficient ride. This All Weather SCOOTER is designed for persons with limited Mobility . Please ensure that you read this manual carefully, it is important for your safety that you understand the guidelines and instructions given. 4/2012 - 3 -FEATURE GUIDE All Weather TM (Figure 1) control head light tip wheels reflectors width armrest seat height adjustment down seat rest steering column and steering wheel angle adjustment basket charging inlet AJUSTMENTS Tiller Angle Adjustment (Figure 5) The middle of the steering bar, there is a black lever, press the lever and release the steering to your comfortable driving position.
3 Then release the lever to lock tiller in place. DO NOT DRIVE SCOOTER IF TILLER IS NOT SECURED. Seat Slide &Swivel Adjustment (Figure 6) Pulling up on the seat black slide lever allows the seat position to be adjusted forward or backward. Release the lever and the seat will Lock in that position. Under the left of the seat there is a spring loaded black lever. Pulling up the lever allow the seat to swivel, when released, the SCOOTER will lock in one position. Tiller Angle Adjustment LeverSeat Slide Lever Swivel Seat Adjustment Lever Figure 5 Figure 6 4/2012 - 4 - Reclining Seat (Figure 7) The reclining seat lever i s located on the left side below the armrest.
4 Simply pull the lever up to adjust. This feature also allows the seat to be folded down. SCOOTER TILLER CONTROLS (Figure 8A 8B & 8C) Speed Controls The speed control knob allows you to set a speed between 1(min) to 13(max).The scooters are also equipped with a speed high/low switch. Battery Level indicator The number of the LED bars lit, shows the amount of charge left in your batteries. The amount of charge will only show at its true level when the SCOOTER is in drive. CAUTION Do not let the LED bars go out/down completely as complete discharge of the batteries could cause irreversible damage. Lights A button on the control panel operates light.
5 Push Button Disengage gear for manual pushing Horn A button with horn picture located on the control panel operates the horn. Accelerator Lever Controls We use "V" accelerator, the right lever forward motion, and left lever for backward. Amount of pressure applied to each lever will determine the speed the SCOOTER travels at. Release the lever and the SCOOTER will slowly come to a stop. On/Off Key Switch Reclining Seat Lever Figure 7 Annular Steering WheelLights Push ButtonLeft TurnOn/off Key Swith Right TurnHorn Speed Limiting SwithAccelerator Lever Hazard warning swith Battery level indicatorHigh or low speed 4/2012 - 5 -Insert the key in the right side of the tiller. Turn the key and the LED bars will light up.
6 There is a delay before the accelerator lever can be operated, while the controller checks the circuits. Indicator Switch Operates turn indicator lights. Hazard Warning Switch Push button to operate all hazard flashers. Electromagnetic Brake The brake is automatically operated when the accelerator control levers are released. There is a slight delay when the SCOOTER decelerates; this allows the SCOOTER to come at a smooth stop. FREE WHEEL OPERATION The free wheel lever allows you to put the SCOOTER in neutral and push it. The free wheel lever is located toward the inside of rear wheel. To push the SCOOTER (neutral), push the free wheel lever down. To put the SCOOTER in gear (drive), lift the lever up.
7 The SCOOTER will not operate when the lever is down (neutral). WARNING! For safety, always put the SCOOTER into gear (lever up) after pushing or rolling SCOOTER . Failure to do so may result in injury. Anti tip Wheels The anti tip wheels are located at the rear of the SCOOTER frame. The SCOOTER should not be used unless the anti tipping wheels are in place. Rear Chassis cover SCOOTER Serial Number Anti-tip Wheels Electromagnetic Brake Rear Chassis cover Electromagnetic Brake 4/2012 - 6 -STARTING TO DRIVE YOUR SCOOTER Getting Started 1. You must charge your SCOOTER completely before first time use(8 10hours). 2. Select a level area with plenty of space. 3. Mount the SCOOTER , either by lifting the arm and sliding onto the seat or rotate the seat outwards, mount and then rotate the seat back to face the tiller.
8 4. Adjust the tiller and seat as previously described. Starting SCOOTER Movement 1. Ensure that you are seated in a comfortable position. 2. Turn the key to the ON position. 3. Your speed setting should be on 1 or equipped, set the speed high/low switch to low. 4. Pull/press the accelerator right lever, the SCOOTER will move forward slowly. The further pull/press the faster the SCOOTER goes but will only reach the speed level has been selected. 5. Release the lever and the SCOOTER will slowly come to a stop as the magnetic brake is automatically applied. Steering Steering the SCOOTER is light and easy. Ensure when starting off you give a wide clearance when turning so that the rear wheels clear any obstacle that you are passing.
9 When steering through limited spaces such as a doorway or when turning around, turn the tiller handles where you want to go and apply power gently. The SCOOTER will turn very tightly, but will still move with complete stability as long as the speed is not too high. Reversing Before reversing ensure that the area behind is free from any hazards or obstructions. Adjust your speed setting to a low setting before you reverse. Pull/press the left lever, and steer wide of all concerns and obstacles. Dismounting Before dismounting ensure that the key is turned to the off position. Raise the armrest to slide off the seat or turn the swivel seat outward. CAUTION: Please ensure that care is exercised when mounting or dismounting the SCOOTER and that the tiller ,seat back and foot rest are not used of support.
10 For support, use the arm rests. EXTRA GUIDELINES IN THE CONTROL OF YOUR SCOOTER Ramps The stability of your SCOOTER is governed by several factors such as the seat position, the angle of slope, your height and weight. When approaching an incline, do so directly and not at an angle and whenever possible avoid making turns. When going down a ramp or slope keep the speed settings to low. This will ensure there is a safe controlled descent. When the accelerator levers are released the SCOOTER will slowly come to a stop. CAUTION: Don't turn the key off while the SCOOTER is in motion. 4/2012 - 7 - Grass and Gravel Please follow the guidelines previously given and your SCOOTER will perform admirably over many surfaces.