Example: bachelor of science
MICROWAVE HOOD COMBINATION INSTALLATION …
holes should align with mounting holes in the vent opening, as shown in inset. 4. Secure vent deflector with 2 mounting screws (1 on each end). 5. Replace vent screen. Wall Venting Installation Only To Remove Wall Damper Vent Cover: 1. Locate the wall damper vent cover on the back of the microwave oven. 2.
Tags:
Information
Domain:
Source:
Link to this page:
Documents from same domain

MICROWAVE HOOD COMBINATION …
www.whirlpool.comMICROWAVE HOOD COMBINATION INSTALLATION INSTRUCTIONS MICROWAVE HOOD COMBINATION SAFETY This product is suitable for use above electric or gas cooking products up to 36" (91.4 cm) wide.

INSTALLATION INSTRUCTIONS AND OWNER’S …
www.whirlpool.comINSTALLATION INSTRUCTIONS AND OWNER’S MANUAL Top Mount Refrigerator Do Not Throw Away — Additional important safety information included. Para las instrucciones en español, visite nuestro sitio de internet.
DISHWASHER USER INSTRUCTIONS - Whirlpool
www.whirlpool.comTHANK YOU for purchasing this high-quality product. If you should experience a problem not covered in TROUBLESHOOTING, please visit our website at www.whirlpool.com for additional information. If you still need assistance, call us at 1-800-253-1301.

ELECTRIC RANGE USER INSTRUCTIONS - Whirlpool
www.whirlpool.comTHANK YOU for purchasing this high-quality product. If you should experience a problem not covered in TROUBLESHOOTING, please visit our website at www.whirlpool.com for additional information. If you still need assist ance, call us at 1-800-253-1301.

REFRIGERATOR USER INSTRUCTIONS - Whirlpool
www.whirlpool.comYour safety and the safety of others are very important. We have provided many important safety messages in this manual and on your appliance. Always read and obey all safety messages. This is the safety alert symbol. This symbol alerts you to potential hazards that can kill or hurt you and others.

ELECTRIC DRYER OWNER’S MANUAL GUIDE D’UTILISATION …
www.whirlpool.comELECTRIC DRYER OWNER’S MANUAL GUIDE D’UTILISATION DE LA SÉCHEUSE ÉLECTRIQUE Table of Contents Dryer Safety.2 Dryer Safety.2 Dryer Maintenance and Care.5 Cleaning the Dryer Location.5 Cleaning the Dryer Interior.5 Removing Accumulated Lint.5 Cleaning the Lint Screen.5 Changing the Drum Light (on some models).6 Check Your Vent …

Use & Care Guide - Whirlpool
www.whirlpool.comUse the Automatic Cycles to provide the most energy savings and enhanced fabric care from the dryer. During Automatic Cycles, drying air temperature and moisture level are sensed in the load.

Use & Care Guide - Whirlpool
www.whirlpool.comW10607424B W10607425B - SP If you have any problems or questions, visit us at www.whirlpool.com Pour tout problème ou toute question, consulter www.whirlpool.ca Use & Care Guide

Use & Care Guide - Whirlpool
www.whirlpool.comW10680139D W10680140D - SP If you have any problems or questions, visit us at www.whirlpool.com Pour tout problème ou question, consulter www.whirlpoolappliances.ca Use & Care Guide Guide d’utilisation et d’entretien
WHIRLPOOL CORPORATION MAJOR APPLIANCE LIMITED …
www.whirlpool.com2/14 WHIRLPOOL CORPORATION MAJOR APPLIANCE LIMITED WARRANTY ATTACH YOUR RECEIPT HERE. PROOF OF PURCHASE IS REQUIRED TO OBTAIN WARRANTY SERVICE. Please have the following information available when you call the
Related documents
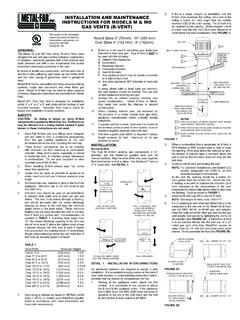
B-Vent Installation Instructions - mtlfab.com
www.mtlfab.comd. Make remainder of vent installation per B-Vent installation instructions. Oval Vents The 4MO and 5MO oval vents are listed for use in either 2” x 4” or 2” x 6” stud walls, with firestop/spacer to maintain proper clearance to combustibles. The 6MO is listed for use in 2” x 6” stud wall. The firestop/spacer is to

INSTALLATION INSTRUCTIONS
www.owenscorning.comdeck manufacturer’s instructions. 2. Prevent the wood deck from getting wet before, during and after installation. • Ventilation: Must comply with local building codes. • Handling: Use extra care in handling shingles when the temperature is below 40°F. • Storage: Store in a covered, ventilated area at a maximum temperature of 110°F.

MICROWAVE HOOD COMBINATION INSTALLATION …
www.whirlpool.com1.Remove screws attaching vent cover B, C and D to top of microwave exterior. Slide out vent covers B, C and D. Keep the vent cover C for step 2 use. 2.Place the vent cover C (removed from step 1) to area A, and rotate 180 degrees. 3. Attach the vent covers located in the upper polyfoam (see item J in "Parts Supplied" section). 4.
INSTALLATION INSTRUCTIONS Mopar Performance 4” Lift …
starparts.chrysler.comThe upper end of the axle vent hose is clamped to the driver side frame rail. Leave the hose attached to frame; simply pull down approximately 4” of hose. On Rubicon models, the wiring loom for the locking differential is attached to the axle-to-frame ... INSTALLATION INSTRUCTIONS Mopar Performance 4” Lift System 2007 and newer JEEP ...

INSTALLATION INSTRUCTIONS AND OWNERS MANUAL
newcontent.westmarine.comfill and vent system here seastar nylon tubing or 3⁄ 8" copper tubing port line (left) starboard line (right) if copper tube is used for general installation, use cylinder hose kit here. rod end ball joint tiller arm cylinder mounting foot additional steering station. compensating line this helm must be fitted with a non-vent plug. failing to ...
INSTALLATION INSTRUCTIONS MECHANICAL GAUGES
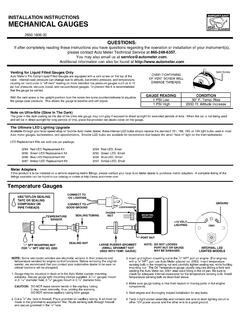
autometer.comINSTALLATION INSTRUCTIONS MECHANICAL GAUGES 2650-1606-00 OVER-TIGHTENING OF VENT SCREW WILL DAMAGE THREADS. GAUGE READING 1 PSI Low 1 PSI High CONDITION 30° F. Temp. Rise 2000 Ft. Altitude Increase NOTE: Some late model vehicles use electronic sensors in their pressure and temperature senders for engine control functions. …
INSTALLATION INSTRUCTIONS - Zoeller Pump Company
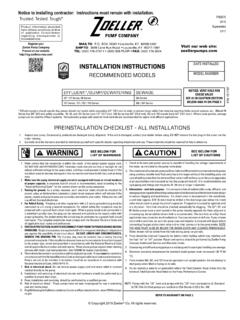
www.zoellerpumps.comto reduce clogging and seal failures. If a check valve is incorporated in the installation, a vent hole (approx. 3/16" [5 mm]) must be drilled in the discharge pipe below the check valve and pit cover to purge the unit of trapped air. Trapped air is caused by agitation and/ or a dry basin. Vent hole should be checked periodically for clogging.
INSTALLATION INSTRUCTIONS - FREESTANDING GAS …
pdf.lowes.comthe gas supplier's instructions. • If you cannot reach your gas supplier, call the fire department. — Installation and service must be performed by a qualified installer, service agency or the gas supplier. Important notes to the installer • Read all instructions contained in these installation instructions before installing range.
INSTALLATION INSTRUCTIONS - MyRheem.com
pts.myrheem.comInstallation Instructions remain with the furnace as a reference guide to the servicing contractor. We recommend that performance and installation data be recorded for future reference on this sheet to meet service and warranty obligations so that job site information is …

Installation & Operating Manual
downloads.hearthnhome.com11 Vermont Castings • Radiance VF Installation ManualR14 • 06/18 3-90-30005056 D E S I G N C E RT IF D Radiance® Vent Free Gas Heater Models: 0003380, 0003381 INSTALLER: Leave this manual with the appliance. CONSUMER: Retain this manual for future reference. INSTALLER / CONSUMER SAFETY INFORMATION