Transcription of Model 5103 Installation Guide - directeddealers.com
1 Model 5103 Installation GuideThis product is intended for Installation by a professional installer only! Attempts to install this product by a person other than a trained professional may result in severe damage to a vehicle s electrical system and components. 2009 Directed Electronics, Vista, CA N5103L 2009-07 Bitwriter , Code Hopping , Doubleguard , ESP2 , FailSafe , Ghost Switch , Learn Routine , Nite-Lite , Nuisance Prevention Circuitry, Revenger , Silent Mode , Soft Chirp , Stinger , Va-let , Vehicle Recovery System , VRS , and Warn Away are all Trademarks or Registered Trademarks of Directed with date code of 6A or older require an IC upgrade (p/n 998M). Some Bitwriters with a date code of 6B do not require the IC upgrade. Refer to Tech Tip # 1112 for more informationThe Bitwriter (p/n 998U) requires chip version or newer to program this !
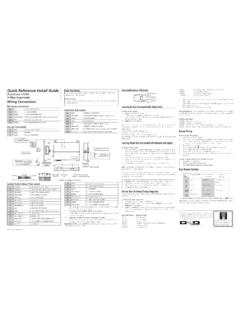
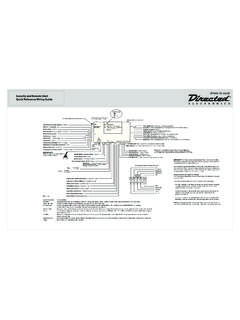
2 Safety first ..5 What is included ..7 Installation points to remember ..8 Virtual tach ..8D2D ..8 Before beginning the Installation ..9 After the Installation ..9 Component locations and finding wires ..10 Valet/program switch ..10 Status LED ..11 Making your wiring connections ..12 Primary harness (H1), 12-pin connector ..13 Auxiliary harness (H2), 6-pin connector ..13 Door lock harness, 3-pin connector ..13 Remote start ribbon harness, wiring diagram ..14 Heavy gauge relay satellite wiring diagram ..14 Relay satellite 4-pin connector ..14 Remote start harness, (H3) 5-pin connector ..15 AUX 4, Horn, (H4), 2-pin connector ..15 Wire connection guides ..15 Primary harness (H1), 12-pin connector ..15 Auxiliary harness (H2), 6-pin connector ..21 Relay satellite 4-pin connector ..26 Remote start, (H3) secondary harness ..27 AUX 4, Horn, (H4) 2-pin connector.
3 29 Neutral safety switch interface ..30 Testing the neutral safety switch ..30 Plug-in LED and valet/program switch ..31D2D programmer interface - 4-pin red plug ..31 Shock sensor harness, 4-pin connector ..32 Tachometer settings ..33 Virtual tach ..33 Tach learning ..34 Programming jumpers ..35 Tach threshold On/Off ..35 Light flash (+) / (-) polarity ..35 Transmitter/receiver Learn Routine ..36 Transmitter configurations ..39 Standard configuration ..39 Multi-level security arming ..40 System features learn routine ..41 Feature menus ..43 Menu 1 - Basic ..43 Menu 2 - Advanced ..44 Menu 3 - Remote start ..45 Feature descriptions ..46 Menu 1 - Basic ..46 Menu 2 - Advanced ..49 Menu 3 - Remote start ..52 NPC, Valet Mode, Rear defogger, Timer Mode ..54 Table of zones ..55 Long term event history ..56 Shutdown diagnostics ..57 Safety check ..58 Troubleshooting.
4 59 Alarm ..59 Remote start ..60 Wiring quick reference Guide ..62 Relay satellite wiring quick reference Guide ..635 2009 Directed Electronics. All rights ,bankselectorAUDIOPWR12 REWFFPLAY/PROGNR3456 DISC-DISC+11:53XM1-1CH-001 CHVOLSCANSOUNDAM/ xt 10secto togglechannelor beeptosavetoa ne modeindicatorMODEDUALOFFAUTOMAP/GUIDEMEN USETUPINFOZOOMCANCELAUDIOAUTOMODEA/ +123456 DISC-DISC+VOLPWRPUSHTUNESOUNDPUSHXM1-1 VOLCHCHANNELCATEGORYNAMETITLE::::1CH2CH3 CH6CH5CH4 CHMODESCANSOUND001-HITS1 POPMUSICNAMEMUSICTITLEC hannelcontrolCategoryControl001014018040 065115 TogglesbetweenchannelandcategorymodesBan kandpresentindicatorUpperdisplaytext modeselectorSat modeand saveto a textIndicatorfieldsTogglesScanmodeTu ne modeindicatorANTENNASC OUTPUTS irius-Ready, SAT Radio Ready or select OEM headunits with optional Honda Bus Compatible TranslatorHeadunit bus cableSiriusConnect CableHON-SC1 Honda Bus CompatibleTranslator Warning!
5 Safety firstThe following safety warnings must be observed at all times:Due to the complexity of this system, Installation of this product must only be performed by an authorized Directed Electronics properly installed, this system can start the vehicle via a command signal from the remote control. Therefore, never operate the system in an area that does not have adequate ventilation. The following precautions are the sole responsibility of the user; however, autho-rized Directed Electronics dealers should:Never use a test light or logic probe when installing this unit. Always use a multimeter. Never operate the system in an enclosed or partially enclosed area without ventilation (such as a garage). When parking in an enclosed or partially enclosed area or when having the vehicle serviced, the remote start system must be disabled using the installed toggle switch.
6 It is the user s sole responsibility to properly handle and keep out of reach from children all remote controls to assure that the system does not unintentionally remote start the MUST INSTALL A CARBON MONOXIDE DETECTOR IN OR ABOUT THE LIVING AREA ADJACENT TO THE VEHICLE. ALL DOORS LEADING FROM ADJACENT LIVING AREAS TO THE ENCLOSED OR PARTIALLY EN-CLOSED VEHICLE STORAGE AREA MUST REMAIN CLOSED AT ALL TIMES. Use of this product in a manner contrary to its intended mode of operation may result in property damage, personal injury, or death. Except when performing the Safety Check outlined in this Installation Guide , (1) Never remotely start the vehicle with the vehicle in gear, and (2) Never remotely start the vehicle with the keys in the ignition. The user will be responsible for having the neutral safety fea-ture of the vehicle periodically checked, wherein the vehicle must not remotely start while the car is in gear.
7 This testing should be performed by an authorized Directed Electronics dealer in accordance with the Safety Check outlined in this product Installation Guide . If the vehicle starts in gear, cease remote start operation immediately and consult with the user to fix the problem immediately. After the remote start module has been installed, test the remote start module in accordance with the Safety Check outlined in this Installation Guide . If the 6 2009 Directed Electronics. All rights starts when performing the Neutral Safety Shutdown Circuit test, the remote start unit has not been properly installed. The remote start module must be removed or properly reinstalled so that the vehicle does not start in gear. All installations must be performed by an authorized Directed Electronics dealer. OPERATION OF THE REMOTE START MODULE IF THE VEHICLE STARTS IN GEAR IS CONTRARY TO ITS INTENDED MODE OF OPERATION.
8 OPERAT-ING THE REMOTE START SYSTEM UNDER THESE CONDITIONS MAY RE-SULT IN PROPERTY DAMAGE OR PERSONAL INJURY. IMMEDIATELY CEASE THE USE OF THE UNIT AND REPAIR OR DISCONNECT THE INSTALLED RE-MOTE START MODULE. DIRECTED ELECTRONICS, INC. WILL NOT BE HELD RESPONSIBLE OR PAY FOR Installation OR REINSTALLATION COSTS. 7 2009 Directed Electronics. All rights is includedThe control module (see diagram) HX antenna receiver Two remote controls (P/N 474L)A Stinger Doubleguard two - stage shock sensor A Revenger Soft Chirp six tone programmable siren A push-button Valet switch A status LED indicator light A shut-down toggle switch AVISTART 51038 2009 Directed Electronics. All rights points to rememberThis product is designed for fuel-injected, automatic transmission vehicles only. Installing it in a standard transmission vehicle is dangerous and is contrary to its intended use.
9 Virtual tachVirtual Tach is the default RPM-sensing method for the new remote start systems. Virtual Tach gives the installer the performance of a hard wired tach wire, with the convenience of voltage sensing. It is far superior to any voltage-sense feature you ve tried before. Virtual Tach monitors the cranking voltage of the vehicle using a very fast micro controller and an analog-to-digital converter. The microprocessor saves the base voltage as a reference. When Virtual Tach sees the slightest uptick in voltage, indicating that the alternator is charging the battery, the starter motor shuts off instantly. D2 DThe system has the ability to interface with an Xpresskit module through the D2D port. The advantage to using a D2D interface is that there is less wiring involved in the Installation . Check the Xpresskit module Installation Guide to determine which wires are not needed, and which options are available.
10 For more infor-mation visit 9 2009 Directed Electronics. All rights reserved. Before beginning the installationPlease read this entire Installation Guide before beginning the Installation . The Installation of this remote start system requires interfacing with many of the vehicle s systems. Many new vehicles use low-voltage or multiplexed systems that can be damaged by low resistance testing devices, such as test lights and logic probes (computer safe test lights). Test all circuits with a high quality digital multi-meter before making not disconnect the battery if the vehicle has an anti-theft-coded radio. If equipped with an air bag, avoid disconnecting the battery if possible. Many airbag systems display a diagnostic code through the warning lights after the lights lose power. Disconnecting the battery causes the anti-theft code to be erased, which can then require a trip to the mounting the LED or Valet Switch, check with the customer about the mounting locations.