Transcription of Model DS104, Model DS106, Model DS108, and …
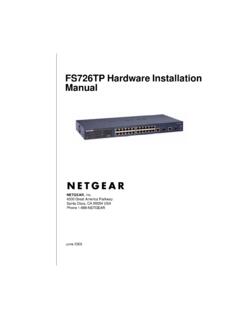
1 Model ds104 /DS106/ ds108 /DS116 Dual Speed Hub Installation Guide The NETGEAR Model ds104 , Model DS106, Model ds108 , and ModelDS116 Dual Speed Hubs are network hubs that enable users to mix and match10 and 100 megabit per second (Mbps) devices on the same network. Thiscapability eliminates the high cost and complexity of separate networkequipment for 10 and 100 Mbps users. These four hubs, also known as theDS100 Series hubs, are ideal for small networks in transition from 10 to 100 Mbps and for linking networks operating at different four hub models connect PCs to share printers, files, Internet access, and e-mail communications. Each network port coordinates with the connected PC torun at 10 or 100 Mbps, making network configuration and upgrade effortless. Inaddition, the 10 and 100 Mbps network segments are internally bridged to formone network, providing full connectivity among all users. The DS100 Series hubs have the following key features: Per port, autosensing, dual-speed (10/100 Mbps) operation IEEE standard compliance for interoperation with all 100 BASE-TX Fast Ethernet (100 Mbps) products and standard compliance for interoperation with all 10 BASE-T Ethernet products Easy Plug-and-Play installation with no software to configure, saving time and minimizing the potential for configuration errors Ability of each port on the hub to independently detect the speed of the attached device and to automatically connect at the appropriate speed Internally bridged 10 and 100 Mbps network segments to form one network, providing full connectivity among all users Chassis equipped with.
2 Four ( Model ds104 ), six ( Model DS106), eight ( Model ds108 ), or 16 ( Model DS116) 10 BASE-T or 100 BASE-TX ports to provide fast information exchange, resource sharing, and client or peer-to-peer communication using simple Category 5 UTP wiring Built-in vista LEDs on each network port clearly indicating individual port status Additional LEDs providing network traffic status for the hub Two LED bar graphs (on the Model ds104 , Model DS106, and Model ds108 only) providing online status of network utilization and alerting you to potential network overload Normal/Uplink push button for simplifying network extension Compact, durable design that enables tabletop or wall mounting Limited five-year warranty on the hub and three-year warranty on the power adapter Start HereFeatures Model ds104 /DS106/ ds108 /DS116 Dual Speed Hub Installation Guide Verify that the package contains the following items, as shown in the diagram: DS100 Series hub Wall mount hardware Rubber footpads for tabletop installation This installation guide Warranty & Owner Registration Card Support Information Card Power adapter Caution: Use the appropriate power cord as required by your national electrical codes and Contents9498 FAWall mounthardwareRubberfootpadsModel ds104 , Model DS106, Model ds108 , or Model DS116 hub ( Model DS116 shown)Normal/Uplink10M Link Activity100M Link ActivityPowerCollisionInstallation guide,Warranty & OwnerRegistration Card,Support Information CardPoweradapter Model ds104 /DS106/ ds108 /DS116 Dual Speed Hub Installation Guide Refer to the following illustration when connecting your DS100 Series hub.
3 Theillustration shows a Model DS116 hub connecting users to a printer, servers, anda router. You can substitute a Model ds104 , Model DS106, or Model DS108hub, depending on the number of connections ApplicationsNormal/Uplink100M Link Activity10M Link Activity13141516910111256781234 PowerCollisionAuto 10/100 MbpsDUAL SPEEDDUAL SPEED HUB DS1169090 FAModel DS116 hub100 Mbps10 MbpsModel RT328 ISDN RouterNetworkprinterISDNP oweruserPCsServers Model ds104 /DS106/ ds108 /DS116 Dual Speed Hub Installation Guide Front-Panel LEDs The DS100 Series hubs provide front-panel LEDs for monitoring individualports and hub status. The following tables describe the front-panel LEDs andtheir IllustrationNormal/Uplink100M Link Activity10M Link Activity13141516910111256781234 PowerCollisionAuto 10/100 MbpsDUAL SPEEDDUAL SPEED HUB DS116 Front Panel of the Model ds108 HubFront Panel of the Model DS116 HubFront Panel of the Model DS106 HubPower LEDP ower LED10 Mbps Collision LED10/100 Mbps Collision LED10 MbpsUtilization LEDsNormal/UplinkOn - Link Blinking = Receive12100M10M345678 Pow11020>40 Utilization%Col10 Mbps100 MbpsAuto 10/100 MbpsDUAL SPEEDDUAL SPEED HUB ds108 Normal/Uplinkpush buttonvista RJ-45network ports100 MbpsUtilization LEDs100 Mbps Collision LED9091 FBNormal/UplinkOn - Link Blinking = Receive12100M10M3456 Pow11020>40 Utilization%Col10 Mbps100 MbpsDUAL SPEED HUB DS106 Front Panel of the Model ds104 HubNormal/UplinkOn - Link Blinking = Receive12100M10M34 Pow11020>40 Utilization%Col10 Mbps100 MbpsDUAL SPEEDDUAL SPEED HUB ds104 Model ds104 /DS106/ ds108 /DS116 Dual Speed Hub Installation Guide
4 Model ds104 , Model DS106, and Model ds108 LEDsModel DS116 LEDs LabelColorActivityDescription Power Green OnPower is supplied to the MbpsAmberOnData collision is occurring on the 10 Mbps network segment (some collisions are normal).100 MbpsAmberOnData collision is occurring on the 100 Mbps network segment (some collisions are normal).Utilization%10 Mbps GreenBlinkingIndicates the amount of data traffic on the 10 Mbps segment. (If a 100 Mbps user is sending data to a 10 Mbps user, the 10 Mbps utilization will be high.)100 MbpsGreenBlinkingIndicates the amount of data traffic on the 100 Mbps or 100M Link/Receive (built into each vista RJ-45 network port)GreenOnA link is successfully established between the hub and the data link is established and/or the cable is not connected, is defective, or is the wrong is incoming data on the port. LabelColorActivityDescription Power Green OnPower is supplied to the collision is occurring on a 10 Mbps or 100 Mbps network segment (some collisions are normal).
5 10M or 100M Link/Receive (built into each vista RJ-45 network port)GreenOnA link is successfully established between the hub and the data link is established and/or the cable is not connected, is defective, or is the wrong is incoming data on the port. Model ds104 /DS106/ ds108 /DS116 Dual Speed Hub Installation Guide vista RJ-45 Network Ports with Built-in LEDs The front panel of the Model ds104 hub provides four vista RJ-45 networkports (six on the Model DS106 hub, eight on the Model ds108 hub, 16 on theModel DS116 hub). These standard RJ-45 connectors accept two-pair or four-pair Category 5 unshielded twisted pair (UTP) copper wiring (only two pairs areused). The RJ-45 connector uses an 8-pin interface. Two LEDs are positioned atthe top corners of each RJ-45 connector. The left indicator is the 100 MbpsLink/Receive LED, and the right indicator is the 10 Mbps Link/Receive illustration shows the Model DS116 Link/Receive LEDs. The LEDs for theModel ds104 , Model DS106, and Model ds108 hubs are identical.
6 The tablethat follows describes the LEDs for all three models. Rear Panel The rear panels of the DS100 Series hubs are identical. Each has a ground clipand a receptacle for the power adapter. LED StatusDescription OnLink (Good Connection)BlinkingRX (Receive Data)8152FB100 MbpsLED10 MbpsLEDvista RJ-45network portsRear Panel of the Model ds104 , Model DS106, Model ds108 , and Model DS116 HubGround clipPowerreceptacle9092FB5 Vdc 800 mA-+ Model ds104 /DS106/ ds108 /DS116 Dual Speed Hub Installation Guide Before you begin installing the hub, prepare the installation site. Make sure thesite meets the operating environment requirements of the equipment. Install the Hub on a Flat Surface If installing the hub on a flat surface such as a tabletop, make sure the bottom ofthe chassis is clean and dry. To install the hub on a flat surface: 1. Set the hub on a table or shelf so that it has at least 2 inches (5 cm) of space on all Connect the power cord(s) first to the power entry receptacle on the hub rear panel and then to the wall.
7 Install the Hub on a Wall If installing the hub on a wall, make sure you have a Phillips screwdriver. To install the hub on a wall: 1. Set the mounting screws and anchors (supplied with the wall mount hardware) in the Using the slots on the bottom of the hub, hang the hub on the wall. 3. Connect the power cord(s) first to the power entry receptacle on the hub rear panel and then to the wall. CharacteristicRequirement TemperatureAmbient temperature between 0 and 40 C (32 and 104 F). No nearby heat sources such as direct sunlight, warm air exhausts, or maximum relative humidity, 2 inches ( cm) on all sides for airflow in room or wiring conditionsAt least 6 feet ( m) to nearest source of electromagnetic noise (such as photocopy machine or arc welder).Service accessMinimum 12 inches ( cm) front and back for service access and and back clearance for cables and wiring hardware such as punchdown power source within 6 feet ( m).Wiring hardwareWiring hardware, such as punchdown blocks or patch panels, complete before installing the ProceduresPrepare the SiteInstall the Hub Model ds104 /DS106/ ds108 /DS116 Dual Speed Hub Installation Guide Set Normal/Uplink Push Button The Normal/Uplink push button on the front panel of the hub allows you toselect the Uplink (MDI) or Normal (MDI-X) position for port 4 on the ModelDS104 hub, port 6 on the Model DS106 hub, port 8 on the Model ds108 hub,and port 16 on the Model DS116 hub.
8 All other ports are wired Normal fordirect connection to Normal if connecting a PC, server, or router to the port. Select Uplink ifconnecting a hub or switch. The Normal/Uplink push button eliminates the needto use a crossover cable. Caution: 100 Mbps operation requires the use of Category 5 UTP wiring with 100 Mbps certified connectors. NETGEAR highly recommends using Category 5 cable so your network can operate at either 10 or 100 Mbps. Connect a PC to the HubNormal/Uplink10M Link Activity100M Link ActivityPowerCollision9097FA Model ds104 /DS106/ ds108 /DS116 Dual Speed Hub Installation Guide 10 or 100 Mbps Transmission with the Hub Two Model ds104 hubs, two Model DS106 hubs, two Model ds108 hubs, twoModel DS116 hubs, or a combination of DS100 Series hubs can be daisy-chained together at 100 Mbps to support a growing number of PCs. For largernetworks, use a 10/100 Mbps switch such as the NETGEAR Model FS104switch, as shown in the illustration following illustration shows a two-hub daisy-chain configuration.
9 Thisillustration shows the Model ds104 hub and the Model DS116 hub daisy-chained together. You can use any two DS100 Series hubs in this Hubs at 10/100 MbpsNormal/Uplink100M Link Activity10M Link Activity13141516910111256781234 PowerCollisionAuto 10/100 MbpsDUAL SPEEDDUAL SPEED HUB DS116 Normal/UplinkOn - Link Blinking = Receive12100M10M34 Pow11020>40 Utilization%Col10 Mbps100 MbpsDUAL SPEEDDUAL SPEED HUB ds104 Model ds104 hubModel DS116 hubModel ds108 hubModel FS10410/100 MbpsswitchPCsPCsPCsSwitched network with Model ds104 , Model DS108, and Model DS116 hubsServer9093 FAModel ds104 and Model DS116 hubsdaisy-chainedNormal/UplinkOn - Link Blinking = Receive12100M10M34 Pow11020>40 Utilization%Col10 Mbps100 MbpsDUAL SPEEDDUAL SPEED HUB ds104 Normal/Uplink100M Link Activity10M Link Activity13141516910111256781234 PowerCollisionAuto 10/100 MbpsDUAL SPEEDDUAL SPEED HUB DS1169110FA Model ds104 /DS106/ ds108 /DS116 Dual Speed Hub Installation Guide When installation is complete and power has been applied to the hub, thefollowing conditions should exist: Power LED is on.
10 Link LED on each connected port is on. Utilization LEDs on the front panel are blinking when data is being received by any port in the hub, and the Link/Receive LED on the connected port is blinking when data is being received by that there are any problems, refer to the Troubleshooting table. SymptomCauseSolution Link LED off or intermittentPor t connection not functioningMake sure the power cord is properly connected and the crimp on the RJ-45 connectors and make sure that the plug is properly inserted and locked into the port at both the hub and the device. Make sure cabling is Category 5 and meets the requirements for 100 Mbps installation of the network interface cards and verify that they are 100 Mbps capable. Be sure that the proper software driver is loaded. Check link LEDs on the network adapter card and PC or workstation. Make sure cables and connectors are LED on or blinkingCollisions taking place on network segment(s)Excessive collisions can be caused by incorrect cabling, connectors, or wiring techniques or can occur when the network is too busy.