Transcription of NovaT installation instructions - Lutron Electronics
1 Incandescent Dimmers NT-SeriesMagnetic Low-Voltage Dimmers NTLV-SeriesElectronic Low-Voltage Dimmers NTELV-SeriesFan-Speed Controls NTFS-SeriesQuiet Fan-Speed Controls NTFSQ-SeriesFluorescent Dimmers NTF- and NTFTU- SeriesInstallation InstructionsPlease Leave for OccupantOriginal is a registered trademark of Hunter Fan Company, Memphis, Tennessee. NEC is a registered trademark of the National Fire Protection Association, Quincy, Massachusetts. Advance and Mark X are registered trademerks of Philips Electronics North America and Nova T* are registered trademarks of Lutron Electronics Co., Inc. The design of this product may be cov-ered by one or more of the following trademark registrations: 1,617,349; 1,626,714; 1,624,489; 1,624,490; and 1,638,913. 2012 Lutron Electronics Co., 0301630 Important NotesPlease read before Install in accordance with national and local electrical codes. NOTICE: To avoid damage to dimmer and/or equipment, use only approved loads.
2 See table for When no grounding means exists within the wallbox for an existing switch or dimmer, the 2011 National Electrical Code (NEC ) allows a switch/dimmer to be installed as a replacement as long as 1) a nonmetallic, noncombustible faceplate is used with nonmetallic attachment screws or 2) the circuit is protected by a ground fault circuit interrupter. The 2008 NEC has the same allowances but does not contain the requirement for nonmetallic attachment screws. When installing a switch/dimmer according to any of these methods, cap or remove the green wire before screwing the switch/dimmer into the These controls are designed to operate in ambient temperatures from 32 F to 104 F (0 C to 40 C)4. Strip wallbox wires. Important: When making wire connections, follow the recommended strip lengths and combinations for the supplied wire connectors. Twist wire connector tight making sure that no bare wire is exposed. Note: Wire connectors provided are suitable for copper wire only.
3 For aluminum wire, consult an Some dimmers require a neutral wire in the wallbox. If a neutral wire is not present, contact a licensed electrician for installation . See wiring diagrams and table for Check for short circuits in new installations before wiring controls. With power OFF, use standard switch and connect to lamp and voltage line. Turn power ON. If breaker trips, a short is present. Correct wiring and check circuit again. Install control only when short is no longer Multiphase applications: Use a separate neutral for each phase containing a control circuit. For more information, refer to Application Note 17, Common Neutral Interaction, P/N 360283, at For best dimming performance, fluorescent lamps may need to be operated at full light output for a specified amount of time prior to dimming. Contact the lamp manufacturer for their specific recommendations concerning lamp seasoning. 9. To clean, wipe with a clean damp cloth.
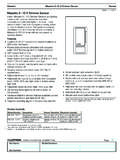
4 DO NOT use any chemical cleaning AdapterSliderFaceplateAdapter Mounting ScrewsControl Mounting ScrewsInstallationIf more than one control is to be installed in the same wallbox, review the Multigang installation section before beginning. Lutron multigang faceplates are available for ganging multiple WARNING: Shock Hazard. May result in serious injury or power OFF at circuit breaker or remove fuse. Damage to this product caused by wiring with power on voids the warranty. 2. Remove faceplate and faceplate adapter (if applicable) from control to prevent damage and to access mounting holes. Pull from top of faceplate to remove. Unscrew faceplate adapter. Set Wire control per appropriate wiring diagram (see table on next page) using wire connectors provided. Note: Color names refer to the wire colors on the Push wires into wallbox, allowing room for control to be inserted. Do not pinch wires between wallbox and Mount control to wallbox using control mounting screws provided.
5 Controls must be mounted vertically. See stamp on control for correct Mount adapter plate with adapter mounting screws provided (see below).7. Snap on slider and Turn power ON at circuit breaker or replace Controls: Raise slider to increase light intensity. Lower slider to decrease light intensity and turn Dimmers: Push button in center of slider to alternately turn lights on to preset level (set by slider) or turn lights off. Raise slider to increase light intensity. Lower slider to decrease light intensity. Push button again to turn lights and 4-Way Switches: When switching power from remote location, lights will turn on to level set on dimmer (by slider), or turn off. Move slider up or down to turn lights on or off. Note, use only one dimmer per Light Level Adjustment: Dimmers are factory calibrated. Some dimmers have the ability for low-end adjustment, which is not normally required. If lamps flicker or drop out at the minimum dimming level there may be an installation error.
6 Continued use of the system in this mode will cause premature lamp failure. If this is occurring, call the Lutron Technical Support Center at: Electronics Co., Suter RoadCoopersburg, PA 18036-1299 0301630 Rev. B 10/2012 Multigang InstallationMultiple controls can be installed in a multigang wallbox or a series of interconnected wallboxes for a clean, consolidated appearance. Lutron multigang faceplates are available to complete the installation . Refer to instruction sheet supplied with multigang faceplates for new installations, controls can be ganged without removing side sections, but, to reduce the size of the multigang installation or to fit existing wallboxes, inner side sections must be removed. Because side sections are designed to dissipate heat, removing them derates the capacity of the : When ganging any combination of small and large controls, place all small controls on one end of the gang and all large controls on the other.
7 Use the chart below to determine the size and rating of each control.*NT-2000 cannot have side sections removed. Note: The Wallbox Requirement Charts on this sheet do not apply for the T-2000. See the NT-2000 instruction sheet for the appropriate Warranty(Valid only in , Canada, Puerto Rico, and the Caribbean.) Lutron will, at its option, repair or replace any unit that is defective in materials or manufacture within one year after purchase. For warranty service, return unit to place of purchase or mail to Lutron at 7200 Suter Rd., Coopersburg, PA 18036-1299, postage WarraNTy Is IN LIeu Of aLL OTher exPress WarraNTIes, aNd The IMPLIed WarraNTy Of MerchaNTabILITy Is LIMITed TO ONe year frOM Purchase. ThIs WarraNTy dOes NOT cOver The cOsT Of installation , reMOvaL Or reINsTaL-LaTION, Or daMage resuLTINg frOM MIsuse, abuse, Or daMage frOM IMPrOPer WIrINg Or installation . ThIs WarraNTy dOes NOT cOver INcIdeNTaL Or cONse-queNTIaL daMages.
8 Lutron s LIabILITy ON aNy cLaIM fOr daMages arIsINg OuT Of Or IN cON Nec TION WITh The MaNufacTure, saLe, installation , deLIvery, Or use Of The uNIT shaLL Never exceed The Pur chase PrIce Of The uNIT. This warranty gives you specific legal rights, and you may have other rights which vary from state to state. Some states do not allow the exclusion or limitation of incidental or consequential damages, or limitation on how long an implied warranty may last, so the above limitations may not apply to you. 2012 Lutron Electronics Co., Inc. Worldwide Technical and sales assistanceIf you have questions concerning the installation or operation of these products, call the Lutron Technical Support Center. Please provide exact model number when ( , Canada, and the Caribbean)Other Countries call + + our website at inner side sections (shaded) not remove outer side Sections Removed (Derating Required) Number of Small Controls 0 1 2 3 4 0 0 1 1+1 4 4+1 Number 1 1 3 5 6 8of Large 2 4 6 7 9 10 Controls 3 6 8 10 11 13 4 9 11 12 14 15 Note.
9 When ganging an even number of small controls with side sections intact, use gangable 3 in x 2 in (76 mm x 51 mm) wallboxes. Space an additional wallbox 3 4 in (19 mm) apart from the other wallboxes. A 3 4 in (19 mm) chase nipple is recommended as a spacer between : Wallbox arrangement required for ganging 4 small controls with no side sections removed:No Side Sections Removed(Derating Not Required)Remove inner side sections from controls. Using pliers, bend side sections up and down until they break off. Single-gang wallbox3 4 in (19 mm) space (use chase nipple)Four-gang wallboxWallbox Gang Size Requirement ChartWallbox Gang Size Requirement ChartControl Size and Derating Chart Control No Sides 1 Side 2 SidesModel Size Removed Removed RemovedNT-600 S 600 W 500 W 300 WNT-1000 S 1000 W 900 W 700 WNT-1500 L 1500 W 1250 W 1000 WNT-2000* L 1950 W NT-603P S 600 W 500 W 300 WNT-1003P S 1000 W 900 W 700 WNT-1503P L 1500 W 1250 W 1000 WNT-1PS S 20 A 20 A 20 ANT-3PS S 20 A 20 A 20 ANT-4PS S 20 A 20 A 20 A NTLV-600 S 600 VA / 450 W 500 VA / 400 W 300 VA / 200 WNTLV-600-277 S 600 VA / 450 W 500 VA / 400 W 300 VA / 200 WNTLV-1000 S 1000 VA / 800 W 900 VA / 700 W 700 VA / 550 WNTLV-1000-277 S 1000 VA / 1200 W 900 VA / 1000 W 700 VA / 800 WNTLV-1500 L 1500 VA / 1200 W 1250 VA / 1000 W 1000 VA / 800 WNTLV-603P S 600 VA / 450 W 500 VA / 400 W 300 VA / 200 WNTLV-1003P S 1000 VA / 800 W 900 VA / 700 W 700 VA / 550 WNTLV-1503P L 1500 VA / 1200 W 1250 VA / 1000 W 1000 VA / 800 WNTELV-300 S 300 W 300 W
10 250 WNTELV-600 S 600 W 500 W 400 WNTFS-6E S 6 A A ANTFS-12E L 12 A 10 A ANTFSQ S A A ANTF-10 S 16 A 16 A 16 ANTF-10-277 S 8 A 8 A 8 ANTF-103P S 8 A 8 A 8 ANTF-103P-277 S 6 A 6 A 6 ANTFTU-5A S 5 A 4 A ANTFTU-5A-277 S 5 A 4 A ANTFTU-3AP-277 S 3 A 3 A 3 A Number of Small Controls 0 1 2 3 4 5 6 0 0 1 2 3 4 5 6 Number 1 1 3 4 5 6 7 8of Large 2 3 5 6 7 8 9 10 Controls 3 5 7 8 9 10 11 12 4 7 9 10 11 12 13 14 If you have questions concerning the installation or operation of Advance Mark X ballasts, call the Advance Technical Support Center.