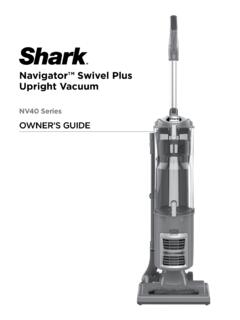
Transcription of NV70 Owner’s Guide - SharkClean.com
1 owner s 113-02-28 1:48 PMTOLL FREE: 1-800-798-7398 This manual covers model number: nv70 26 TECHNICAL SPECIFICATIONS Voltage: 120V. Watts: 1200W Amps: 10A Hertz: 60 HzEuro-Pro, Shark and Navigator are trademarks of Euro-Pro Operating LLC. All other brand names may be trademarks of their respective 213-02-28 1:48 Safety Instructions 2 Getting Started 4 Using the Vacuum 6 Cleaning with the Vacuum Accessories 7 Emptying the Dust Cup Assembly 8 Proper Care of Your Vacuum 9 troubleshooting 10 Checking for Blockages 11 Maintenance 12 Warranty and Registration 13 Thank you for purchasing the Shark Navigator 113-02-28 1:48 PM2 TOLL FREE: 1-800-798-7398 WARNING.
2 TO REDUCE THE RISK OF ELECTRIC SHOCK OR INJURY DO NOT USE OUTDOORS OR ON WET USING YOUR SHARK NAVIGATOR DLX VACUUM, BASIC SAFETY PRECAUTIONS SHOULD ALWAYS BE FOLLOWED, INCLUDING THE FOLLOWING:READ ALL INSTRUCTIONS BEFORE USING YOUR SHARK NAVIGATOR DLX PLUG: This appliance has a polarized plug (one blade is wider than the other). As a safety feature, this plug will fit into a polarized outlet only one way. Do not force into the outlet or try to modify the plug to SAFETY INSTRUCTIONSFor Household Use OnlyWARNING:TO REDUCE THE RISK OF FIRE, ELECTRIC SHOCK OR INJURY:GENERAL ELECTRICAL SAFETY:1. Unplug from electrical outlet when not in use and before DO NOT use vacuum with a damaged cord or plug. If appliance is not working as it should, has been dropped, damaged, left outdoors, or dropped into water, return it to EURO-PRO Operating LLC for examination, repair, or DO NOT pull or carry vacuum by the DO NOT unplug by pulling on cord; to unplug, grasp the plug, not the DO NOT handle plug or appliance with wet DO NOT run the vacuum over the power DO NOT use the cord as a DO NOT close a door on the DO NOT pull cord around sharp corners.
3 The use of an extension cord is not DO NOT leave appliance when plugged Keep cord away from heated Turn off all controls before plugging or unplugging vacuum Always turn off this appliance before connecting or disconnecting motorized Store your appliance with the power cord secured around the two cord holders-as shown in the storage 213-02-28 1:48 ATTACHMENTS:1. DO NOT use if air flow is restricted; if the air paths, the hose, or the accessories become blocked, turn the vacuum cleaner off. Remove all obstructions before you turn on the unit Keep the end of the hose and accessory openings away from face and Keep cleaning tools and hose suction openings away from hair, face, fingers, uncovered feet,or loose Only use manufacturer s recommended USE:1. Use only as described in this DO NOT put any objects into openings. DO NOT use with any opening blocked; keep free of dust, lint, hair, and anything that may reduce air Keep your work area well Keep the vacuum moving over the carpet surface at all times to avoid damaging the carpet DO NOT place vacuum on unstable surfaces such as chairs or DO NOT allow young children to operate the vacuum or use as a toy.
4 Close attention is necessary when used by or near DO NOT use vacuum cleaner if it has been dropped, damaged, left outdoors, or submerged in water. Return to EURO-PRO Operating LLC for examination, repair, or DO NOT use without dust cup and/or filters in place. DUST CUP/FILTERS/ACCESSORIES:Before turning on the vacuum:1. Make sure that all filters are thoroughly dry after routine Make sure that dust cup and all filters are in place after routine Make sure accessories are free of Only use filters and accessories provided by EURO-PRO Operating LLC. [Failure to do so will void the warranty.]GENERAL CLEANING:1. DO NOT pick up large-sized DO NOT pick up hard or sharp objects such as glass, nails, screws or coins that could damage the vacuum DO NOT pick up smoking or burning objects such as hot coals, cigarette butts, or DO NOT pick up flammable or combustible materials such as lighter fluid, gasoline, or kerosene or use vacuum in areas where they may be DO NOT pick up toxic solutions such as chlorine bleach, ammonia, or drain DO NOT use in an enclosed space where vapors are present from paint, paint thinner, moth-proofing substances, flammable dust or other explosive or toxic DO NOT vacuum up any DO NOT immerse vacuum cleaner in water or other DO NOT use outdoors or on wet surfaces; use only on dry surfaces.
5 10. Use extra care when cleaning on THESE 313-02-28 1:48 PM4 TOLL FREE: 1-800-798-7398 WHAT S IN THE BOX YOU JUST OPENED:A Vacuum BodyB Floor Power NozzleC Handle AssemblyD Super Stretch HoseE Cleaning Wand F Pet Hair BrushG Dusting BrushH Crevice ToolGetting StartedYour Shark Navigator DLX is easy to assemble:1 Lay your vacuum body on a level surface. 2 Slide the electrical connection from the power nozzle into the main body to click into Connect the hose from the main body to the power nozzle; push with a slight turning motion to create a snug Slide the handle assembly into the upright unit aligning the hose hook on the handle assembly with the power cord hooks on the back of the Secure the handle assembly in place with included nut/bolt (shipped attached to handle assembly).6 Place the vacuum in the upright Insert the Cleaning Wand into the center post on the tool caddy. 8 Store the Crevice Tool, Dusting Brush on the back of the unit.
6 413-02-28 1:48 To carry the vacuum: With the unit in the standing position, lift by the Dust Cup Assembly Handle (carry handle). CAUTION: When lifting or carrying, DO NOT press Dust Cup Assembly release Attach the Super Stretch Hose: a) Snap hose into swivel connector b) Route under anti-tip hook to prevent vacuum from tipping c) Route over upper hose holder d) Press securely onto cleaning wand with handle IMPORTANT: Insert the hose into the wand. This completes the air path and enables suction to reach the Floor Power To store the vacuum: When storing your vacuum, wind the cord around the two cord holders and secure with cord clip: Quick Cord release at the top of the unit place in the upright position. Cord holder near the base turn it until it is pointing down. To release the cord, turn the Quick Cord release to the left or right. 513-02-28 1:48 PM6 TOLL FREE: 1-800-798-7398 Using the VacuumYour Shark Navigator DLX Vacuum can be used to clean bare floors or carpets with the click of a the vacuum into the upright in the Start with the Power Switch in the O" - Off Place your foot on the Floor Power Nozzle and pull handle towards Set the Power Switch to desired cleaning Push the power cord into the groove on the handle and then secure the power cord into the cord Press the On/Off switch to the I" position to vacuum bare floors or cleaning with the hose (straight suction only) or to the "II" position to engage the motorized floor brush (for vacuuming carpets and rugs).
7 6 Due to the huge suction power of this vacuum, it may become necessary to adjust the suction release on the hose. If the vacuum is difficult to push or pull or if it is lifting up area rugs, adjust the suction release by opening the valve at the top end of the hose. Close the suction release valve for maximum suction when vacuuming floors or when using the pet hair power brush. IMPORTANT: Your Brushroll Indicator Light will illuminate solid green when the brushroll is on, or solid red if there is a blockage. This feature is designed to protect your Lifetime Belt that powers your brushroll. See Checking for Blockages on page 11. NOTE: The height of your power nozzle has been optimized for easy pushing and superior cleaning on all floor types, so there is no need to make any height adjustments as you transition to different floor & carpet types. IMPORTANT: To protect your carpets, the brushroll will only turn on when you have pulled the handle back towards you and released the Floor Power Floors / ToolsCarpetsPower Switch SettingsSuction Release Release suction for easier push and pull on high pile carpets and area 613-02-28 1:48 with the Vacuum AccessoriesBefore cleaning with your accessories:Stand vacuum into upright Super Stretch Hose in the anti-tip hose hook to prevent the I" - On position for suction only cleaning.
8 DO NOT pull vacuum cleaner around by the hose. DO NOT overextend the AccessoriesYour vacuum comes with a Super Stretch Hose and Cleaning Wand. Use one or the other to attach your cleaning Using the Super Stretch Hose: Stand the vacuum into upright position. Remove the hose from the Cleaning Wand. Push the selected tool into the hose Using the Cleaning Wand: Stand the vacuum into upright position. Remove the Cleaning Wand (with hose attached) from the unit. Push the selected tool into the end of the Cleaning Pet Hair Power Brush4 Dusting Brush5 Crevice ToolTo order additional parts and accessories, go to or call 713-02-28 1:48 PM8 TOLL FREE: 1-800-798-7398 MaintenanceFor best results empty the Dust Cup Assembly after each use, as needed during prolonged usage or when it reaches the MAX fill line. DO NOT vacuum off before empty the Dust Cup:1 Grip carry handle and press the Dust Cup release button to Option A: For Quick Empty: Insert Dust Cup deep inside trash receptacle to contain dust and debris.
9 Press the bottom Dust Cup release button; tap container gently to dislodge and release dust and debris. Snap door in place. Important: If the Dust Cup Door does not swing open after pressing the release button, push the door open using the bottom door : Unplug the vacuum; failure to do so might result in electric Option B: For Allergy Sufferers: Wrap a trash bag around the Dust Cup leaving space at the bottom for the door to swing open. Locate the Dust Cup Door release button within the trash bag and press to release as you shake the dust cup to empty dust and debris. Snap the bottom door in place. Note: Option B can also be performed outside of the home to further minimize releasing dust back into the air. Carry just the Dust Cup and trash bag outside. Note: Some dust and debris may remain in the top of your dust cup on or near the metal screen. It is not necessary to completely remove this material before continuing to vacuum; Shark advanced cyclonic action will sweep the metal screen clean once you begin to refill your dust 813-02-28 1:48 SCHEDULER inse and air dry every month under normal each time you Foam FilterDust CupRinse and air dry every month under normal Felt Filter Clean once a year under normal HEPA Filter1234To clean the pre-motor filters:1 Remove the dust Pull the 2 filters out from the top of the motor base.
10 3 Rinse the filters thoroughly in lukewarm water until the water runs clear. DO NOT put the filters in the washing machine or dishwasher. NOTE: The material in the filters will discolor over time. This is NORMAL and will not affect the performance of the Squeeze out excess water and let air-dry for at least 24 hours before replacing. Do not use a hair dryer or other heating methods to dry. 5 Place the felt filter in first, then the foam Replace the dust clean the post-motor HEPA filter:1 Remove the filter cover from the front of the vacuum by pulling up on the tab and pulling the cover away from the vacuum. 2 Take out the HEPA filter by pulling it straight out. 3 Turn the HEPA filter over so that the dirty side is on the bottom and vigorously tap it clean against a garbage can to remove any Wash the HEPA filter under the tap using lukewarm water with the dirty side face down until the water runs clear. DO NOT put the HEPA filter in the washing machine or dishwasher.