Transcription of ON-3 LATERAL TRANSFER DEVICE Skills Checklist Objectives …
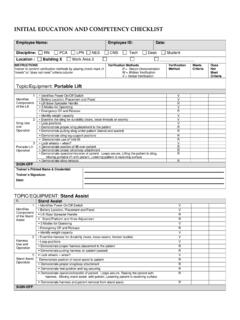
1 _____ON-3 LATERAL TRANSFER DEVICE Skills Checklist Objectives : Operates lift/ TRANSFER in a manner that is safe and comfortable for both the patient and the employee. Focused Competency: Patient assist using the On-3 LATERAL TRANSFER DEVICE . References/Content Expert: Did we say we would cut this? Assessment Criteria: All Skills must be met. Skills must be done in order stated. Verifier places check mark in appropriate box with initials. After learning requirements met, Learner and Instructor to sign & date at bottom of page. Key Points in using this lift: The employee is to complete the Skills using proper body mechanics. The employee takes into consideration the needs, safety & comfort of the patient and caregiver when choosing the equipment. Communication with patient and other caregivers preparatory to, during and after the move. RN makes final determinations of equipment(after consultation with appropriate parties) as regards selection of equipment Learner Performs Skill: Operating theOn-3 Met Needs Review 1.
2 Assess indications and counter indications (for example, if the following is true, prior to use: the patient requires LATERAL TRANSFER , is in a level position, <400#,can tolerate lying flat . 2. Asses the work area ( and equipment compatibility). 3. Check functionality of DEVICE (check batter power if applicable). 4. Explain lift procedure to patient and provide privacy. 5. Untuck bottom sheet or full sheet from delivery surface that pt is on 6. Open TRANSFER rod, bridge and pull out the straps , placing straps on receiving surface 7. Fold sheet tightly around TRANSFER rod (should not include draw sheet). 8. Place TRANSFER bridge under TRANSFER rod 9. Connect each strap to the rod at the indentation site. 10. Push receiving surface up against delivery surface 11. Adjust receiving surface to approximately 1 inch below delivery surface 12. Adjust on-3 height line so that it is least one inch above receiving surface 13. Press remote on either side to take the slack out of the strap 14.)
3 Press remote in center once both straps are tightened to move pt. 15. When TRANSFER complete. Removes straps, rod and bridge 16. If transferring into bed, place bed in low position and raise top side rails 17. Prepare DEVICE for next user (wipe clean with #M HB Quat disinfectant. Return on- 3 to storage area and plug it back into wall outlet to recharge I have successfully completed the procedures for operating ON-3 LATERAL TRANSFER DEVICE . I have demonstrated the tasks/ Skills and understand that these lifts are to be used to comply with Safe Patient Moving Policy & Procedures. Learner's Name and Title (PRINTED) : _____. Learner's Signature: _____ DATE: _____. Instructor's Name and Title (PRINTED) : _____. Instructor's Signature:_____. DATE:_____. I have successfully completed the procedures for operating ON-3 LATERAL TRANSFER DEVICE . I have demonstrated the tasks/ Skills and understand that these lifts are to be used to comply with Safe Patient Moving Policy & Procedures.)
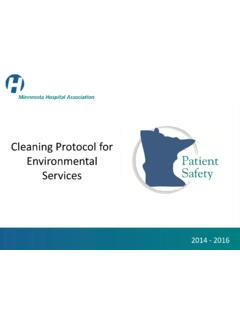
4 Learner's Name and Title (PRINTED) : _____. Learner's Signature: _____ DATE: _____. Instructor's Name and Title (PRINTED) : _____. Instructor's Signature:_____ DATE:_____. Beasy Board Skills competency Objectives : Operate TRANSFER DEVICE in a manner that is safe and comfortable, for both patient and employee. Focused Competency: Patient assists using the Beasy Board DEVICE . References/Content Expert: _____. Assessment Criteria: All Skills must be met and demonstrated in the order presented Preceptor places check mark in appropriate box with initials After learning requirements met, employee & Preceptor sign & date at bottom of page Key Points in using this DEVICE : Caregivers should never use gait belts to lift, support weight, or manually TRANSFER a patient. Alternative transfers should be considered in these circumstances. The employee will complete the Skills using proper body mechanics The employee will consider the needs, safety & comfort of the patient and caregiver(s) when choosing equipment Communicates with patient and other caregivers prior to, during and after the move.
5 Employee Performs Skill: Operating Beasy Board to TRANSFER a patient. Met Needs review 1. patients must be cooperative and have sufficient strength to assist in the TRANSFER . patients may not weigh in excess of 375 pounds. 2. Check work area and equipment compatibility. Remove obstacles. Plane of TRANSFER should be as level as possible. A difference in height of up to six (6). inches between delivery and receiving surfaces is permissible. 3. Explain process to the patient prior to TRANSFER and provide privacy. 4. If supine, assist patient to seated position properly. Place gait belt around patient's lower trunk. 5. Remove obstructions to TRANSFER such as removable or swing away armrests and footrests 6. If applicable, TRANSFER to patient's stronger side. Position receiving surface as close to a 45 degree angle as possible from the delivery surface. Ensure that delivery and receiving surfaces are locked in place. 7. Ensure safety before instructing patient to lean.
6 Instruct patient to lean as far as possible to the opposite side of the TRANSFER to clear the way for Beasy disc placement. If patient is able, instruct patient to lift lead leg and cross it over the trailing leg. 8. Place Beasy disc under the patient. Hold the disc in place to keep it from moving in the track. 9. Instruct patient to sit straight upright. If applicable, instruct patient to uncross legs. Be sure the edge of the disc is visible with all patients (Disc should NOT be totally under the patient). Ensure that the board makes sound contact with both receiving and delivery surfaces before attempting TRANSFER . 10. Instruct patient to place their hands on either side of the board and push themselves toward the receiving surface using their legs (if possible). If the patient is not able to use their legs, they can slide themselves on the disc using their arms. Caregivers may grasp the gait belt to stabilize the patient during TRANSFER .
7 Ensure the disc and track are clear of any obstruction and the patient's fingers are not pinched during movement. 11. Remove Beasy Board and secure patient (armrests replaced and locked, etc.). 12. Prepare DEVICE for next user: Disinfect between each use. Replace in dedicated, exclusive storage space. I have successfully completed the procedures for operating the Beasy Board. I have demonstrated the tasks/ Skills and understand that these devices are to be used to comply with Safe Patient Moving Policy &. Procedures. Employee Name (print): Employee Number: Employee Signature: _____ Employee Job Title: _____. Verifier Name (print): Verifier Job Title: Verifier Signature: Department: Date: _____. Competency Checklist for the Vander Lift Objectives : Operates lift/ TRANSFER DEVICE in a manner that is safe and comfortable for both the patient and the employee. Focused Competency: Patient assist using the Vander Lift DEVICE . References/Content Expert: Assessment Criteria: All Skills must be met, and demonstrated in the order presented.
8 Verifier places check mark in appropriate box with initials. After learning requirements met, Learner and Instructor to sign & date at bottom of page. Key Points in using this DEVICE : The employee is to complete the Skills using proper body mechanics. The employee takes into consideration the needs, safety & comfort of the patient and caregiver(s) when choosing the equipment. Communication with patient and other caregivers preparatory to, during, and after the move. Learner Performs Skill: Operating the Vander Lift DEVICE to TRANSFER a patient. Met Needs Review 1. Knowledge of potential candidates and exclusions for use with this DEVICE . (A. patient must have enough leg length for the sling to wrap around and lift them and be able to bend their hips to 90 degrees. A patient's weight may not exceed the capacity of the model being used. With any sling, pressure exerted on the skin should be considered.). 2. Check work area (and equipment compatibility), Remove obstacles.
9 3. Check DEVICE (power level, condition of sling). 4. Locate emergency power cut off and emergency lowering. 5. Explain procedure to patient and provide privacy. 6. Identify proper sling size for patient. 7. Demonstrate ability to position a sling behind patient in both bed and wheelchair (normally, any sling, pressure exerted on the skin should be considered.). 8. Secure patient to DEVICE properly (leg straps should be flat under the patient's legs and should criss-cross). Demonstrate ability to adjust patient positioning through use of fabric loops on sling. 9. Watch patient throughout ascent for clearance, stability, and comfort. 10. Move patient from delivery surface. 11. Demonstrate use of DEVICE leg spread. 12. Align patient with receiving surface. Ensure that wheel locks of receiving surface (not DEVICE ) are engaged. Patient is moved as little as possible in this step. 13. Check patient positioning throughout descent. Use positioning handles when patient is approximately 1 inch above receiving surface.
10 14. Ensure patient ends up in a safe position with access to call light and detach sling. Remove sling if patient's skin is compromised or if patient will be up for more than 30. minutes. Note: sling removal guidelines do not apply to repositioning slings. 15. Prepare DEVICE for next user: Disinfect between each patient use. Plug into an electrical outlet when not in use to recharge, and store in appropriate location near outlet. Vander Lift is not plugged into an electrical outlet during patient transfers. 16. Demonstrate knowledge of sling disinfection, storage, and disposable sling protocols. 17. Demonstrate how to use DEVICE to address a patient fall emergency. 18. Demonstrate use of inclusive scale (if applicable to model). 19. Demonstrate use of available specialty slings. I have successfully completed the procedures for operation of the Vander Lift TRANSFER DEVICE . I have demonstrated the tasks/ Skills and understand that these devices are to be used to comply with Safe Patient Moving Policy & Procedures.