Transcription of Operation Guide 3031 - support.casio.com
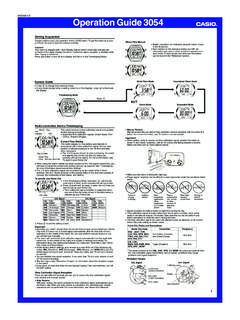
1 1 Operation Guide 3031To measure times with the stopwatch(Stopwatch Mode (ST1) and Stopwatch Mode (ST2))Elapsed Time StartStopRe-startStopClearStartSplit(dis played) Split releaseStopClearStartSplitStopSplit releaseClearSplit Time Two FinishesFirst runner time of first runner time of second Auto-Start (Stopwatch Mode (ST1))With Auto-Start, the watch performs a 5-second countdown, and stopwatch operationstarts automatically when the countdown reaches the final three seconds of the countdown, a beeper sounds with each use Auto-Start (ST1)1. While the stopwatch screen is showing all zeros in theStopwatch Mode, press B. This displays a 5-second countdown screen. To return to the all zeros screen, press B Press D to start the countdown. When the countdown reaches zero, a tone sounds anda stopwatch timing Operation starts automatically. Pressing D while the Auto-Start countdown is inprogress starts the stopwatch watch has two stopwatch modes:Stopwatch Mode(ST1) and Stopwatch Mode (ST2).
2 Both stopwatch modeslet you measure elapsed time, split times, and twofinishes. The Stopwatch Mode (ST1) includes Auto-Start. A display range of the stopwatch is 999 hours,59 minutes, seconds. A stopwatch continues to run, restarting from zero afterit reaches its limit, until you stop it. A stopwatch measurement Operation continues even ifyou exit a Stopwatch Mode. Exiting a Stopwatch Mode while a split time is frozen onthe display clears the split time and returns to elapsedtime measurement. All of the operations in this section are performed in theStopwatch Mode (ST1) or Stopwatch Mode (ST2),which you enter by pressing toggle between 12-hour and 24-hour timekeepingIn the Timekeeping Mode, press D to toggle between 12-hour timekeeping and 24-hour timekeeping. With the 12-hour format, the P (PM) indicator appears to the left of the hour digits fortimes in the range of noon to 11:59 and no indicator appears to the left of thehour digits for times in the range of midnight to 11:59 With the 24-hour format, times are displayed in the range of 0:00 to 23:59, withoutany indicator.
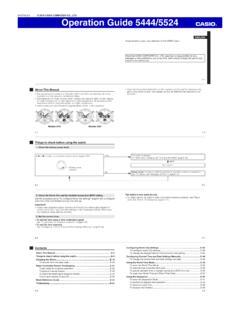
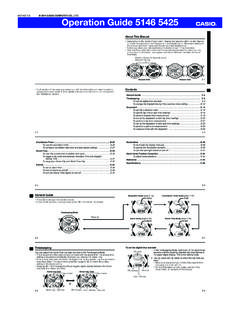
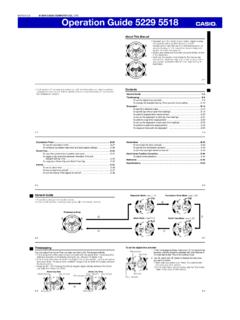
3 The 12-hour/24-hour timekeeping format you select in the Timekeeping Mode isapplied in all other modes. The P indicator is not displayed when the current time is displayed in other This Manual Depending on the model of your watch, display textappears either as dark figures on a light background orlight figures on a dark background. All sample displaysin this manual are shown using dark figures on a lightbackground. Button operations are indicated using the letters shownin the illustration. Each section of this manual provides you with theinformation you need to perform operations in eachmode. Further details and technical information can befound in the Reference ModeWorld Time ModeAlarm ModeCountdown Timer ModeStopwatch Mode (ST1)Stopwatch Mode (ST2)Press .General Guide Press C to change from mode to mode. In any mode, press L to illuminate the set the time and date1. In the Timekeeping Mode, hold down A until theseconds start to flash, which indicates the Press C to move the flashing in the sequence shownbelow to select other Time ZoneHourYearMinutesDayDSTM onth3.
4 When the setting you want to change is flashing, use D and B to change it asdescribed time zone TimekeepingUse the Timekeeping Mode to set and view the currenttime and This Before You Set the Time and Date !The times displayed in the Timekeeping Mode and WorldTime Mode are linked. Because of this, make sure youselect a Home Time zone before you set the time of week Month Day Hour : Minutes PM indicator Seconds DST indicator Screen 50 OFF6-30To do this:Reset the seconds to 00 Toggle between Daylight SavingTime (ON) and Standard Time (OFF)Specify your Home Time zoneChange the hour or minutesChange the yearChange the month or dayDo this:Press D (eastward) and B (westward).Use D (+) and B ( ). For details about time zones, see the City Code Table . See Daylight Saving Time (DST) for details about DST Press A to exit the setting screen. The day of the week is displayed automatically in accordance with the date (year,month, and day) Saving Time (DST)Daylight Saving Time (summer time) advances the time setting by one hour from StandardTime.
5 Remember that not all countries or even local areas use Daylight Saving toggle the Timekeeping Mode time between DST and Standard Time1. In the Timekeeping Mode, hold down A until theseconds start to flash, which indicates the Press C to display the DST setting Press D to toggle between Daylight Saving Time(ON displayed) and Standard Time (OFF displayed).4. Press A to exit the setting screen. The DST indicator appears on the display to indicatethat Daylight Saving Time is turned second Minutes Seconds Timekeeping Mode time *During stopwatch elapsed time measurement, shows the number of hours Guide 3031To turn the Hourly Time Signal on and off1. In the Alarm Mode, use D to select the Hourly TimeSignal (SIG).2. Press A to toggle it on and off. The Hourly Time Signal on indicator () is shown onthe display in all modes while this function is turned Press A to exit the setting OperationThe alarm tone sounds at the preset time for 20 seconds, regardless of the mode thewatch is in.
6 In the case of the snooze alarm, the alarm Operation is performed a totalof seven times, every five minutes, until you turn the alarm off. Alarm and Hourly Time Signal operations are performed in accordance with theTimekeeping Mode time. To stop the alarm tone after it starts to sound, press any button. Performing any one of the following operations during a 5-minute interval betweensnooze alarms cancels the current snooze alarm the Timekeeping Mode setting screenDisplaying the SNZ setting screenTo test the alarmIn the Alarm Mode, hold down D to sound the turn an alarm on and off1. In the Alarm Mode, use D to select an Press A to toggle it on and off. Turning on a alarm (SNZ, AL1, AL2, AL3, orAL4) displays the alarm on indicator (, , , ,or ). In all modes, the alarm on indicator is shown for alarmthat is currently turned on. The alarm on indicator flashes while the alarm issounding. The snooze alarm indicator () flashes while thesnooze alarm is sounding and during the 5-minute intervalsbetween can set up to five independent multi-function alarmswith hour, minutes, month, and day.
7 When an alarm isturned on, the alarm tone sounds when the alarm time isreached. One of the alarms is a snooze alarm, while theother four are one-time can also turn on an Hourly Time Signal that causesthe watch to beep twice every hour on the hour. There are five alarm screens numbered AL1, AL2,AL3, and AL4 for the one-time alarm, a snoozealarm screen indicated by SNZ. The Hourly TimeSignal screen is indicated by SIG. All of the operations in this section are performed in theAlarm Mode, which you enter by pressing C. To specify a countdown start time of 24 hours, set .4. Press A to exit the setting screen. You can also perform steps 1 and 2 of the above procedure whenever you need toview the current auto-repeat and progress beeper use the countdown timerPress D while in the Countdown Timer Mode to start thecountdown timer. The countdown timer Operation continues even if youexit the Countdown Timer Mode.
8 Press D while a countdown Operation is in progress topause it. Press D again to resume the countdown. To stop a countdown Operation completely, first pause it(by pressing D), and then press B. This returns thecountdown time to its starting TimerThe countdown timer can be set within a range of oneminute to 24 hours. An alarm sounds when the countdownreaches zero. The countdown timer also has an auto-repeat feature and a progress beeper that signals theprogress of the countdown. All of the operations in this section are performed in theCountdown Timer Mode, which you enter by the Countdown TimerThe following are the settings you should configure beforeactually using the countdown start time; Auto-repeat on/off; Progressbeeper on/off See To configure the countdown timer for informationabout setting up the Hours Minutes SettingHours, MinutesAuto-repeatProgress BeeperScreenButton OperationUse D (+) and B ( ) to change the D to toggle auto-repeat on ( displayed) and off( displayed).
9 Press D to toggle the progress beeper on () and off ().Alarm time (Hour : Minutes) Alarm number Alarm on indicator Alarm date (Month Day) Alarm TypesThe alarm type is determined by the settings you make, as described below. Daily alarmSet the hour and minutes for the alarm time. This type of setting causes the alarm tosound everyday at the time you set. Date alarmSet the month, day, hour and minutes for the alarm time. This type of setting causesthe alarm to sound at the specific time, on the specific date you set. 1-Month alarmSet the month, hour and minutes for the alarm time. This type of setting causes thealarm to sound everyday at the time you set, only during the month you set. Monthly alarmSet the day, hour and minutes for the alarm time. This type of setting causes the alarmto sound every month at the time you set, on the day you set an alarm time1. In the Alarm Mode, use D or B to scroll through thealarm screens until the one whose time you want to setis displayed.
10 To set a one-time alarm, display an alarm screen AL1, AL2, AL3, or set the snooze alarm, display the SNZ screen. The snooze alarm repeats every five After you select an alarm, hold down A until the hour setting of the alarm timestarts to flash, which indicates the setting screen. This Operation turns on the alarm Press C to move the flashing in the sequence shown below to select other While a setting is flashing, use D and B to change it as described do this:Change the hourand minutesChange themonth and dayDo this:Use D (+) and B ( ). With the 12-hour format, set the time correctly as (P indicator). To set an alarm that does not include a month and/orday, set for each alarm indicator Hourly time signal on indicator Auto-repeatWhen auto-repeat is turned on, the countdown restarts automatically from thecountdown start time when it reaches auto-repeat is turned off, the countdown stops when it reaches zero and thedisplay shows the original countdown start time.