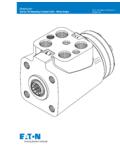
Transcription of Power Steering Steering Control Unit (SCU) with …
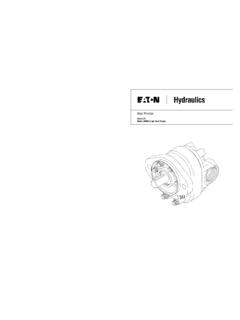
1 TELRPP ower SteeringSteering Control unit (SCU)Parts and Repair InformationSquare Housing with Side PortsRound Housing with Side PortsRound Housing with End Ports5 SeriesSteering Control Units 0012 eaton Char- lynn Power Steering Control unit Series 5 Parts and Repair C-STCU-TS002-E1 November 2006 Series 5 SteeringControl UnitTable of ContentsIntroductionThis manual provides serviceinformation for Char- lynn Series 5 Steering Control by step instructions forcomplete disassembly, inspec-tion and reassembly of the con-trol unit are following recommendationsshould be followed to insuresuccessful repairs. Most repairs require theremoval of the Control unitfrom the vehicle. Cleanliness is extremelyimportant. Clean the port areas thor-oughly before disconnectingthe hydraulic lines. Plug the Control unit ports andcover open hydraulic linesimmediately after they havebeen disconnected.
2 Drain the oil and clean theexterior of the Control unitbefore making repairs. Wash all metal parts in cleansolvent. Use filtered, moisturefreecompressed air to dry theparts. Do not wipe them drywith paper towels or cloth lint in a hydraulic system willcause damage. Always use new seals whenreassembling hydraulic controlunits. Lubricate new rubber sealswith a petroleum jelly beforeinstallation. Torque all bolts over gasketedjoints, then repeat thetorquing sequence to makeup for gasket all repairs are complete itis essential to verify the accura-cy of Control unit repairs on anauthorized test ..2 General InformationOrdering Parts ..3 Tools ..3 Round and Square Housing with Side PortsExploded List ..5 Disassembly .. Housing with End PortsExploded List ..9 Disassembly ..10 Reassembly ..112-Piece Shaft Seal Assembly.
3 123 eaton Char- lynn Power Steering Control unit Series 5 Parts and Repair C-STCU-TS002-E1 November 2006 GeneralInformationOrdering PartsHow to Order Replacement PartsEach order must include the following:1. Product Number2. Date Code3. Part Name4. Part Number5. Quantity of PartsRefer to specific part listingsfor your Char- lynn SteeringControl unit when orderingreplacement parts. Listings areavailable from eaton . Sampletag shows identification. For additional literature contactEaton Hydraulics at:14615 Lone Oak Road Eden Prairie, MN 55344 Required: 10 mm Socket (13 mm Socketfor End-Ported Units) 7/8 in. Socket Torque Wrench (31 Nm [275 lb-in] Capacity) Small Blade ScrewdriverSpecial Tools: Plunger and Sleeve Tool (two-piece seal) No. 600801-001** Tools available by special order through our service FaceEaton Corp.
4 Hydraulics Prairie, MN 55344 Customer part numberor base unit number if ithas a column or valve assembledBar Code Label Launch Date June, 1999 Month / Day / YearEaton Part Number4 eaton Char- lynn Power Steering Control unit Series 5 Parts and Repair C-STCU-TS002-E1 November 2006 DustSealHousingQuadSeal**ThrustBearingSl eeveSpoolPinStandard TorqueCentering Springs*BearingRace (2)O-ringSeal**O-ringSeal**WearPlateDriv eGerotorManual SteeringRelief ValveO-ring**O-ring**O-ring**O-ring**Sea lRing**EndCapCapScrew(7)PlugPlugCheckBal lSpringRetainingRing*Low TorqueCentering Springs*Round andSquare Housingwith Side PortsExploded View*Round housing shown, but applies to square housing Char- lynn Power Steering Control unit Series 5 Parts and Repair C-STCU-TS002-E1 November 2006 Round andSquare Housingwith Side PortsParts ListITEM PAGE1 See Table 7 Cap Screw, Hex Head 62 22994-000 1 Cap, End4 See Table 1 Gerotor.
5 Sub-assembly 65 22993-000 1 Wear Plate6 4994693-001 1 Drive9 22853-000 1 Drive Pin13 4997396-001 2 Bearing Race14 4996933-001 1 Bearing, Needle Thrust16 4997708-001 1 Dust SealREPLACEMENT PART Spring Kit - Standard Torque (contains parts with *)990170-000 Centering Spring Kit - Low Torque (contains parts with **)990252-000 Seal Kit - Standard Back Pressure (contains parts with **)9900256-000 Seal Kit - High Back Pressure (contains parts with **)9900321-000 Seal Kit - Viton, PM Gerotor (contains parts with **)9900323-000 Seal Kit - Viton, Steel Gerotor (contains parts with **)Table and SquareHousing with Side PortsACTUAL DISPLAYREFERENCE NO.
6 4 GEROTORREFERENCE NO. 29 CAP SCREWcm3/r [in3/r]Part mm [in]Part mm [in] [ ] 4996815-001 [.290] 14543-003 35 [ ] [ ] 4996815-002 [.366] 14543-003 35 [ ] [ ] 4996815-003 [.326] 14543-003 35 [ ] [ ] 4996815-004 [.400] 14543-003 35 [ ] [ ] 4996815-005 [.476] 14543-002 40 [ ]100 [ ] 4996815-006 [.642] 14543-004 45 [ ]120 [ ] 4996815-007 [.768] 14543-004 45 [ ]Table Char- lynn Power Steering Control unit Series 5 Parts and Repair C-STCU-TS002-E1 November 2006O-ringSealO-ringSealWearPlateDriveGe rotorSealRingManual SteeringCheck/Relief ValveO-ringO-ringO-ringEndCapCapScrew(7) PlugDustSealHousingBearing Race (2)Spool and SleeveQuadSeal**ThrustBearingRound andSquare Housingwith Side Ports -DisassemblyDisassemblyCleanliness is extremely impor-tant when repairing hydraulicSteering Control Units (SCU).
7 Work in a clean area. Beforedisconnecting the hydrauliclines, clean the port area of theSCU. Before disassembly, drainthe oil, then plug the ports andthoroughly clean the exterior ofthe SCU. During repairs, alwaysprotect machined Remove the seven capscrews and disassemble theSCU as shown in figure Remove the plug and manual Steering check as shown in figure :The manual steeringcheck may be a check ball ora check/relief Slide the spool and sleevefrom the housing, see figure Remove the thrust bearingand bearing Remove the quad Using a small blade screw-driver, carefully pry the dust seal from the :Do not damagethe dust seal Remove the pin that holdsthe spool and sleeve togeth-er, see figure Carefully slide the spool outof the sleeve. The springsand retaining ring will staywith the spool as it Remove the retaining ringand :The centeringsprings are under tension;remove the retaining 1 Figure 2 Port FaceEaton Corp.
8 Hydraulics Prairie, MN 553441314A-273-008 SECTIONLOW TORQUED-D12 Anti-Cavitation Valves (located under these two cap screws)Low Torque7 eaton Char- lynn Power Steering Control unit Series 5 Parts and Repair C-STCU-TS002-E1 November 2006 ReassemblyCheck all mating any parts with scratch-es or burrs that could causeleakage. Wash all metal parts inclean solvent. Blow them drywith pressurized air. Do notwipe parts dry with paper tow-els or cloth as lint in a hydraulicsystem will cause :Always use new seals when reassemblinghydraulic Steering Control to page 5 for seal kit part :During reassemblylubricate the new seals with a petroleum jelly such asVaseline . Also lubricatemachined surfaces and bearingswith clean hydraulic Install the quad seal (see page 12 for 2-piece seal installations): Put one of the bearing races and sleeve into the housing.
9 Together, the housing andbearing race create a grooveinto which the quad seal will be installed. Hold the bearing race tightlyagainst the input end of thehousing by pushing on thegerotor end of the sleeve. Fit the quad seal into its seatthrough the input end of thehousing. Be sure the seal is not twisted. Remove the sleeve and bearing Lubricate and install the dustseal (see Figure 4 for correctseal orientation).12. Install the centering springsin the spool. It is best toinstall the two flat piecesfirst. Next, install the curvedpieces, three at a Fit the retaining ring overthe centering Apply a light coating ofclean hydraulic fluid to the spool and slide it intothe sleeve. Be sure the cen-tering springs fit into thenotches in the Install the drive, be sure theslot in the drive engages the Install the pin (see Figure 3).
10 17. Apply a light coating ofpetroleum jelly to the inner edge of the dust and quad Put the thrust bearing andraces into the housing. The thrust bearing goesbetween the two races (see Figure 2).19. Apply a light coating ofclean hydraulic fluid to the spool and sleeve assem-bly and slide it into the :Do not damagethe dust or quad Clamp the housing in a viseas shown in Figure 5. Usejust enough clamping forceto hold the housing Lubricate and install a newo-ring seal in the groove inthe Install the wear plate andalign the holes in the wearplate with threaded holes inthe :The holes in the wear plate are Lubricate and install a newo-ring seal in the groove inthe wear Install the gerotor and alignthe screw Lubricate and install a newo-ring seal in the groove inthe gerotor Lubricate and install a newo-ring and seal ring in thegroove in the gerotor Install end cap and sevencap screws.
