Transcription of PreSet Hub - ConMet
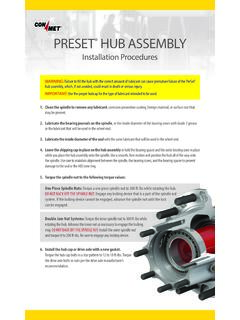
1 PreSet Hub . Installation Procedures WARNING: Failure to fill the hub with the correct amount of lubricant can cause premature failure of the PreSet hub assembly, which, if not avoided, could result in death or serious injury.. IMPORTANT: Use the proper hubcap for the type of lubricant intended to be used. 1. Clean the spindle to remove any lubricant, corrosion prevention coating, foreign material, or surface rust that may be present. 2. Lubricate the bearing journals on the spindle, or the inside diameter of the bearing cones with Grade 2 grease or the lubricant that will be used in the wheel end. 3. Lubricate the inside diameter of the seal with the same lubricant that will be used in the wheel end. 4. Leave the shipping cap in place on the hub assembly or hold the bearing spacer and the outer bearing cone in place while you place the hub assembly on to the spindle. Use a smooth firm motion and position the hub all of the way on to the spindle. Use care to maintain alignment between the spindle, the bearing cones, and the bearing spacer to prevent damage to the seal or the ABS tone ring.
2 5. torque the spindle nut to the following torque values: One Piece Spindle Nuts torque a one piece spindle nut to 300 ft. lbs. while rotating the hub. DO NOT BACK OFF THE SPINDLE NUT. Engage any locking device that is a part of the spindle nut system. If the locking device can not be engaged, advance the spindle nut until the lock can be engaged. Double Jam Nut Systems torque the inner spindle nut to 300 ft. lbs. while rotating the hub. Advance the inner nut as necessary to engage the locking ring. DO NOT BACK OFF THE SPINDLE NUT. Install the outer spindle nut and torque it to 200 ft. lbs. Be sure to engage any locking device. 6. Install the hub cap or drive axle with a new gasket. torque the hub cap bolts in a star pat- tern to 12 to 18 ft. lbs. torque the drive axle bolts or nuts per the drive axle manufactur- ers recommendation. A ConMet PreSet hub cap is required for trailer hubs not equipped with tire inflation systems. PreSet Hub . torque Specifications torque Item measurement Notes (ft-lbs).
3 Ball Seat 3/4 - 16 450 - 500 Always tighten the top nut first or pilot damage may Wheel Nut 1 1/8 - 16 result. Do not lubricate the faces of the hub, drum, wheel or on the ball seats of the wheel nuts. The last nut rotation should be with a calibrated torque device. Hub Pilot 22 mm x mm 450 - 500 Always tighten the top nut first or pilot damage may Wheel Nut Apply two drops of oil between the nut and nut flange, and two or three drops to the outermost 2 or 3 thread of the wheel studs. Lightly lubricate the wheel pilots on the hub. The last nut rotation should be with a calibrated torque device. Drive 3/4 - 16 40 - 90 torque value is for drive axle stud installation only. For Studs, 5/8 - 18 40 - 90 drive axle flange nuts, see axle manufacturer's recom- Installation torque 9/16 - 18 40 - 60 mendations for proper torque . 1/2 - 20 40 - 60. Hub Cap 5/16-18 12 - 18 Minimum SAE Grade 5 fasteners, flat washers only. Oil Fill Plug 1/4 NPT 20 - 25. 3/8 NPT. 9/16 - 18 O-Ring Style Disc Brake Rotor M8 x 18 - 22 - Screw 1/2 - 20 100 - 110.
4 9/16 - 12 130 - 150. 5/8 - 11 190 - 210. 5/8 - 18 155 - 195. Disc Brake 5/8 - 18 180 - 210 - Rotor Nut Disc Brake Rotor M16 x 190 - 210 - Drive Axle Flange See axle manufacturer's recommendations for proper Nuts drive axle nut torque . PreSet 2-Piece Nut 300 Inner* NO BACK OFF. 200 Outer* * PreSet FC medium-duty steer hub is 150 ft-lbs inner, 100 ft-lbs outer PreSet 1-Piece Nut 300** * PreSet FC medium-duty steer hub is 150 ft-lbs WARNING: Always tighten the top nut first to fully seat the brake drum on the drum pilot and against the hub face. See the adjacent diagram for bolt tightening sequence, and tighten in order from 1 through 8 or 10, depending on the bolt pattern. Reprints available from: Consolidated Metco, Inc. 5701 SE Columbia Way, Vancouver, WA 98661. Part No. 10041586. 9-2013 Printed in the USA 2013 CONSOLIDATED METCO, INC.