Transcription of QUICK Install Guide - Fluidmaster
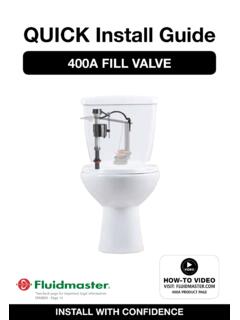
1 Install WITH CONFIDENCEQUICK Install Guide400 HPerforMAX FILL VALVE*See back page for important legal - Page 16 HOW-TO VIDEOVIDEOVISIT: PRODUCT PAGE23 STEP 1: PREPARE TANKGETTING STARTED A: TURN OFF WATER B: DRAIN WATER Flush toilet to drain most of the water from the tank. C: USE SPONGE OR TOWEL TO SOAK UP EXCESS WATER IN TANKFLUSHT owelSpongeTURNCLOCKWISEPARTS OVERVIEWL ocknutShankWasherRefill TubeTank Water LevelAdjustment ScrewBowl Water Level DialRefill ClipTOP DOWN VIEWTOOLS NEEDEDS pongeBucketTowelScissors(Optional)Bowl Water Level DialTank Water LevelAdjustment Screw4 STEP 2: REMOVE OLD FILL VALVE5 STEP 3: ADJUST HEIGHT OF NEW FILL VALVE LEFT LEFT A: REMOVE CONNECTOR Remove water supply connector from bottom of fill valve by twisting connector nut to the left (clockwise).
2 B: REMOVE OLD LOCKNUT Below tank, twist locknut to the left (clockwise) to remove from fill (Optional) A: TWIST FILL VALVE TO ADJUST HEIGHT Top of fill valve cap should measure roughly 3" above top of overflow pipe when (Optional) C: REMOVE OLD FILL VALVE Including refill tube, refill clip and shank washer. Drain any excess water into bucket by removing fill valve from tank. (Pull fill valve up)TWISTLEFTNOTE:Increasing height allowsmore water to fill in the Not Move Lock RingNOTE: Inspect watersupply it if it is worn, oryou don t know how old it is, toprevent flooding and property damage.
3 * The top of the overflow pipe must be a minimum of 1" below tank lever OF FILL VALVE CAPTOP OF OVERFLOW PIPE3"Fill Valve CapOverflow Pipe*Lever Hole67 STEP 4: Install NEW FILL VALVESTEP 5: FINISHING STEPS A: ATTACH WATER SUPPLY CONNECTOR TO FILL VALVE Twist to the right (counterclockwise) *Hand-tighten only. DO NOT OVER C: WATER LEVEL After the tank stops filling, water level should fill the tank to roughly inch below top of overflow pipe to ensure a proper flush. (Does not need to be exact.)* Over tightening may crack the fill valve or tank causing flooding.
4 Make sure the float cup does not touch the tank walls or tank lever and flush : Install LOCKNUT Screw locknut to the right (counterclockwise) onto fill valve shank (below tank). *Hand-tighten only. DO NOT OVER : ATTACH REFILL CLIP TO OTHER END OF REFILL TUBEB: INSERT FILL VALVE Position refill tube to face flush valve making sure fill valve parts do not interfere with lever : ATTACH REFILL CLIP TO OVERFLOW PIPE Note: If refill tube is too long to fit inside tank with lid closed, remove refill tube from fill valve refill port, cut tube, and reattach to (Optional)TOPDOWNVIEWR efill TubeLever ArmOverflow PipeFill Valve B: TURN ON WATER Check for leaks.
5 (Go to for leak solutions.)TURNCOUNTER-CLOCKWISE Over tightening may damage fill valve or coupling nut, potentially causing flooding. Make sure the float cup does not touch the tank walls or tank lever and flush valve.**The top of the overflow pipe must be a minimum of 1" below tank lever hole.*Water LevelTop ofOverflow Pipe1/2"Overflow Pipe**Lever Hole89 STEP 6: FINE-TUNE TANK WATER LEVEL A: FLUSH THE TOILET TO CHECK THE TANK WATER LEVEL After the water stops filling the tank, the water level should be roughly inch below the top of overflow pipe to ensure a proper flush.
6 B: WATER LEVEL IS TOO LOW Turn the tank water level adjustment screw clockwise to raise the float. Flush to reset water level. WATER LEVEL IS TOO HIGH Turn the water level adjustment screw counterclockwise to lower the float. Flush to reset water level. STEP 7: FINE-TUNE BOWL WATER LEVEL1/2"OverflowPipeSee Step 5C for Full Tank viewTank Water LevelAdjustment Screw+ NOTE: The PerforMAX Fill Valve is pre-set to fill the properbowl water level in most toilets straight out of the box. A: FILL BOWL WITH A GALLON OF WATER Wait 1 minute until the bowl water level recedes down and stops.
7 B: MARK THE WATER LEVEL IN THE BOWL With a pencil, draw a line at the top of the water level in bowl. (Pencil mark will easily wash off).C: FLUSH TOILET TO CHECK BOWL WATER LEVEL If the water level matches the line you ve made in the bowl when the fill valve stops filling the tank, the water level is correct, proceed to Step HIGHTOO LOWIf the water level matches the line in the bowl and the fill valve is STILL FILLING, then the bowl water is TOO HIGH, proceed to Step the valve shuts off and the water level does NOT match the line in the bowl, the water level is TOO LOW, proceed to Step for Most Toilets1110 STEP 7: FINE-TUNE BOWL WATER LEVELS till not working exactly right?
8 See the next page for DID IT!We knew you could!Share your success storywith friends and family!#FixedMyToilet#FluidmasterSTEP 8: FLUSH THE TOILET A: FLUSH THE TOILET If you re satisfied with the flush, YOU RE DONE!E: FLUSH TOILET, CHECK BOWL WATER LEVEL Repeat Steps 7D and 7E until water level in bowl matches the line when the fill valve shuts : ADJUST THE BOWL WATER LEVELIF TOO HIGH:Turn the dial TOO LOW: Turn the dial WATERMORE WATER1213 TROUBLESHOOTINGSee Our TroubleshootingHOW-TO THE FILL VALVE: DOES NOT TURN ON WON T TURN OFF WON T REFILL TANKREMOVE CAP AND CHECK FOR DEBRIS A: Turn off water supply.
9 B: Flush toilet. C: With right hand push float up, grip and hold shaft under float. D: With left hand twist cap and lever arm counterclockwise to unlock cap. Let cap hang on float cup. E: Hold empty cup upside down over uncapped valve to prevent splashing. F: Turn water supply on and off a few times. G: Turn water supply off. H: Replace valve Place cap assembly on top of gray valve body by aligning cap arm and adjustment rod next to refill tube. Press down on top cap while rotating top & arm clockwise to locked position.
10 A: WATER FROM REFILL TUBE MUST FLOW THROUGH OVERFLOW PIPE Make sure the refill tube is supplying water down overflow pipe. (Metal side out for refill clip) B: WATER LEVEL IN TANK MAY BE TOO LOW 1/2 below top of overflow pipe is recommended (see page 8). C: FLAPPER MAY BE CLOSING TOO SOON Give flapper chain approximately 1/2" of LEVEL IN BOWL IS TOO LOWO verflowPipeRefill Tube1/2"OverflowPipeREPLACE FILL VALVE SEAL Place cap assembly on top of gray valve body by aligning cap arm and adjustment rod next to refill tube. Press down on top cap while rotating top & arm clockwise to locked position.
