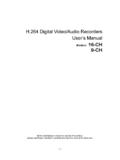
Transcription of remote control openers security at your fingertips …
1 EDR4 1172 5/051remote control openerssecurity at your fingertipsprolift 430 Ropener for roller doorsToll free helpline0800 073 0112 Please have your serialnumber and model nameavailable before 1172 5/052 Important safety instructions for operationIt is vital for the safety of persons to follow all instructions. Save these Do not allow children to play with door controls. Keep remote controls awayfrom children. The appliance is not intended for use by young children or infirm personswithout strongly recommends the use of optical safety beams on all sites as this isa non-contact systemWatch the moving door and keep people away until the door is completely openedor caution when operating the manual release with the door open since it mayfall rapidly due to weak or broken springs or an imbalanced door stand well clearof the path of the moving examine the installation, in particular cables, springs and mountings,for signs of wear damage or imbalance.
2 Do not use if repair or adjustment is neededsince a fault in the installation or an incorrectly balanced door may cause door and opener should be serviced at least annually to ensure safe month check that the drive reverses when the door contacts a 50mm highobject placed on the floor. If check fails contact your Merlin Dealer or AuthorisedMerlin Installer to adjust the force sensitivity should only be adjusted by a professional installer able to testforce at the leading edge of the appliance is intended for use in single household domestic dwellings only. Theappliance should not be used in multi-household or high frequency use electric power to the garage door opener before making any repairs orremoving any side prevent fire or shock hazard, do not expose the opener to rain or avoid electrical shock do not open the cabinet without disconnecting the openerfrom the you for purchasing the Merlin prolift roller door opener.
3 This product combines conveniencewith security . You can operate the door from a remote control radio transmitter or from a push-buttoninside your garage. One touch of the remote control button or internal push button will activate theopener and the door will open (or close) automatically. The door may be stopped in any position duringthe opening cycle by pressing either button. You can close the door by pressing the button ruggedly built garage door opener will provide years of safe and dependable service. Please takea moment to complete and send in the warranty card included with this product. Also please note yourserial number and purchase details. We are proud of our product and want to provide the best aftersale service possible. Please feel free to contact us if you have any suggestions or 1172 5/053 Manually operating the doorThe garage door can be disengaged from the opener to enable the door tobe operated Stand clear when releasing the door if the dooris unbalanced it may move disengage the openerPull the red release cord re-engage the openerPush the lever (attached to the red release cord) upwardsand move the door slightly to allow the gear to door can be re-engaged in any from a remote controltransmitterYour remote control transmitter has two buttons.
4 One large button and one small button. You cancontrol two products with the two buttons. For example a gate opener and a garage door press on a remote control transmitter button will open, stop or close the your remote control transmitter has no ef-fect, move closer to the opener. Radio signalscan be blocked or reduced by many externalfactors. There is a battery inside the remotecontrol transmitter which requires periodic re-placement. A fresh battery will give better per-formance than an old cord & clutchClutch leverRelease cordTransmitterbuttonsPress cover downthen slide off toexpose from a push buttonor wall boxPush button operation is identical to operation from a transmitter, except that there is no radiosignal to be button pushes cause the door to Open, Stop and Close, as described green push button is on the front face of the wall control box buttons have similar functions to your visor 1172 5/054 The procedure for setting the door travellimits differs depending on which sideof the garage door the opener has 1:To access the limits rotate the limit coverclockwise to the open the green control panel coverfrom the left front face of the 2.
5 As viewed while looking out of the ga-rage through the doorway, is the openeron the right-hand or left-hand side?exit delayLight doorroller: Ltall doorauto-closeononRonshortlongopenoperat elearndeletecloseprogramremovefor setupmanualcontrolPre-set forceDo not removeor adjustmentcontact forceDo not removeor adjustmentcontact the door travel limitsMicro switchesFine adjustingscrews accesspointTravel limitactuator coverManualreleaseControl panelcoverTravel limitactuator armsTravel limitactuator coverEDR4 1172 5/055 Setting door travel limits for right-hand mounting onlySTEP 1: Inspect the option switches on the control panel. The switch marked Roller L:R should bemoved to the R 2: Set the bottom limit of the mains power to the opener and switch the power on. Pull the manual release todisengage the door from the the door manually to the fully closed the red LED on the control panel.
6 It should be flashing. (If the red LED is on continuously,rotate the front actuator arm clockwise. If the green LED is on continuously, rotate the rear actuatorarm anti-clockwise.)Rotate the front limit-actuator-arm anti-clockwise until it contacts its microswitch and the red LEDstays on 3: Set the upper limit of the door manually to the fully open the green LED on the control panel. It should be flashing. (If it isn t then rotate the rearlimit-actuator-arm anti-clockwise away from its microswitch.)Rotate the rear limit-actuator-arm clockwise until it contacts its microswitch and the green LEDstays on limits are now largely set in the correct position. However the door travel can be further ad-justed using the fine adjustment turn of the screw results in around 5mm of door the limits have been set close the limit door travel limits for left-hand mounting onlySTEP 1: Inspect the option switches on the control panel.
7 The switch marked Roller L:R should bemoved to the L 2: Set the bottom limit of the mains power to the opener and switch the power on. Pull the manual release todisengage the door from the the door manually to the fully closed the red LED on the control panel. It should be flashing. (If the red LED is on continuously,rotate the rear actuator arm anti-clockwise. If the green LED is on continuously, rotate the frontactuator arm clockwise.)Rotate the rear limit-actuator-arm clockwise until it contacts its microswitch and the red LED stayson 3: Set the upper limit of the door manually to the fully open the green LED on the control panel. It should be flashing. (If it isn t then rotate the rearlimit-actuator-arm anti-clockwise away from its microswitch.)Rotate the front limit-actuator-arm anti-clockwise until it contacts its microswitch and the greenLED stays on 1172 5/056 The limits are now largely set in the correct position.
8 However the door travel can be further ad-justed using the fine adjustment turn of the screw results in around 5mm of door the limits have been set close the limit : The door is not safe for unsupervised operation until the force sensitivityhas been Repeated operation of the opener in a short period of time during the setting of forcesensitivity may trigger the thermal cutout of the motor. In this case you will have to wait forapproximately five minutes for the motor to cool sufficiently to continue the installationprocess. If the unit has overheated you will hear the relays clicking in response to thetransmitter or pushbutton but the motor will not operate. After cooling down, normal op-eration is able to up wireless controlsWireless controls can operate the opener, or the opener s courtesy lamp, by sending coded radiosignals.
9 These coded signals use high- security controls can be hand-held or fixed to walls, such as a wireless keypad, or a wireless to 20 Merlin wireless controls can be learned by the opener. After this, the 20th wireless controlis over-written in the opener s wireless controls can be deleted from the opener s is a red learn button under the green control panel cover on the front face of the opener. Thesmall button on a Merlin M-122 wired wall-switch can also be used as the learn a setting is enabled in the opener, then it is possible to use any existing learned wireless controlas a learn button. (See separate section following.)To learn a remote button to operate the opener:Press the learn button for 1-2 seconds, until the courtesy lamp begins to flash the desired remote button, wait 1 second, press the desired remote button again.
10 The cour-tesy lamp will stop flashing once learning is learn one remote button to operate the opener and another to operate the lamp:Press the learn button for 1-2 seconds, until the courtesy lamp begins to flash the desired remote button for control of the opener, wait 1 second, press the desired remotebutton for control of the courtesy lamp. The courtesy lamp will stop flashing once learning is delete all remote controls from the opener s memoryPress and hold the learn button for eleven seconds, until the courtesy lamp stops flashing. After sixseconds it will flash fast as a warning. If you release the learn button during this warning periodthen the memory will not be 1172 5/057 remote transmitter learningRemote Transmitter Learning (RTL), when enabled, allows any existing learned wireless control tobe used as a learn button for the learning of additional wireless controls.