Example: marketing
TOUCH-ACTIVATED ELECTRONIC INDUCTION COOKTOP
Make Sure Reflector Pans or Drip Bowls Are in Place – Absence of these pans or bowls during cooking may subject wiring or components underneath to damage. Protective Liners – Do not use aluminum foil to line surface unit drip bowls, except as suggested in the manual. Improper installation of these liners may result in a risk of
Tags:
Information
Domain:
Source:
Link to this page:
Documents from same domain

Use & Care Guide - kitchenaid.com
www.kitchenaid.com3 INSTALLATION INSTRUCTIONS Installer: Leave Use and Care Guide with the homeowner. Homeowner: Keep Use and Care Guide for future reference and for local electrical inspector’s use, if required. Unpacking IMPORTANT: Do not grasp console to move compactor. Begin in the room where the compactor will be located. 1. Remove compactor from shipping carton.

KSMSFTA - kitchenaid.com
www.kitchenaid.comPrecise Heat Mixing Bowl, Ice Cream Maker, or the Pouring Shield. The Sifter+Scale attachment can be used in multiple ways: to weigh and sift ingredients while ... WARRANTY AND SERVICE KITCHENAID SIFTER+SCALE ATTACHMENT WARRANTY FOR THE 50 UNITED STATES, THE DISTRICT OF COLUMBIA, PUERTO RICO, AND CANADA

KITCHENAID ICE MAKER WARRANTY
www.kitchenaid.com19 KITCHENAID® ICE MAKER WARRANTY THREE YEAR LIMITED WARRANTY (PARTS AND LABOR) For three years from the date of purchase, when this major applia nce is installed, operated and maintained according to instructions

KITCHENAID DISHWASHER WARRANTY
www.kitchenaid.com21 KITCHENAID® DISHWASHER WARRANTY TWO YEAR LIMITED WARRANTY For two years from the date of purchase, when this major appliance is operated and maintained according to instructions attache d to or

BOWL LIFT STAND MIXER
www.kitchenaid.comreplacement stand mixer, use the carton and packing materials to pack up your “failed” stand mixer. In the carton, include your name and address on a sheet of paper along with a copy of the proof of purchase (register receipt, credit card charge slip, etc.). For a detailed explanation of warranty terms and conditions, including how to ...

STAND MIXER - KitchenAid
www.kitchenaid.comreplacement stand mixer, use the carton and packing materials to pack-up your “failed” stand mixer. In the carton, include your name and address on a sheet of paper along with a copy of the proof of purchase (register receipt, credit card charge slip, etc.). For a detailed explanation of warranty terms and conditions, including how to ...

Use & Care Guide
www.kitchenaid.comWhen using electrical appliances, basic safety precautions should always be followed, including the following: 1. Read all instructions. Misuse of appliance may result in personal injury. 2. To protect against risk of electrical shock, do not put Stand Mixer in water or other liquid. 3. This appliance can be used by children aged from 8 years

Owners Manual - KitchenAid
www.kitchenaid.comDrying - Rinse aid is essential. You must use a drying agent such as a rinse aid for good drying performance (sample included). Rinse aid along with the Heat Dry or ProDry™ option will provide best drying and avoid excessive moisture in the dishwasher interior. For best drying, use the Heat Dry or ProDry™ option. Dispensers vary by model

INSTALLATION INSTRUCTIONS 27 (68.6 CM) AND 30 (76.2 CM ...
www.kitchenaid.com4 Cabinet Dimensions - Double Ovens, Flush Installations A 253/ 8" (64.4 cm) minimum cutout depth is required. These dimensions will result in a 1/4" (6 mm) reveal on the top, a 1/4" (6 mm) reveal on the sides, and a 1/8" (3 mm) reveal on

MICROWAVE OVEN BUILT-IN TRIM KIT INSTALLATION …
www.kitchenaid.comSecure trim kit frame to cutout/cabinet by installing four long wood screws (painted) into the pilot holes drilled in Step 2 above. Installation is now complete. Replace any loose items that have been removed from microwave oven cavity. Save these Installation Instructions for future reference. A.Mounting holes B.Short screws (4)
Related documents

PATIO HEATER OWNER’S MANUAL
pdf.lowes.com(For models with Entire Reflector , skip to Step 9) Step 8 – Install Reflector WARNING Remove protective cover before assemble. Note: If necessary for proper alignment of reflector sections, loose each screw prior to further assembly and retighten after sections are aligned.. Slide two Reflector Panels together.. Insert one Small Screw..

LEARNING STYLES ACCORDING TO HONEY & MUMFORD …
mcgillclinicaleducation.caA REFLECTOR . . . - is cautious - is painstaking and methodical - is pensive - listens attentively to others and memorizes facts - rarely jumps to conclusions - tends to avoid direct participation - takes a long time to think before giving an opinion or making a decision - tends to be overly cautious and takes too few risks
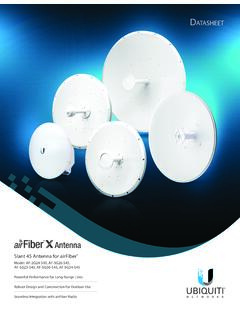
airFiber Antennas Datasheet - Ubiquiti
dl.ubnt.comIncorporating a dish reflector design for excellent beam directivity, the airFiber X antennas feature robust mechanical design using industrial-strength hardware for outdoor application use. Plug and Play Integration airFiber X antennas and airFiber X radios have been designed to seamlessly work together. Every airFiber X antenna has a built-in

STINGER LED STINGERDS LED - Streamlight
www.streamlight.comWeight: 12.8 oz (364 grams) Stinger LED Length: 8.41 in. (21.36 cm) Diameter: Major Diameter: 1.62 in. (4.11cm) Body Diameter: 1.17 in. (2.97 cm) Weight: 12.4 oz (352 grams) – High power LED technology for extreme brightness – IPX4 Rated for water resistant operation – 1 meter impact resistance tested