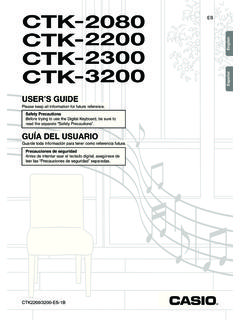
Transcription of USER’S GUIDE Español - support.casio.com
1 GU A DEL USUARIOUSER S GUIDEESCTK4200/WK220-ES1 BGuarde toda la informaci n para futuras keep all information for future de seguridadAntes de intentar usar el teclado digital, aseg rese de leer las Precauciones de seguridad Precautions Before trying to use the Digital Keyboard, be sure to read the separate Safety Precautions .EnglishEspa olNOTICEThis equipment has been tested and found to comply with the limits for a Class B digital device, pursuant to Part 15 of the FCC Rules. These limits are designed to provide reasonable protection against harmful interference in a residential installation. This equipment generates, uses and can radiate radio frequency energy and, if not installed and used in accordance with the instructions, may cause harmful interference to radio communications. However, there is no guarantee that interference will not occur in a particular installation. If this equipment does cause harmful interference to radio or television reception, which can be determined by turning the equipment off and on, the user is encouraged to try to correct the interference by one or more of the following measures: Reorient or relocate the receiving antenna.
2 Increase the separation between the equipment and receiver. Connect the equipment into an outlet on a circuit different from that to which the receiver is connected. Consult the dealer or an experienced radio/TV technician for WARNINGC hanges or modifications not expressly approved by the party responsible for compliance could void the user s authority to operate the of ConformityModel Number: CTK-4200/WK-220/WK-225 Trade Name: casio COMPUTER CO., party: casio AMERICA, : 570 MT. PLEASANT AVENUE, DOVER, NEW JERSEY 07801 Telephone number: 973-361-5400 This device complies with Part 15 of the FCC Rules, Operation is subject to the following two conditions:(1) This device may not cause harmful interference, and (2) this device must accept any interference received, including interference that may cause undesired !Please note the following important information before using this product. Before using the optional AC Adaptor to power the unit, be sure to check the AC Adaptor for any damage first.
3 Carefully check the power cord for breakage, cuts, exposed wire and other serious damage. Never let children use an AC adaptor that is seriously damaged. Never attempt to recharge batteries. Do not use rechargeable batteries. Never mix old batteries with new ones. Use recommended batteries or equivalent types. Always make sure that positive (+) and negative ( ) poles are facing correctly as indicated near the battery compartment. Replace batteries as soon as possible after any sign they are getting weak. Do not short-circuit the battery terminals. The product is not intended for children under 3 years. Use only a casio AD-E95100L adaptor. The AC adaptor is not a toy. Be sure to disconnect the AC adaptor before cleaning the mark applies in EU countries only. Any reproduction of the contents of this manual, either in part or its entirety, is prohibited. Except for your own, personal use, any other use of the contents of this manual without the consent of casio is prohibited under copyright laws.
4 IN NO EVENT SHALL casio BE LIABLE FOR ANY DAMAGES WHATSOEVER (INCLUDING, WITHOUT LIMITATION, DAMAGES FOR LOSS OF PROFITS, BUSINESS INTERRUPTION, LOSS OF INFORMATION) ARISING OUT OF THE USE OF OR INABILITY TO USE THIS MANUAL OR PRODUCT, EVEN IF casio HAS BEEN ADVISED OF THE POSSIBILITY OF SUCH DAMAGES. The contents of this manual are subject to change without notice. The actual appearance of the product may be different from that shown in the illustrations in this User s GUIDE . Company and product names used in this manual may be registered trademarks of : casio COMPUTER CO., , Hon-machi 1-chome, Shibuya-ku, Tokyo 151-8543, Japan Responsible within the European Union: casio EUROPE GmbHCasio-Platz 1, 22848 Norderstedt, GermanyE-1E-2 ContentsGeneral GUIDE .. E-4 Using the 10-key Pad (br)..E-7 FUNCTION Button (ct) Functions ..E-7 Returning the Digital Keyboard to Its Factory Default Settings ..E-8 Getting Ready to Play .. E-9 Preparing the Music Stand.
5 E-9 Power Supply ..E-9 Playing the Digital Keyboard .. E-10 Turning on Power and Playing ..E-10 Using Headphones ..E-11 Connecting a Microphone (WK-220 and WK-225) ..E-11 Changing Keyboard Response to Touch Pressure (Touch Response)..E-12 Adjusting Display the Metronome ..E-13 Controlling the Keyboard Sounds .. E-14 Select from a variety of musical instrument sounds ..E-14 Layering Two Tones ..E-15 Splitting the Keyboard between Two Different Tones ..E-15 Using a Pedal ..E-17 Changing the Pitch (Transpose, Tuning, Octave Shift)..E-17 Sampling Sounds and Playing Them on the Digital Keyboard .. E-19 Connection and and Playing a Melody Sound (Melody Sampling) ..E-20 Incorporating a Sampled Sound into a Drum Set (Drum Sampling) ..E-22 Other Sampling Functions ..E-25 Playing Built-in Songs .. E-27 Playing the Demo Songs ..E-27 Playing Back a Particular Song ..E-28 Increasing the Selection of Songs ..E-30 Using Built-in Songs to Master Keyboard E-31 Phrases.
6 E-31 Step Up Lesson Flow .. E-31 Selecting the Song, Phrase, and Part You Want to E-32 Lessons 1, 2, and E-33 Lesson Settings .. E-34 Using Auto Step Up Lesson .. E-36 Music Challenge Keyboard Game .. E-37 Using Auto E-38 Playing the Rhythm Part Only .. E-38 Playing All Parts .. E-39 Using Auto Accompaniment Effectively .. E-41 Using One-Touch Preset .. E-42 Using Auto Harmonize .. E-43 Looking Up the Notes of Chords (Chord Book).. E-44 Editing Auto Accompaniment Patterns .. E-45 Saving Keyboard Setups to Registration Memory .. E-48To save a setup to registration E-49To recall a setup from registration memory .. E-49 Recording Your Keyboard E-50 Recording and Playing Back Keyboard Play .. E-50 Using Tracks to Record and Mix Parts .. E-51 Recording Two or More Songs, and Selecting One for E-53 Recording while Playing Along with a Built-in E-53 Saving Recorded Data on an External Device .. E-54 EnglishContentsE-3 Other Useful Digital Keyboard Functions.
7 E-55 Changing the Scale of the Music Preset ..E-56 Using the User Song All Data in Digital Keyboard Memory ..E-58 Connecting External Devices .. E-59 Connecting a Computer ..E-59 MIDI Settings ..E-60 Storing and Loading Digital Keyboard Memory Data ..E-62 Connecting to Audio Equipment ..E-66 Operating Messages ..E-68 Song List ..E-69 Fingering GUIDE ..E-70 MIDI Implementation ChartIncluded Accessories Music Stand Song Book Leaflets Safety Precautions Appendix Other (Warranty, etc.)Items included as accessories are subject to change without Available Accessories You can get information about accessories that are separately for this product from the casio catalog available from your retailer, and from the casio website at the following GUIDE In this manual, the term Digital Keyboard refers to the CTK-4200/WK-220/WK-225. Illustrations in this User s GUIDE show the WK-220. In this manual, buttons and other controllers are identified using the numbers shown below.
8 There is a button number reference at the back of this manual. You can tear it out and refer to the button numbers as dn do dpdkdqdrEnglishGeneral GuideE-5 The following explains the meaning of the $ symbol that appears on the product console and with the key names below.$: Indicates a function that is enabled by holding down the button for some button E-102 VOLUME knob E-103 RECORDER button E-504 RHYTHM EDITOR button E-455 METRONOME, $ BEAT button E-136 INTRO, REPEAT button E-29, 417 NORMAL/FILL-IN, REW button E-28, , FF button E-28, 419 SYNCHRO/ENDING, PAUSE button E-28, 41bkSTART/STOP, PLAY/STOP button E-27, 38bl$ CHORDS, ACCOMP, PART SELECT button E-30, 39bmTEMPO buttons E-13bnTONE button E-14boRHYTHM, $ ONE TOUCH PRESET button E-38, 42bpSONG BANK button E-28bqMUSIC PRESET button E-56brNumber buttons, [ ]/[+] keys E-7bsBANK, LISTEN button E-33, 48btArea1, WATCH button E-33, 48ckArea2, REMEMBER button E-34, 48clArea3, NEXT button E-32, 48cmArea4, AUTO button E-36, 48cnSTORE, MUSIC CHALLENGE button E-37, 49coSPLIT button E-15cpLAYER button E-15cqAUTO HARMONIZE/ARPEGGIATOR, $ TYPE button E-43, 57crPIANO/ORGAN button E-14csCHORD BOOK button E-44ctFUNCTION button E-7dkSpeakersdlSong Bank listdmDisplaydnMusic Preset listdoRhythm listdpTone listdqCHORD root names E-39drPercussion instrument list E-14 General GuideE-6dsUSB port E-59dtSUSTAIN/ASSIGNABLE JACK E-17ekMIC VOLUME knob (WK-220 and WK-225) E-19elMIC IN/SAMPLING jack (WK-220 and WK-225) E-19emAUDIO IN jack E-19enDC terminal E-9eoPHONES/OUTPUT jack E-11dsdtelemeoenek BackEnglishGeneral GuideE-7 Use the number buttons and the [ ] and [+] keys to change the settings of the parameters that appear in the upper left area of the the number buttons to enter numbers and values.
9 Enter the same number of digits as the currently displayed value. Negative values cannot be input using the number buttons. Use [ ] (decrease) and [+] (increase) can use the [ ] (decrease) and [+] (increase) keys to change the displayed number or value. Holding down either key scrolls the displayed setting. Pressing both keys at the same time will revert to the initial default setting or the recommended can use the FUNCTION button (ct) to adjust the reverb effect, to delete data, and to perform a wide range of other Digital Keyboard ct (FUNCTION) to display the function the br (10-key) [4] (o) and [6] (p) keys to display the function you want. You can exit the function menu by pressing ct (FUNCTION). After selecting functions 8 through 13, press the br (10-key) [9] (ENTER) key to display the menu item s submenu. Then use [4] (o) and [6] (p) to select an item. You can exit a submenu by pressing the br (10-key) [7] (EXIT) to the indicated pages for details about each the 10-key Pad (br)Number ButtonsExample:To enter tone number 001, input 03 03 1.
10 [ ] and [+] KeysSettingSt .GrPnoFUNCTION Button (ct) FunctionsTo select a functionGeneral GuideE-8 The tone and other parameters revert to their initial defaults whenever you turn on power (page E-10).Perform the following procedure when you want to return the Digital Keyboard s stored data and settings to their initial factory off the Digital holding down bp (SONG BANK) and the [1] 10-key (br) key at the same time, press 1. Keep bp (SONG BANK) and the [1] 10-key (br) key depressed until the next step is the message Pls wait appears on the screen, release bp (SONG BANK) and the [1] 10-key (br) key. You will be able to use the Digital Keyboard in a short while after its system is initialized. See Turning on Power and Playing (page E-10) for information about turning digital power on and Page1 Accompaniment VolumeAcompVolE-423 Song VolumeSong VolE-304 Touch ResponseTouchE-125 TuningTuneE-176 ReverbReverbE-167 ChorusChorusE-168 SamplingSAMPLINGA utomatic Sampling StartAutoStrtE-25 Automatic Sampling StopAutoStopE-25 Sampled Tone Protect(Protect)E-269 Step Up LessonLESSONV oice Fingering GuideSpeakE-34 Note GuideNoteGuidE-35 Performance EvaluationScoringE-35 Phrase LengthPhraseLnE-3510 Preset ScalesSCALEE-5511 Other SettingsOTHERA rpeggiator HoldArpegHldE-57 Pedal EffectJackE-17 Accompaniment ScaleAcompSclE-56 LCD ContrastContrastE-1212 MIDI SettingsMIDIK eyboard ChannelKeybd ChE-60 Navigate ChannelsNavi.