Transcription of Weather Thermometer …
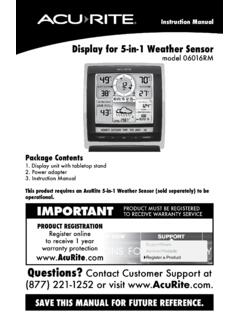
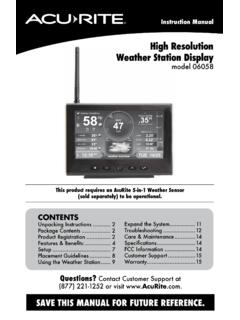
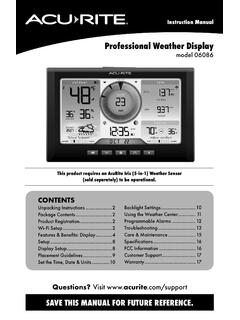
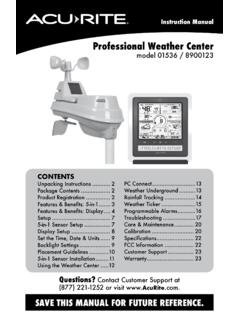
1 Weather Thermometer models 00754/00771W/00772W/00773W/00774W Instruction manual CONTENTS Unpacking Instructions .. 2 Package Contents .. 2 Product Registration .. 2 Features & Benefits: 2 Features & Benefits: 3 Setup .. 4 Sensor Setup .. 4 Display Setup .. 5 Intelli-Time Clock .. 6 Set the Time, Date & Units .. 6 Placement Guidelines .. 7 Using the 8 Troubleshooting .. 9 Care & Replace Intelli-Time FCC Information ..10 Customer Support ..11 Questions? Contact Customer Support at (877) 221-1252 or visit SAVE THIS manual FOR FUTURE REFERENCE. Archive:l Products II Congratulations on your new AcuRite product. To ensure the best possible product performance, please read this manual in its entirety and retain it for future reference. Unpacking Instructions Remove the protective film that is applied to the LCD screen prior to using this product.
2 Locate the tab and peel off to remove. Package Contents 1. Display unit 2. Outdoor sensor 3. Instruction manual IMPORTANT PRODUCT MUST BE REGISTERED TO RECEIVE WARRANTY SERVICE PRODUCT REGISTRATION Register online to receive 1 year warranty protection Register a Product Features & Benefits 1 2 3 4 5 OUTDOOR SENSOR 1. Integrated Hanger For easy placement. 2. Wireless Signal Indicator Flashes when data is being sent to the display unit. 3. Battery Compartment 4. A-B-C Switch ID code that must match display s A-B-C switch to ensure units synchronize. 5. Battery Compartment Cover 2 Features & Benefits 1 2 3 4 5 6 7 14 13 12 11 10 9 8 15 16 17 18 DISPLAY UNIT 1. Current Outdoor Temperature Arrow icon indicates the direction the temperature is trending.
3 2. Outdoor Sensor Signal Strength 3. Daylight Saving Time Indicator Shown only during setup. 4. Display Low Battery Indicator 5. Day of the Week 6. Current Indoor Temperature Arrow icon indicates the direction the temperature is trending. 7. Button 8. SET Button 9. Button 10. Date 11. Selected Time Zone 12. Intelli-Time Clock 13. Outdoor Sensor Low Battery Indicator 14. Freeze Alert Indicator Indicates temperature is below freezing (32 F; 0 C). 15. Integrated Hang Hole For easy wall mounting. 16. Reset Full reset to factory default. 17. A-B-C Switch ID code that must match sensor s A-B-C switch to ensure units synchronize . 18. Battery Compartment 19. Battery Compartment Cover (Not shown) 3 B~~f~~~S It ( Q & ALKALINE BATTERIES (70 C) 1S8 F I (70 C) 1S8 F I SETUP Sensor Setup 1 2 Set the A-B-C Switch The A-B-C switch is located inside the battery compartment.)
4 It can be set to A, B or C. However, you must select the same letter choices for both the sensor and the display unit in order for the units to synchronize. Install or Replace Batteries AcuRite recommends high quality alkaline or lithium batteries for the best product performance. Heavy duty or rechargeable batteries are not recommended. The sensor requires lithium batteries in low temperature 2 Install Batteries 2 AA batteries conditions. Cold temperatures can cause alkaline batteries to function improperly. Use lithium batteries in the sensor for temperatures below -4 F / -20 C. 1. Slide off the battery compartment cover. Take note of the A-B-C switch setting inside the battery compartment. 2. Insert 2 x AA batteries into the battery compartment, as shown. Follow the polarity (+/-) diagram in the battery compartment.
5 3. Replace the battery cover. 1 A-B-C Switch set to match display unit A B C 4 Display Unit Setup 1 Set the A-B-C Switch 2 Install or Replace Batteries Locate the A-B-C switch inside the battery compartment. Set the A-B-C switch to A, B or C. You must select the same letter choices for both the display unit and the sensor in order for the units to synchronize. 1. Remove the battery compartment cover. 2. Insert 3 x AA alkaline batteries into the battery compartment, as shown. Follow the polarity (+/-) diagram in the battery compartment. 3. Replace the battery cover. A B C 2 Install Batteries 3 AA batteries 1 A-B-C Switch set to match sensor PLEASE DISPOSE OF OLD OR DEFECTIVE BATTERIES IN AN ENVIRONMENTALLY SAFE WAY AND IN ACCORDANCE WITH YOUR LOCAL LAWS AND REGULATIONS. BATTERY SAFETY: Clean the battery contacts and also those of the device prior to battery installation.
6 Remove batteries from equipment which is not to be used for an extended period of time. Follow the polarity (+/-) diagram in the battery compartment. Promptly remove dead batteries from the device. Dispose of used batteries properly. Only batteries of the same or equivalent type as recommended are to be used. DO NOT incinerate used batteries. DO NOT dispose of batteries in fre, as batteries may explode or leak. DO NOT mix old and new batteries or types of batteries (alkaline/standard). DO NOT use rechargeable batteries. DO NOT recharge non-rechargeable batteries. DO NOT short-circuit the supply terminals. 5 Intelli-Time Clock Intelli-Time products are pre-programmed with the correct time and date. All you need to do is select your Time Zone and Daylight Saving Time preferences. The clock will then automatically update for Daylight Saving Time.
7 Set the Time, Date & Units Press the SET button, for 3 seconds, to enter SET MODE. Once in set mode, the preference you are currently setting will blink on the display. To adjust the currently selected (flashing) item, press and release the or buttons (press and HOLD to fast adjust). To save your adjustments, press and release the SET button again to adjust the next preference. The preference set order is as follows: TIME ZONE ( PST MST CST EST AST HAST AKST) DST (Daylight Saving Time ON or OFF)* CLOCK HOUR CLOCK MINUTE CALENDAR MONTH CALENDAR DATE CALENDAR YEAR TEMPERATURE UNITS ( F or C) *If you live in an area that observes Daylight Savings Time, DST should be set to ON, even if it is not currently Daylight Savings Time. You will automatically exit SET MODE if no buttons are pressed for 30 seconds. Enter setup mode at any time by pressing the SET button.
8 6 l 1111 \ I I --o----/ I \' Placement for Maximum Accuracy AcuRite sensors are sensitive to surrounding environmental conditions. Proper placement of both the display unit and outdoor sensor are critical to the accuracy and performance of this product. Display Unit Placement Place the display unit in a dry area free of dirt and dust. Display unit stands upright for tabletop use or is wall-mountable. Outdoor Sensor Placement Sensor must be placed outside to observe outdoor conditions. Sensor is water resistant and is designed for general outdoor use, however, to extend its life place the sensor in an area protected from direct Weather elements. Hang the sensor using the integrated hang holes or hanger, or by using string (not included) to hang it from a suitable location, like a well covered tree branch.
9 The best location is 4 to 8 feet above the ground with permanent shade and plenty of fresh air to circulate around the sensor. Important Placement Guidelines To ensure accurate temperature measurement, place units out of direct sunlight and away from any heat sources or vents. Display unit and outdoor sensor must be within 330 ft (100 m) of each other. To maximize wireless range, place units away from large metallic items, thick walls, metal surfaces, or other objects that may limit wireless communication. To prevent wireless interference, place both units at least 3 ft (.9 m) away from electronic devices (TV, computer, microwave, radio, etc.). TV 3 (330 feet maximum) (.91 m) AT LEAST APART (100 meters) Setup is Complete The sensor will now synchronize with the display unit. It may take a few minutes for synchronization to complete.
10 Please refer to the troubleshooting section of this manual if anything appears to be functioning improperly. 7 OPERATION Using the Thermometer High/Low Records Today s high and low values are recorded for indoor and outdoor temperature. The high and low records automatically clear at 12:00am. To view the LOW temperature record, press and release the button. The MIN icon appears on the display next to the low records. To view the HIGH temperature record, press and release the button. The MAX icon appears on the display next to the high records. To reset the LOW records, press AND HOLD the button while viewing the low records. Dashes will display to confirm all low values have been cleared. To reset the HIGH records, press AND HOLD the button while viewing the high records. Dashes will display to confirm all high values have been cleared.