Transcription of www.metraonline.com
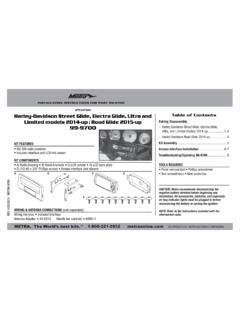
1 CAUTION! All accessories, switches, climate controls panels, and especially air bag indicator lights must be connected before cycling the ignition. Also, do not remove the factory radio with the key in the on position, or while the vehicle is running. INSTALLATION INSTRUCTIONS99-5834 CHThe World s best kits. COPYRIGHT 2018 METRA ELECTRONICS CORPORATION REV. 8/29/18 INST99-5834 CHKIT FEATURES ISO DIN radio provision with pocket ISO DDIN radio provision Painted charcoal Touchscreen display for climate and personalization features Note: This kit will not support the Pro Trailer Backup Assist feature, nor the massaging COMPONENTS A) Radio trim panel with touchscreen display B) Radio brackets C) SYNC module brackets D) Pocket E) (4) #8 x 3/8 Phillips truss-head screws F) (4) #4 x 1/2 Phillips pan-head screws G) (7) Panel clips H) HVAC interface and wiring harness (not shown) I) Antenna adapter (not shown)TOOLS REQUIRED Panel removal tool Phillips screwdriver 9/32 Socket wrench Cutting toolTABLE OF CONTENTSDash Disassembly.
2 2-3 Kit Preparation ..4 Kit Assembly ISO DIN radio provision with pocket ..5 ISO DDIN radio provision ..5 Axxess Interface Installation ..6-15 WIRING & ANTENNA CONNECTIONSW iring Harness: Axxess interface and wiring harness includedAntenna Adapter: Included with kitFord F-150 | DISASSEMBLY1. For vehicles with a center channel speaker: Unclip and remove the speaker grille in the center of the dash above the radio/climate control panel, and then remove the (2) 9/32 screws exposed. (Figure A)2. For vehicles without a center channel speaker: Remove the rubber pad in the shallow pocket above the radio/climate control panel, and then remove the (2) 9/32 screws exposed. (Figure B)3. Unclip and remove the panel above the radio/climate control panel, and then remove the (2) 9/32 screws from the top of the radio/climate control panel. (Figure C)Ensure that the vehicle is completely off before proceeding onto the following (5) steps4.
3 Unclip, unplug, and remove the radio/climate control panel. 5. Remove the 9/32 screws securing the display screen; qty. (4) for the display screen models, qty. (6) for 8-inch display screen models, then unplug and remove. (Figure D) Continued on the next page(Figure D)(Figure C)(Figure A)(Figure B)3234567891890 76 11 7 DASH DISASSEMBLY(Figure G)(Figure H)(Figure F)6. For models with a display screen and SYNC : Remove the (2) 9/32 screws securing the SYNC module , then unplug and remove. (Figure F)7. Remove the (4) 9/32 screws securing the radio chassis, then unplug and remove. (Figure G)8. For models equipped with a factory backup camera: Remove the (3) 10mm nuts securing the camera module , move the module down onto the lower stud, and then re-secure using just (1) 10mm nut. (Figure H) Continue to Kit | PREPARATIONFrom the factory radio/climate control panel:1.
4 Unclip and remove the hazard switch and traction control the 99-5834CH radio trim panel:1. Attach the hazard switch and traction control buttons. (Figure C)2. Attach the (7) panel clips provided. (Figure D) Continue to Kit Assembly(Figure B)(Figure D)(Figure A)For display screen models only, and if SYNC is desired to be retained:1. Remove the (4) 9/32 screws securing the brackets from SYNC Attach the SYNC module brackets to the SYNC module using the (4) #8 x 1/2 Phillips pan-head screws provided. (Figure A)3. Secure the module into the lower sub-dash using the factory hardware removed in step 7 of dash disassembly. (Figure B)(Figure C)5234567891890 76 11 7 KIT ASSEMBLY(Figure B)(Figure A)ISO DIN radio provision with pocket1. Attach the pocket to the radio brackets using the (4) supplied #8 x 3/8 Phillips truss-head screws. (Figure A)2. Remove the metal DIN sleeve and trim ring from the aftermarket Slide the radio into the completed assembly, and then secure it to the assembly using screws supplied with the radio.
5 (Figure B)(Figure A)ISO DDIN radio provision1. Attach the radio brackets to the radio using screws supplied with the radio. (Figure A) | INTERFACE INSTALLATIONINTERFACE FEATURESINTERFACE COMPONENTS Axxess interface (built into the touchscreen display) 5834 harness HVAC interface HVAC interface harness 4-pin flat to 4-pin stacked harness 16-pin harness with stripped leads 54-pin backup camera harness 12-pin backup camera harness 4-pin harness with yellow RCA jacks Female connector with stripped leadsTOOLS REQUIRED Crimping tool and connectors, or solder gun, solder, and heat shrink Tape Wire cutter Zip ties Provides accessory power (12-volt 10-amp) Retains (retained accessory power) Provides NAV outputs (parking brake, reverse, speed sense) Retains audio controls on the steering wheel Retains SYNC ( display screen models only) Retains the factory backup camera Can be used in both amplified and non-amplified models (including Sony)
6 Retains balance and fade (excluding Sony) Micro B USB updatableTABLE OF CONTENTSC onnections For models without a Sony amplifier ..7 For models with a Sony amplifier ..8 jack steering wheel control retention ..9 Backup camera harness ..9 Installation ..10 Programming ..11 Final assembly ..11 Extra features ..11 Touchscreen display operation ..12-13 Steering wheel control settings ..14-15 Troubleshooting ..157234567891890 76 11 7 CONNECTIONSThe following (3) wires are only for multimedia/navigation radios that require these wires. Connect the Blue/Pink wire to the VSS/speed sense wire. Connect the Green/Purple wire to the reverse wire. Connect the Light Green wire to the parking brake the 5834 harness to the aftermarket radio: Connect the Black wire to the ground wire. Connect the Yellow wire to the battery wire. Connect the Green wire to the left rear positive speaker output.
7 Connect the Green/Black wire to the left rear negative speaker output. Connect the Purple wire to the right rear positive speaker output. Connect the Purple/Black wire to the right rear negative output. Tape off and disregard the following (1) wire, it will not be used in this application: Blue For models with a display screen and SYNC : Connect the Red and White RCA jacks labeled RSE/SYNC/SAT to the audio AUX-IN jacks of the aftermarket radio. For models equipped without SYNC : Connect the Red and White RCA jacks labeled FROM to the audio AUX-IN jacks of the aftermarket radio. Continue to jack steering wheel control retentionAttention! This interface will work with models that are either Sony amplified, or non-amplified. Please follow the instructions carefully for your model vehicle. Failure to do so will result in either no sound, or low sound.
8 If you are unsure if your vehicle is factory amplified or not, please contact your local models without a Sony amplifier: From the 16-pin harness with stripped leads to the aftermarket radio: Connect the Red wire to the accessory wire. If equipped with a factory subwoofer, connect the Blue/White wire to the amp turn on wire. If the aftermarket radio has an illumination wire, connect the Orange/White wire to it. If the aftermarket radio has a mute wire, and the vehicle is equipped with SYNC , connect the Brown wire to it. If the mute wire is not connected, the radio will turn off when SYNC is activated. Connect the Gray wire to the right front positive speaker output. Connect the Gray/Black wire to the right front negative speaker output. Connect the White wire to the left front positive speaker output. Connect the White/Black wire to the left front negative speaker output.
9 Tape off and disregard the following (4) wires, they will not be used in this application: Green, Green/Black, Purple, | following (3) wires are only for multimedia/navigation radios that require these wires. Connect the Blue/Pink wire to the VSS/speed sense wire. Connect the Green/Purple wire to the reverse wire. Connect the Light Green wire to the parking brake wireFrom the 5834 harness to the aftermarket radio: Connect the Black wire to the ground wire. Connect the Yellow wire to the battery wire. Tape off and disregard the following (5) wires, they will not be used in this application: Blue, Green, Green/Black, Purple, Purple/Black Disregard the Red and White RCA jacks labeled RSE/SYNC /SAT , they will not be used in this application. Disregard the Red and White RCA jacks labeled FROM , they will not be used in this application. Continue to jack steering wheel control retentionAttention!
10 This interface will work with models that are either Sony amplified, or non-amplified. Please follow the instructions carefully for your model vehicle. Failure to do so will result in either no sound, or low sound. If you are unsure if your vehicle is factory amplified or not, please contact your local models with a Sony amplifier:From the 16-pin harness with stripped leads to the aftermarket radio: Connect the Red wire to the accessory wire. Connect the Blue/White wire to the amp turn on wire. This wire must be connected to hear sound from the factory amplifier. If the aftermarket radio has an illumination wire, connect the Orange/White wire to it. Connect the Gray wire to the right front positive speaker output. Connect the Gray/Black wire to the right front negative speaker output. Connect the White wire to the left front positive speaker output. Connect the White/Black wire to the left front negative speaker output.