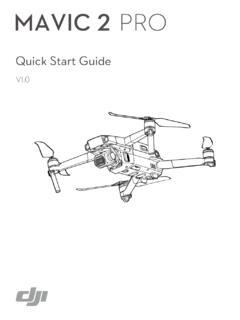
Transcription of ZENMUSE H3-2D Gimbal User ManualV1 - …
1 2013 DJI Innovations. All Rights Reserved. ZENMUSE H3-2D Gimbal user For Firmware IMU , GCU , CMU & Assistant Revision 2013 DJI Innovations. All Rights Reserved. 2 Warning & Disclaimer No adjusting or amending is allowed to the H3-2D !!! Before use, make sure to mount the camera to Gimbal first, and then mount the Gimbal to aircraft. After this, you can power on the Gimbal . H3-2D is specialized for Camera and Lens before it leaves the factory. Please mount your camera to H3-2D when get it. No adjusting or amending is allowed to H3-2D . Do not modify or add any other component/device (such as filter, lens hood, etc.)
2 To the camera; make sure to use the original battery; otherwise it may end up with worse performance or even internal malfunction. The Gimbal can only work with Autopilot system specified by DJI Innovations (NAZA-M/NAZA-M V2/WooKong-M), so as to ensure the highest stability and precision. Please download the corresponding assistant software and upgrade the autopilot system MC firmware, otherwise may lead the Gimbal work abnormally. Make sure the Autopilot system operates in the safest manner when the main power battery is connected. We strongly recommend customers to remove all propellers, use power supply from R/C system or flight pack battery, and keep children away during Gimbal calibration and parameter setup.
3 Please strictly follow these steps to mount and connect Gimbal on your aircraft, as well as to install the assistant software on your computer. Please respect the AMA s National Model Aircraft Safety Code. As DJI Innovations has no control over use, setup, final assembly, modification (including use of non-specified DJI parts motors, ESCs, propellers, etc.) or misuse, no liability shall be assumed nor accepted for any resulting damage or injury. By the act of use, setup or assembly, the user accepts all resulting liability. DJI assumes no liability for damage(s) or injuries incurred directly or indirectly from the use of this product. DJI and H3-2D are registered trademarks of DJI Innovations Names of product, brand, etc.
4 , appearing in this manual are trademarks or registered trademarks of their respective owner companies. This product and manual are copyrighted by DJI Innovations with all rights reserved. No part of this product or manual shall be reproduced in any form without the prior written consent or authorization of DJI Innovations. No patent liability is assumed with respect to the use of the product or information contained herein. Product Profile This product is an excellent Gimbal designed for AP. Excellent job can be done by this Gimbal . The Gimbal has built-in slip ring in the mechanical structure, preventing wire rod from winding up. It also has built-in independent IMU (Inertial Measurement Unit) module, special servos drive module, etc.
5 2013 DJI Innovations. All Rights Reserved. 3 In The Box Gimbal 1 The Gimbal has built-in special servos drive module, and independent IMU module. It controls both the tilt and the roll axis, to enhance the attitude stabilization. Damping Unit 1 Connect the aircraft and the Gimbal , in order to reduce the mechanical vibration. There are three types of Vibration Absorber, the White is softest, the Black is hardest, and the Grey is in the middle. It is recommended to use the White on DJI F450, not use any on DJI F550, and the DJI PHANTOM can use any type. Gimbal Controller Unit (GCU) 1 Connect the Gimbal controller to the autopilot system by CAN-Bus.
6 And Use the 3S~6S power cable to supply power for the GCU and Gimbal . Screw Package 1 : For fixing the camera to the Gimbal . : For fixing the Gimbal to the damping unit. M3x8 (with M3 nuts and M3 spacers): For mounting the damping unit to the aircraft. Gimbal Video signal Cable 1 For the Gimbal controller unit and your Wireless Video Transmission Unit connecting, transmitting the video signal. CAN-Bus Cable 1 Use CAN-Bus to communicate with the autopilot system. DJIDJI 8-Pin Cable 1 For the Gimbal and the GCU connecting, Spare Package 1 Spare Screw 2013 DJI Innovations. All Rights Reserved. 4 Index WARNING & DISCLAIMER.
7 2 PRODUCT PROFILE .. 2 IN THE BOX .. 3 INDEX .. 4 ASSEMBLY .. 5 Gimbal DESCRIPTION .. 5 STEP1. MOUNT THE Gimbal TO THE AIRCRAFT OR LANDING GEAR .. 5 STEP2. MOUNT THE CAMERA TO THE Gimbal .. 7 STEP3. DOUBLE CHECK .. 7 AUTOPILOT SYSTEM, GCU AND Gimbal WIRING .. 8 GCU PORT DESCRIPTION .. 8 STEP1. MOUNT THE GCU HORIZONTALLY OR VERTICALLY ON THE AIRCRAFT.. 8 STEP2. CONNECT GCU AND AUTOPILOT SYSTEM .. 8 STEP3. VIDEO SIGNAL TRANSMISSION .. 11 ASSISTANT .. 12 STEP1. INSTALL DRIVER AND SOFTWARE .. 12 STEP2. GUI .. 12 STEP3. CHANNEL SETTING .. 12 STEP4. FIRMWARE & SOFTWARE UPGRADE .. 13 TEST .. 14 STEP1. CHECK LIST BEFORE EVERY FLIGHT .. 14 STEP2. Gimbal TEST .. 14 APPENDIX .. 15 TROUBLE SHOOTING .. 15 SETTINGS USING WITH THE A2 FLIGHT CONTROL 15 SPECIFICATIONS.
8 16 2013 DJI Innovations. All Rights Reserved. 5 Assembly Gimbal Description Notes: (1) Mack sure nothing blocks the servo driver module rotation, to avoid Servo Driver Module damage. (2) Clear obstacle at once if the rotating Gimbal is blocked. Top oard of the Damping Unit BServo Driver Module(Roll) Camera Fixed MountingCamera Interface Servo Driver Module(Tilt) Port of 8-Pin CableTo GCU G8( )Camera Mounting Base Vibration AbsorberBottom oard of the Damping Unit B STEP1. Mount the Gimbal to the Aircraft or Landing Gear The following procedure applies to DJI F450, DJI other type of aircraft or to your own aircraft.
9 For DJI F450, there are diagrams for your reference. 1. Attach the Vibration Absorber to the Top Board of Damper Unit shown in 2. Mount the Top Board of Damper Unit to the Bottom Board of aircraft; fix the M3x8screws, M3 spacers and M3 nuts shown in 3. Plug one port of the 8-Pin cable into the 8-Pin port on the Gimbal shown in 4. Tighten the screws to fix the Gimbal to the Bottom Board of Damper Unit shown in the or Fig5, select one of the steps according the position of screw threads. 5. Attach the Vibration Absorber to the Bottom Board of Damper Unit shown in 6. Make sure the damping unit is horizontally mounted and both damping boards are paralleled to the bottom of the aircraft, further to make sure the Gimbal is precisely and firmly assembled.
10 Notes: 2013 DJI Innovations. All Rights Reserved. 6 (1) This product does not include any extra aircraft, landing gear or camera, please prepare them by yourself. (2) Make sure the Camera Mounting Base is pointing to the aircraft nose direction. (3) The Gimbal center of gravity has been set, whose position directly determine Gimbal performance. Please do not adjust the Gimbal center of gravity by yourself. (4) The Gimbal is high-precision controlled. Do not remove any other screws in the Gimbal , which may result in bad performance or even damage. (5) Do not unplug any cable attaching to the Gimbal ports, or even change the mechanical structure.