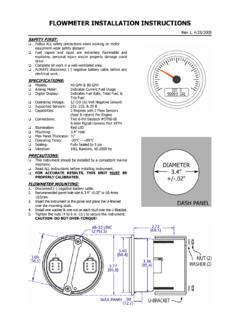
FLOWMETER INSTALLATION INSTRUCTIONS - …
FLOWMETER INSTALLATION INSTRUCTIONS - 2 - FLOWMETER WIRING CONNECTOR 1: Disconnect (-) negative battery cable before doing any electrical work.
Download FLOWMETER INSTALLATION INSTRUCTIONS - …

Information
Domain:
Source:
Link to this page:
Documents from same domain

NMEA 0183 GPS Receivers - Livorsi Marine
www.livorsi.comHIGHLIGHTS • 1Hz unit outputs NMEA0183 data at 4800 baud, 8 data bits, 1 stop bit, no parity (NMEA 0183 standard). • 10Hz unit outputs same
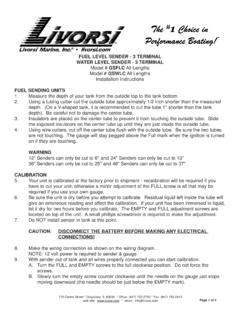
FUEL LEVEL SENDER - 3 TERMINAL WATER LEVEL …
www.livorsi.comFUEL LEVEL SENDER - 3 TERMINAL WATER LEVEL SENDER - 3 TERMINAL Model # GSFLC All Lengths Model # GSWLC All Lengths Installation Instructions FUEL SENDING UNITS 1. Measure the depth of your tank from the outside top to the tank bottom.

THROTTLES AND CONTROLS - Livorsi Marine
www.livorsi.comTHROTTLES AND CONTROLS Model # TH SERIES (All Configurations) Installation Instructions Thank you for choosing Livorsi Marine® controls. Your new marine engine controls feature a 1 year

VESSELVIEW INSTALLATION INSTRUCTIONS
www.livorsi.comVESSELVIEW INSTALLATION INSTRUCTIONS 90-898278002 MAY 2008 Page 3 / 17 4. Remove the template and insert the VesselView into the panel to ensure fit.
Livorsi DTS Controls Single/Dual Engine Digital …
www.livorsi.comLivorsi DTS Controls- Single/Dual Engine Installation May 2016 Page 6 of 12 . Installing the Control to the Console . 1. Secure the control to the console using 4 x #10 screws and rubber O-Rings.

TEMPERATURE GAUGE and SENDER - Livorsi Marine
www.livorsi.comTemperature Gauge and Senders Trouble Shooting STEP ONE(this usually solves the problem) - Before you do anything else, check for defective wiring or grounds, as …

DIESEL TACHOMETER with SENDER - Livorsi Marine
www.livorsi.comDIESEL TACHOMETER with SENDER Models #GL4000MSGD All Colors ... Mechanical Take-off Rubber Washer Adaptor Sending Coupling Unit 2 of 2 1. Thread adaptor coupling onto sending unit and tighten. 2. Place rubber washer in large end of adaptor coupling. 3. Insert square end of drive tip into sending unit.

Installation and Operation Manual - livorsi.com
www.livorsi.comInstallation and . Operation Manual. ... operation manual provides users with a resource to realize the full potential and capabilities of Vantage View® instrumentation. Covered in this manual are display options, menu navigation and : menu function usage.

Installation and Operation Manual - Livorsi Marine
www.livorsi.comInstallation and Operation Manual ... instructions. FWA Warning Gauge Installation Vantage View® Installation Manual. g Installation Guide ... Installation Guide • Fuel Sender Compatibility Float Arm and Fuel/Water Level Senders are compatible with the Vantage View system. As well as 3

Parameter Range Analog Input LCD Display Name
www.livorsi.com75 Vantage View® Operation Manual ... Engine Oil Temperature 1 175 65262 0-500 ºF Eng Oil Temp Engine Total Hours of Operation 247 65253 0-999999 Hours Engine Hours Engine Speed 190 61444 0-10,000 RPM Engine Speed Engine Exhaust Gas Temperature 173 65270 0-3000 ºF Exh Gas Temp.
Related documents

KEYLESS ENTRY and ALARM SYSTEM …
www.crimestopper.com4 WIRING GREEN WIRE: (-) NEGATIVE DOOR TRIGGER Identify the wire that reads ground when any door is open and 12 volts when all doors are closed.

MSD 6 Series Installation Instructions 6A, 6AL, 6T, …
www.g3ignition.comAUTOTRONIC CONTROLS CORPORATION • 1490 HENRY BRENNAN DR., EL PASO, TEXAS 79936 † (915) 857-5200 † FAX (915) 857-3344 MSD 6 Series Installation Instructions 6A, 6AL, 6T, 6BTM, 6TN, 6ALN Parts Included: 1 - MSD 6 Series Ignition 1 - …
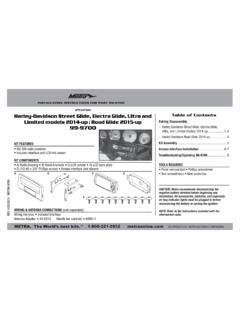
INSTALLATION INSTRUCTIONS FOR PART 99-9700
www.metraonline.com99-9700 6 • Provides accessory power (12-volt 10-amp) • High level speaker input • Retains balance and fade • Retains oil pressure and EITMS status

12-Volt Negative Ground Installation Instructions
www.pertronix.com15. If the gap is greater than 0.060” record what it is. The gap is adjusted by installing thin washers over the 6/32 studs between the magnet ring and advance mechanism plate.

12-Volt Negative Ground Installation Instructions
www.pertronix.com12-Volt Negative Ground Installation Instructions Page 1 of 4 ATION Beore ta eae rea te oo mortat ormato 99-599-5955 www.pertronix.com 1. The Ignitor is designed for 12-olt negative ground systems.
TECH SUPPORT 1-888-588-4506 ….WEB …
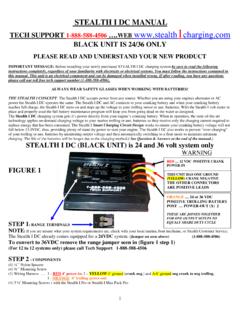
www.stealth1charging.com1 STEALTH I DC MANUAL TECH SUPPORT 1-888-588-4506 ….WEB www.stealth1charging.com BLACK UNIT IS 24/36 ONLY PLEASE READ AND UNDERSTAND YOUR NEW PRODUCT IMPORTANT MESSAGE: Before installing your newly purchased STEALTH I DC charging system be sure to read the following instructions …