The Atmel-ICE Debugger - Microchip Technology
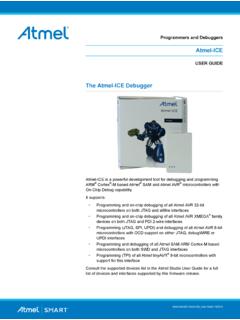
To assemble your Atmel-ICE into its default configuration, connect the 10-pin 50-mil IDC cable to the unit as shown below. Be sure to orient the cable so that the red wire (pin 1) on the cable aligns with the triangular indicator on the blue belt of the enclosure. The cable should connect upwards from the unit. Be
Download The Atmel-ICE Debugger - Microchip Technology

Information
Domain:
Source:
Link to this page:
Documents from same domain
Power Factor Correction in Power Conversion …
ww1.microchip.com© 2007 Microchip Technology Inc. DS01106A-page 2 AN1106 FIGURE 1: CURRENT WAVEFORMS WITH AND WITHOUT PFC These waveforms illustrate that …
2.7V to 5.5V Single Supply CMOS Op Amp
ww1.microchip.comMCP601/1R/2/3/4 DS21314G-page 2 © 2007 Microchip Technology Inc. 1.0 ELECTRICAL CHARACTERISTICS Absolute Maximum Ratings † VDD –VSS.....7.0V
Data Encryption Routines for PIC24 and dsPIC Device
ww1.microchip.com© 2006 Microchip Technology Inc. DS01044A-page 1 AN1044 INTRODUCTION Currently, there are three data encryption standards approved …
Using SAM-BA for Linux on SAMA5D3 Xplained
ww1.microchip.comAN-8995 – Using SAM-BA for Linux on SAMA5D3 Xplained: 42328A−06/2014 Page 5 of 19 2. Setup With Ubuntu distributions, a user has to be member of the dialout group to access serial devices like
MCP6021/1R/2/3/4 - Rail-to-Rail Input/Output, 10 …
ww1.microchip.com2001-2017 Microchip Technology Inc. DS20001685E-page 1 MCP6021/1R/2/3/4 Features • Rail-to-Rail Input/Output • Wide Bandwidth: 10 MHz (typical)
Low Quiescent Current LDO - Microchip Technology
ww1.microchip.com2005-2016 Microchip Technology Inc. DS20001826D-page 1 MCP1700 Features: • 1.6 µA Typical Quiescent Current • Input Operating Voltage Range: 2.3V to 6.0V
MCP1703 250 mA, 16V, Low Quiescent Current
ww1.microchip.com2010 Microchip Technology Inc. DS22049E-page 1 MCP1703 Features: • 2.0 µA Typical Quiescent Current • Input Operating Voltage Range: 2.7V to16.0V

MTCH6102 Low-Power Projected Capacitive Touch …
ww1.microchip.com2014 Microchip Technology Inc. DS40001750A-page 1 Description: Microchip’s MTCH6102 is a turnkey projected capacitive touch controller that simplifies adding
PIC32 GUI Development Board with Projected …
ww1.microchip.comPIC32 GUI Development Board with Projected Capacitance (PCAP) Touch Information Sheet Microchip Technology Inc.

RN4020 Bluetooth Low Energy Module User’s Guide
ww1.microchip.comRN4020 BLUETOOTH LOW ENERGY MODULE USER’S GUIDE 2014 Microchip Technology Inc. DS70005191B-page 7 Preface INTRODUCTION This chapter contains general information that will be useful to know before using the
Related documents
ANIMAL TRIBE – Build Your Own Totem Pole!
www.animaltribe.combutton. (If you experience printing problems, please refer to your printer’s operational manual.) 9) When your Totem document is finished printing, using your scissors, cut down the edges of all three totem animal cards as indicated to the right. Part Four: Assembling Your Totem Pole 1) Cut out all the parts from the “TotemPole

SDW 5000 Series - Sennheiser
assets.sennheiser.comDepending on the variant you can plug in the headset system to your fixed line phone and/or your computer. Via the Bluetooth dongle BtD 800 UsB you can connect mobile phones or Bluetooth headsets. Additionally you can plug a UsB headset or speakerphone in the UsB port or the busy light UI 10 BL in the back of the
User’s Guide
files.support.epson.comsupply specifications in your area, contact your local power company or consult your dealer. Connect all equipment to properly grounded electrical outlets. Avoid using outlets on the same circuit as photocopiers or air control systems that regularly switch on and off. Do not use a damaged or frayed power cord.

User’s Guide
files.support.epson.comsupply specifications in your area, contact your local power company or consult your dealer. Connect all equipment to properly grounded electrical outlets. Avoid using outlets on the same circuit as photocopiers or air control systems that regularly switch on and off. Do not use a damaged or frayed power cord.

CAUTION! – ALWAYS UNPLUG YOUR TREE FROM ITS POWER …
images.thdstatic.comAssembling the tree stand Step 1. Choose a location near a wall outlet. Step 2. Open the stand to a 90 degree angle until the hole lines up with the hole on the tube. Step 3. Screw an eye bolt into the hole. CAUTION! – ALWAYS UNPLUG YOUR TREE FROM ITS POWER SOURCE BEFORE ASSEMBLING OR DISASSEMBLING. Assembling the tree

CAUTION! – ALWAYS UNPLUG YOUR TREE FROM ITS POWER …
images.thdstatic.comAssembling the tree stand Step 1. Choose a location near a wall outlet. Step 2. Open the stand to a 90 degree angle until the hole lines up with the hole on the tube. Step 3. Screw an eye bolt into the hole. CAUTION! – ALWAYS UNPLUG YOUR TREE FROM ITS POWER SOURCE BEFORE ASSEMBLING OR DISASSEMBLING. Assembling the tree

Understanding the Results of Your Vark ... - Learning Center
learningcenter.unt.eduThe results of your VARK indicate your preferences but are not necessarily your strengths. Some preferences may change as you mature. Work experiences and life experiences will blur differences between preferences as you learn to use aural, visual, read/write and kinesthetic modes equally well. Preferences may also be masked by experiences.
Introduction Introduction to SketchUp
n3d.nd.eduDelete the guidelines using the edit menu. Then erase the highlighted lines below (one by one). Also erase the inner surface. Erase the inner surface. This can be done by right clicking on it and clicking Erase. Assembling the Monogram Create a guideline that is offset 0.168” to the left of the top left corner of the “N”. Then

Owner’s Manual
oldmedia.dyson.comJul 01, 2008 · Assembling 4 Using your DCO7 6 Washing your filter 8 Using the tools 10 Emptying the Clear binTM 12 Clearing blockages 14 Using and maintaining optional accessories 16 Troubleshooting tips 18 Limited warranty and Customer care 19 Contents Owner’s Manual Please read this guide carefully before use. Dyson Helpline contact us at1-866-693-9766 3
Reading DNA - University of Utah
teach.genetics.utah.edubackbone using toothpicks cut or broken in half. This forms a new mRNA copy of your DNA strand. b. Label this new strand mRNA-1 or mRNA-2 (the same number as your DNA strand) on the left end of the backbone. Reading a Copy of the DNA Instructions to Assemble a Protein – Translation The mRNA copy of DNA is essentially a recipe for assembling a ...