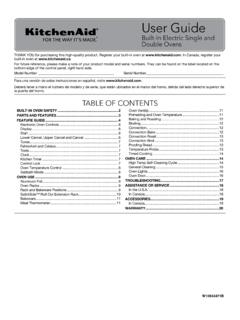
User Guide - KitchenAid
KEY FEATURE INSTRUCTIONS CLOCK/TOOLS Clock The Clock uses a 12-hour cycle. See the “Electronic Oven Controls” section. 1. Touch CLOCK/TOOLS. 2. Touch the “1” key to select Clock. Then touch the number keys to set the time of day. 3. Touch START. CLOCK/TOOLS Settings Enables you to personalize the audible tones and oven operation to suit ...
Download User Guide - KitchenAid

Information
Domain:
Source:
Link to this page:
Documents from same domain
Use & Care Guide - kitchenaid.com
www.kitchenaid.com3 INSTALLATION INSTRUCTIONS Installer: Leave Use and Care Guide with the homeowner. Homeowner: Keep Use and Care Guide for future reference and for local electrical inspector’s use, if required. Unpacking IMPORTANT: Do not grasp console to move compactor. Begin in the room where the compactor will be located. 1. Remove compactor from shipping carton.

KSMSFTA - kitchenaid.com
www.kitchenaid.comPrecise Heat Mixing Bowl, Ice Cream Maker, or the Pouring Shield. The Sifter+Scale attachment can be used in multiple ways: to weigh and sift ingredients while ... WARRANTY AND SERVICE KITCHENAID SIFTER+SCALE ATTACHMENT WARRANTY FOR THE 50 UNITED STATES, THE DISTRICT OF COLUMBIA, PUERTO RICO, AND CANADA

KITCHENAID ICE MAKER WARRANTY
www.kitchenaid.com19 KITCHENAID® ICE MAKER WARRANTY THREE YEAR LIMITED WARRANTY (PARTS AND LABOR) For three years from the date of purchase, when this major applia nce is installed, operated and maintained according to instructions

KITCHENAID DISHWASHER WARRANTY
www.kitchenaid.com21 KITCHENAID® DISHWASHER WARRANTY TWO YEAR LIMITED WARRANTY For two years from the date of purchase, when this major appliance is operated and maintained according to instructions attache d to or

BOWL LIFT STAND MIXER
www.kitchenaid.comreplacement stand mixer, use the carton and packing materials to pack up your “failed” stand mixer. In the carton, include your name and address on a sheet of paper along with a copy of the proof of purchase (register receipt, credit card charge slip, etc.). For a detailed explanation of warranty terms and conditions, including how to ...

STAND MIXER - KitchenAid
www.kitchenaid.comreplacement stand mixer, use the carton and packing materials to pack-up your “failed” stand mixer. In the carton, include your name and address on a sheet of paper along with a copy of the proof of purchase (register receipt, credit card charge slip, etc.). For a detailed explanation of warranty terms and conditions, including how to ...

Use & Care Guide
www.kitchenaid.comWhen using electrical appliances, basic safety precautions should always be followed, including the following: 1. Read all instructions. Misuse of appliance may result in personal injury. 2. To protect against risk of electrical shock, do not put Stand Mixer in water or other liquid. 3. This appliance can be used by children aged from 8 years

Owners Manual - KitchenAid
www.kitchenaid.comDrying - Rinse aid is essential. You must use a drying agent such as a rinse aid for good drying performance (sample included). Rinse aid along with the Heat Dry or ProDry™ option will provide best drying and avoid excessive moisture in the dishwasher interior. For best drying, use the Heat Dry or ProDry™ option. Dispensers vary by model

INSTALLATION INSTRUCTIONS 27 (68.6 CM) AND 30 (76.2 CM ...
www.kitchenaid.com4 Cabinet Dimensions - Double Ovens, Flush Installations A 253/ 8" (64.4 cm) minimum cutout depth is required. These dimensions will result in a 1/4" (6 mm) reveal on the top, a 1/4" (6 mm) reveal on the sides, and a 1/8" (3 mm) reveal on
TOUCH-ACTIVATED ELECTRONIC INDUCTION COOKTOP
www.kitchenaid.comThe touch-activated electronic controls offer a variety of heat settings for optimal cooking results. When melting foods such as chocolate or butter, the surface cooking area can be set to the Melt function for minimal cooking power. For maximum surface cooking power, all cooktop touch-activated electronic controls can be set to Performance Boost
Related documents

Instruction manual of Digital Alarm Clock(MX6666)
images.elmarc.nlInstruction manual of Digital Alarm Clock NIKKEI NR05WE Congratulations on your purchase of the MX6666 Digital Alarm Clock. Features of model MX6666 include: - LED Backlight for night viewing - Single Alarm with Snooze function MAIN FEATURE A. SNOOZE-LIGHT BUTTON -Press to turn on the backlight for 5 seconds
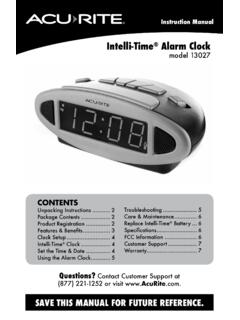
Intelli-Time Alarm Clock - AcuRite
www.acurite.comUnpacking Instructions . Remove the protective film that is applied to the LCD screen prior to using this product. Locate the tab and peel off to remove. Package Contents . 1. Alarm clock 2. Instruction Manual . IMPORTANT. PRODUCT MUST BE REGISTERED TO RECEIVE WARRANTY SERVICE

User Guide - JennAir
www.jennair.comIn some cooking modes, the user can set the cooking time while other modes have fixed times. To set a cooking time, follow these instructions. At any time, touch BACK to return to the previous screen. Touch CANCEL for the selected oven to cancel the current cycle and return to the main menu. 1. To set a cook time, first start a cooking cycle. NOTE:

TABLE OF CONTENTS TABLE OF CONTENTS 1 ... - MyFreeStyle
www.myfreestyle.comSet Day • The day blinks. Press or to set the day • Press to continue 8. Set Year • Press or to set the year • Press to save. Setup complete day month day month Performing a Blood Glucose Test 1. The test is complete when the result appears on the Open the foil test strip packet at the notch and tear down to remove the test strip. 2.

DAY CLOCK USER INSTRUCTIONS - TabTimer
www.tabtimer.com.auDAY CLOCK USER INSTRUCTIONS Making Adjustments: Press the button to display the on screen menu: Please Note: Changes can only be made to the line when highlighted in brackets and underlined. Use the UP or DOWN button to highlight the line to apply changes. Use the LEFT or RIGHT buttons to underline the text for adjustment.
ELECTRIC RANGE USER INSTRUCTIONS - Whirlpool
www.whirlpool.comKEYPAD FEATURE INSTRUCTIONS CLOCK Clock The Clock uses a 12-hour cycle. 1. Check that the oven is off. 2. Press CLOCK. 3. Press TEMP/TIME “up” or “down” arrow pads to set the time of day. 4. Press CLOCK or START. OVEN LIGHT Oven cavity light Depending on your model, the oven light may be co ntrolled by a keypad on the oven control panel
ELECTRIC DOUBLE OVEN RANGE USER INSTRUCTIONS
www.whirlpool.comKeypad Feature Instructions Clock Clock This clock can use a 12- or 24-hour cycle. See “Electronic Oven Controls” section. 1. Press the Clock keypad. 2. Press “3” for AM or “6” for PM. 3. Press the number keypads to set the time of day. 4. Press the Clock keypad, START UPPER or START LOWER. Oven Light Oven cavity light