Transcription of Archer C60 User Guide - TP-Link
1 1910011738 Archer C60 User GuideAC1350 Wireless Dual Band RouterContentsAbout This Guide ..1 Chapter 1. Get to Know About Your Router .. 21. 1. Product Overview .. 31. 2. Panel Layout .. 31. 2. 1. Top View.. 31. 2. 2. The Back Panel .. 4 Chapter 2. Connect the Hardware.. 62. 1. Position Your Router.. 72. 2. Connect Your Router .. 7 Chapter 3. Log into Your Router.. 10 Chapter 4. Set Up Internet Connection .. 124. 1. Use Quick Setup Wizard .. 134. 2. Manually Set up Your Internet Connection .. 134. 3. Set Up an IPv6 Internet Connection.. 17 Chapter 5. Guest Network .. 215. 1. Create a Network for Guests .. 225. 2. Customize Guest Network Options.. 23 Chapter 6. Parental Controls.. 24 Chapter 7. QoS.. 287. 1. Prioritize Internet Traffic with QoS.. 29 Chapter 8. Network Security.. 338. 1.
2 Protect the Network from Cyber Attacks .. 348. 2. Access Control .. 358. 3. IP & MAC Binding.. 37 Chapter 9. NAT Forwarding.. 389. 1. Share Local Resources on the Internet by Virtual Servers.. 399. 2. Open Ports Dynamically by Port Triggering.. 409. 3. Make Applications Free from Port Restriction by DMZ .. 419. 4. Make Xbox Online Games Run Smoothly by UPnP .. 42 Chapter 10. VPN Server.. 4410. 1. Use OpenVPN to Access Your Home Network.. 4510. 2. Use PPTP VPN to Access Your Home Network.. 46 Chapter 11. Customize Your Network Settings .. 5211. 1. Change the LAN Settings .. 5311. 2. Configure to Support IPTV Service .. 5311. 3. Specify DHCP Server Settings.. 5511. 4. Set Up a Dynamic DNS Service Account.. 5611. 5. Create Static Routes .. 5711. 6. Specify Wireless Settings .. 5911. 7. Use WPS for Wireless Connection.
3 6111. 7. 1. Set the Router s PIN .. 6111. 7. 2. Use the WPS Wizard for Wi-Fi Connections .. 61 Chapter 12. Manage the Router .. 6212. 1. Set Up System Time .. 6312. 2. Test the Network Connectivity.. 6412. 3. Upgrade the Firmware.. 6512. 3. 1. Online Upgrade.. 6612. 3. 2. Local Upgrade .. 6612. 3. 3. Restore Interrupted Upgrade after Power Failure.. 6712. 4. Backup and Restore Configuration Settings .. 6712. 5. Change the Administrator Account .. 6912. 6. Password Recovery.. 6912. 7. Local Management.. 7012. 8. Remote Management .. 7112. 9. System Log .. 7212. 10. Monitor the Internet Traffic Statistics.. 7412. 11. Control LEDs .. 75 FAQ ..771 About This GuideThis Guide is a complementation of Quick Installation Guide . The Quick Installation Guide instructs you on quick Internet setup, and this Guide provides details of each function and shows you the way to configure these functions appropriate to your needs.
4 When using this Guide , please notice that features of the router may vary slightly depending on the model and software version you have, and on your location, language, and Internet service provider. All screenshots, images, parameters and descriptions documented in this Guide are used for demonstration this Guide the following conventions are used:ConventionDescriptionBlue ItalicHyperlinks are in blue italic. You can click to redirect to a website or a specific section. BlueContents to be emphasized and texts on the web page are in blue, including the menus, items, buttons, etc.>The menu structures to show the path to load the corresponding page. For example, Advanced > Wireless > MAC Filtering means the MAC Filtering function page is under the Wireless menu that is located in the Advanced :Ignoring this type of note might result in a malfunction or damage to the :Indicates important information that helps you make better use of your on the web page click to edit the corresponding entry.
5 Click to delete the corresponding entry. click to enable or disable the corresponding entry. click to view more information about items on the Info The latest software, management app and utility can be found at Download Center at The Quick Installation Guide (QIG) can be found where you find this Guide or inside the package of the router. Specifications can be found on the product page at A Technical Support Forum is provided for you to discuss our products at Our Technical Support contact information can be found at the Contact Technical Support page at 1 Get to Know About Your RouterThis chapter introduces what the router can do and shows its appearance. This chapter contains the following sections: Product Overview Panel Layout3 Chapter 1 Get to Know About Your Router1.
6 1. Product OverviewThe TP-Link router is designed to fully meet the need of Small Office/Home Office (SOHO) networks and the users demanding higher networking performance. The powerful antennas ensure continuous Wi-Fi signal to all your devices while boosting widespread coverage throughout your home, and the built-in Ethernet ports supply high-speed connection to your wired , it is simple and convenient to set up and use the TP-Link router due to its intuitive web interface and the powerful Tether 2. Panel Layout1. 2. 1. Top ViewThe router s LEDs (view from left to right) are located on the front panel. You can check the router s working status by following the LED Explanation ExplanationNameStatusIndication (Power)OnSystem initialization initialization or firmware upgrade is in process.
7 Do not disconnect or power off the is 1 Get to Know About Your RouterLED ExplanationNameStatusIndication ( Wireless)OnThe wireless band is working GHz wireless band is disabled. ( 5 GHz Wireless)OnThe 5 GHz wireless band is working 5 GHz wireless band is disabled. (Ethernet)OnAt least one Ethernet port is Ethernet port is connected. (Internet)Green OnInternet is OnThe router s Internet port is connected, but the Internetis not router s Internet port is not connected. (WPS)On/OffTurns on when a WPS connection is established, and goes off about 5 minutes wireless device is trying to connect to the network via WPS. This process may take up to 2 2. 2. The Back PanelThe following parts (view from left to right) are located on the rear panel. ItemDescriptionPower PortFor connecting the router to a power socket via the provided power 1 Get to Know About Your RouterItemDescriptionPower On/Off ButtonPress this button to power on or off the On/Off ButtonPress this button for about 2 seconds to turn on or off the wireless function of your this button, and immediately press the WPS button on your client device.
8 The WPS LED of the router should change from flashing to solid on, indicating successful WPS ButtonPress this button for about 5 seconds to reset the router to its factory default PortFor connecting to a DSL/Cable modem, or Ethernet Ports (1/2/3/4)For connecting your PCs or other wired network devices to the routerAntennasUsed for wireless operation and data transmitting. Upright them for the best Wi-Fi 2 Connect the HardwareThis chapter contains the following sections: Position Your Router Connect Your Router7 Chapter 2 2. 1. Position Your Router The Product should not be located where it will be exposed to moisture or excessive heat. Place the router in a location where it can be connected to the various devices as well as to a power source. Make sure the cables and power cord are safely placed out of the way so they do not create a tripping hazard.
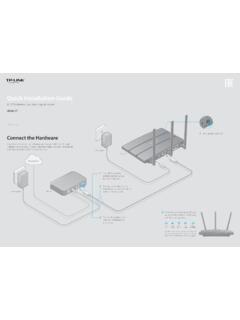
9 The router can be placed on a shelf or desktop. Keep away from the strong electromagnetic radiation and the device of electromagnetic 2. Connect Your Router1. Follow the steps below to connect your your Internet connection is through an Ethernet cable from the wall instead of through a DSL / Cable / Satellite modem, connect the Ethernet cable directly to the router s Internet port, then follow step 4 and 5 to complete the hardware AdapterPower Adapter1 ) Turn off the modem, and remove the backup battery if it has ) Connect the modem to the Internet port on your router with an Ethernet ) Turn on the modem, and then wait about 2 minutes for it to 2 Smart Device4 ) Turn on the ) Verify that the hardware connection is correct by checking these : If LED and 5 GHz LED are off, press the WPS/Wi-Fi On/Off button for about 2 seconds, and then check the LEDs again in a few Connect your computer to the router.
10 Method 1: WiredTurn off the Wi-Fi on your computer and connect the devices as shown Cable Method 2: Wirelessly1 ) Find the SSID (Network Name) and Wireless Password/PIN printed on the label at the bottom of the ) Click the network icon of your computer or go to Wi-Fi Setting of your smart device, and then select the SSID to join the are availableWireless Network ConnectionConnect automaticallyConnect TP-LINK_XXXXTP-LINK_XXXX_5 GWi-FiWi-Fi TP-LINK_XXXXTP-LINK_XXXX_5 GCHOOSE A < SettingsSmart DeviceComputer Method 3: Use the WPS buttonWireless devices that support WPS, including Android phones, tablets, most USB network cards, can be connected to your router through this method. (WPS is not supported by iOS devices .)Note:The WPS function cannot be configured if the wireless function of the router is disabled.