Transcription of CODE-HOPING REMOTE - Centurion Systems
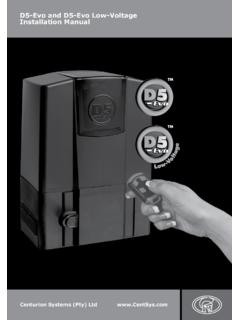
1 The nova system incorporates code-hopping TMtechnology (Keeloq encryption) to offer the ultimate security in a REMOTE is NOT necessary to open this transmitter to code the unit as it already has a unique code. Centurion Systems manufactures a range of different receivers that operate with its nova transmitters: Single channel nova receiver Multichannel nova receiver nova VOYAGER receiver SUPA nova multi-user receiver Onboard nova receivers that are incorporated into the following products: VECTOR2 swing gate operator D5-Evo sliding gate operator D10 sliding gate operator SECTOR traffic barrier G2 intercom system XTrac garage door operatorTo make this unit functional, the nova receiver unit must memorize the nova REMOTE transmitter s unique code as described in the following procedures.
2 Please note that each button of a multi-button transmitter transmits its own unique code and the receivers referred to above, are limited in the number of transmitter codes that can be learned. This is often referred to as self-learning memory capacity. Refer to the respective receiver for more details. If you need to learn the transmitter into the SUPA nova multi-user receiver or an onboard receiver, please refer to the installation manual of the product, or visit to view or download a copy. The instructions are often mentioned under the controller features , or the programming sections of these installation manuals.
3 Learning/Creating the master transmitter (applicable to new or erased* units):1. Open the receiver unit. Ensure that the jumper is not bridging J1 or J2. Store the jumper on one of the pins. 2. The first transmitter that is learned into the nova VOYAGER receiver (with a completely clear or erased memory) becomes the master transmitter. With the nova VOYAGER plugged into or connected to the motherboard of the operator, press and hold any nova transmitter button down for at least five The red LED will now The operator is triggered, indicating that the transmitter button has been This transmitter is now the master transmitter.
4 Mark the transmitter clearly as master transmitter as it will be required whenever new transmitters are to be added to the receiver s the transmitter(s) for pulsed operation: 1. Open the receiver unit, and with power on, bridge the learn/J1 pins with the jumper The red LED will now Press the required button on the nova transmitter. The red LED will flash once, indicating that the transmitter button has been learned. If you need to learn further buttons or ` transmitters, repeat the procedure as in Step 3. 4. Once the LED has confirmed that the transmitter button has been learned, remove the jumper from the learn/J1 pins and store on one of the pins.
5 5. Your transmitter will now activate the receiver, and your system is ready for Single and multichannel nova receiverReceiver may be mounted loose or in protective housing, internal or external to the operatorReceiver may be mounted loose or in protective housing, Receiver may be mounted loose or in protective housing, internal or external to the operatorinternal or external to the operatorReceiver may be mounted loose or in protective housing, internal or external to the operator2. nova VOYAGER receiverIMPORTANT NOTICE: When learning a transmitter into a multichannel nova receiver, the transmitter button can only be learned if the button number matches the channel number of the receiver, button one of a transmitter (single or multi-button) can only be learned to operate channel one of a receiver.
6 Similarly button two of a multi-button transmitter can only be learned to operate channel two of a receiver, etc. For instructions on setting latching operation and erasing the receiver memory of a single channel or multichannel nova receiver, please refer to the instructions provided with the respective receiver, or visit to view or download a copy. continued overleafSingle channel Single channel nova receiverNOVA receiverSingle channel nova receiverNOVA VOYAGER receiverNOVA VOYAGER receiverpost September 2007post September 2007 nova VOYAGER receiverpost September 2007 Multichannel Multichannel nova receiverNOVA receiverMultichannel nova receiverNOVA VOYAGER receiverNOVA VOYAGER receiverpre September 2007pre September 2007 nova VOYAGER receiverpre September 2007 Look for a RELAY on the boardto confirm single channel RxMake certain thatthere is NO relay on the board toconfirm type of RxNOVA Transmitterinstructions
7 InsertCODE-HOPINGREMOTECONTROLSL earning additional transmitter buttons:1. Press any button on the master transmitter for at least ten flashes of the red LED. If the receiver is not visible, count at least ten seconds. After at least ten seconds, release the master transmitter button (The receiver will not enter learn mode if this button is pressed for more than twenty seconds).2. The receiver is now in learn mode, and will remain so for ten seconds. The red LED will remain on during this time3. Press the required button on the nova transmitter during this time and it will be learned into the nova VOYAGER s memory.
8 Each time a button is pressed, the learn time is extended for another ten Ten seconds after the last transmitter button has been pressed, the red LED will turn off, indicating that the nova VOYAGER receiver has exited learn mode.*Erasing the nova VOYAGER receiver memory1. Bridge pins J1 or J2 with the jumper The red LED will flash eleven times. Removing the jumper during this time will cancel the erase After eleven flashes, the red LED will remain on. 4. Remove the jumper to completely erase* the receiver to create a new master transmitter (if the existing master transmitter is mislaid):1.
9 The master transmitter can be identified by looking at the red LED when pressing any transmitter button on the master transmitter. The red LED will give one long flash, followed by one short flash to indicate a master If the master transmitter is lost, the only way to add more transmitters is to first erase the receiver s memory, and then learn in a new master transmitter. Unfortunately, all existing buttons will need to be Rotate the inner casing, as shown in Figure 1, and remove it from the outer clip (Figure 2).2. Using a coin, separate the two halves of the case as shown in Figure Replace the battery with type GP23 or Pay attention to the battery s positive and negative terminals ensuring that the new battery is correctly inserted (See Figure 4).
10 Instructions to replace the nova REMOTE transmitter batteryFigure 1 Figure 2 Figure 3 Figure 4 Operating frequencyFrequency stabilityPower sourceOperating voltageMinimum operating voltageOperating currentTransmit indicationOperating temperature rangeDimensions (LxBxH)Mass (including battery) nova REMOTE transmittertechnical 12V alkaline battery12V DC5V DC7mAGreen LED-15 C to 50 C59mm x 35mm x 16mm38 gramsFCC information to users USA and Canada only where a FCC ID number is inscribed on the transmitter, the following information is applicable to users:FCC Label @ FCC and Class B Unintentional radiators:This equipment has been tested and found to comply with the limits for Class B digital devices, pursuant to Part 15 of the FCC Rules.
