Transcription of D10 and D10 Turbo Installation Manual - Centurion …
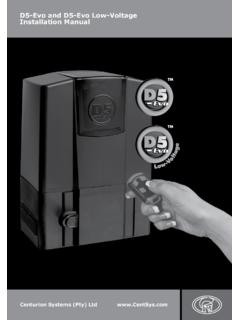
1 D10 and D10 Turbo Installation Manual INDUSTRIALSLIDING GATEOPERATORTMTMC ompany ProfileCompany ProfileCenturion Systems (Pty) Ltd reserves the right to make changes to the products described in this Manual without notice and without obligation of Centurion Systems (Pty) Ltd to notify any persons of any such revisions or changes. Additionally, Centurion Systems (Pty) Ltd makes no representations or warranties with respect to this part of this document may be copied, stored in a retrieval system or transmitted in any form or by any means electronic, mechanical, optical or photographic, without the express prior written consent of Centurion Systems (Pty) testing of productsIn-houseR & Ddevelopmentteam Manufacture tointernational quality standardISO 9001:2008 1986 199019951999 Competent after-sales technical supportfrom 07h00 - 18h00 Monday to FridayCenturion SystemstodaySales and support throughout Southern Africa and over 50 countries worldwide Contents IMPORTANT SAFETY INSTRUCTIONS page 3 Mechanical Setup Electrical Setup Commissioning and Handover 1.
2 Declaration of Conformity 2. General Description Lightning Protection Theft Protection3. Specifications Physical Dimensions Technical Specifications Fuse Protection 4. Icons used in this booklet5. Product Identification 6. Required Tools and Equipment 7. Preparation of Site General considerations for the installations Endstops Guide-rollers and anti-lift bracket Starting and running forces 8. Cabling Requirements 9. Lubrication10. Operator Installation 11. Electrical Setup12. Wiring Diagram for Closing Safety Beam13. Wiring Diagram For opening Safety Beam14. Wiring Diagram for External Radio Receiver and Loop Detector15. Wiring Diagram for other Inputs16. Mains Supply, Battery, Charger and Pillar Light Connections17. Earthing for Effective Lightning Protection18. Commissioning the System Setting the gate limits19.
3 How to set up additional features on the D10/D10 Turbo controller20. Menu Navigation Map21. Controller Features 22. Factory Defaults Schedule 23. Description of Terminal Functions 24. Diagnosticspage 5page 6page 6page 7page 8page 8page 8page 9page 9page 10page 11page 12page 12page 13page 14page 15page 16page 17page 18page 28page 29page 30page 31page 32page 33page 34page 35page 35page 36page 37page 40page 53page 55page 58page 1page 2page 2 Diagnostic LEDs Gate Status LED LCD Display Buzzer Feedback25. Fault-finders Guide 26. Manual Operation Manual release operation Manual release latching27. Installation Handoverpage 58page 58page 59page 60page 61page 65page 65page 65page 66 Mechanical SetupHeed necessary site considerations page 12 Check cabling requirementspage 15 Gather required tools and equipment page 11 Secure foundation plate page 20 Add oil to gearboxpage 16 Mount gearboxpage 21 Mount rackpage 23 Mount origin markerpage 26 Apply warning decalspage 27 These abbreviated instructions are for the experienced installer who needs a checklist to get a standard Installation up and running in the minimum of Installation features and functions are referred to later in this all wiring step10 Electrical Setupst ep11 Set gate end-of-travel limitsstep13 Carry out professional handover to client Commissioning and Handoverstep12 Set additional features via the menus.
4 If requiredWarnings for the installerCAREFULLY READ AND FOLLOW ALL INSTRUCTIONS before beginning to install the product. All Installation , repair, and service work to this product must be carried out by a suitably qualified person Do not activate your gate opener unless you can see it and can determine that its area of travel is clear of people, pets, or other obstructions NO ONE MAY CROSS THE PATH OF A MOVING GATE. Always keep people and objects away from the gate and its area of travel NEVER LET CHILDREN OPERATE OR PLAY WITH THE GATE CONTROLS Secure all easily accessed gate opener controls in order to prevent unauthorized use of the gate Do not in any way modify the components of the automated system Do not install the equipment in an explosive atmosphere: the presence of flammable gasses or fumes is a serious danger to safety Before attempting any work on the system, cut electrical power to the operator and disconnect the batteries The mains power supply of the automated system must be fitted with an all-pole switch with contact opening distance of 3mm or greater.
5 Use of a 5A thermal breaker with all-pole circuit break is recommended Make sure that an earth leakage circuit breaker with a threshold of 30mA is fitted upstream of the system Never short circuit the battery and do not try to recharge the batteries with power supply units other than that supplied with the product, or by Centurion SystemsIMPORTANTS afety InstructionsATTENTIONTo ensure the safety of people, it is important that you read all the following instructions. Incorrect Installation or incorrect use of the product could cause serious harm to installer, being either professional or DIY, is the last person on the site who can ensure that the operator is safely installed, and that the whole system can be operated safely. Make sure that the earthing system is correctly constructed, and that all metal parts of the system are suitably earthed Safety devices must be fitted to the Installation to guard against mechanical movement risks, such as crushing, dragging and shearing It is recommended that at least one warning indicator light be fitted to every system Always fit the warning signs visibly to the inside and outside of the gate The installer must explain and demonstrate the Manual operation of the gate in case of an emergency, and must hand the User Guide over to the user Explain these safety instructions to all persons authorized to use this gate, and be sure that they understand the hazards associated with automated gates Do not leave packing materials (plastic, polystyrene, etc.)
6 Within reach of children as such materials are potential sources of danger Dispose of all waste products like packaging materials, worn out batteries, etc. according to local regulations Always check the obstruction detection system, and safety devices for correct operation Centurion Systems does not accept any liability caused by improper use of the product, or for use other than that for which the automated system was intended This product was designed and built strictly for the use indicated in this documentation. Any other use, not expressly indicated here, could compromise the service life/operation of the product and/or be a source of dangerEverything not expressly specified in these instructions is not 41. Declaration of Conformitypage 5 Manufacturer: Centurion Systems (Pty) Ltd. Unit 13 Production Park Intersection Newmarket Road & Epsom Avenue North Riding Gauteng South AfricaDeclares that the product:Product name: D10/D10 Turbo Sliding gate operatorConforms with the following specifications:Safety: SANS 60335-1:2007 IEC 60335-1:2006 Emissions: CISPR 11 CLASS A - Radiated and conducted Interference field strength (emission tests) 150 KHz TO 6 GHz Immunity: IEC 61000-4-2 Electrostatic discharge IEC 61000-4-3 Radiated immunity 80 MHz TO 1000 MHz IEC 61000-4-4 Electrical fast transients/burst IEC 61000-4-5 Surges IEC 61000-4-6 Conducted immunity 150 KHz TO 80 MHz IEC 61000-4-11 Voltage dips and interruptionStandard to which conformity is declared: IEC 60335-1:2006 Safety IEC 61000-6-4:2006 Emissions IEC 61000-6-2.
7 2005 ImmunitySigned at North Riding, South Africa on April 14, 2010 Ian RozowskyResearch & Development D10 is a heavy duty sliding gate operator designed to open and close industrial sliding gates weighing up to D10 Turbo is perfectly suited for sites with lighter gates requiring a high number of operations per day, and can reach almost double the speed of the standard D10. However, it is not recommended for gates weighing more than 240kg, as the inertia generated by heavier loads might prove detrimental to the gearbox at such high speeds. A die cast aluminium gearbox, coupled to a powerful 24V DC motor and switch-mode charger, make the D10/D10 Turbo the automatic choice for townhouse complexes and office parks. Gate travel limits are managed by an opto-electronic system, comprising a gate-mounted origin magnet and an internal rotary encoder.
8 This system yields precise and repeatable control over gate position. The gearbox of the D10 Turbo utilises a true or full involute gear instead of a helical gear, which means that there is a larger contact area with the worm shaft, ensuring much greater load bearing capabilities. The standard D10 uses a 34 tooth internal gear and a 17 tooth output pinion, whereas the D10 Turbo uses a 22 tooth internal gear and a 20 tooth output features of the D10/D10 Turbo logic controller include: Interactive graphical user interface via a backlit LCD display Automated setup of gate endpoints (limits) Fail-safe collision detection and auto reverse (adjustable sensitivity) Smooth, adjustable start/stop (ramp-up/ramp-down) Multiple operational modes Selectable, adjustable Autoclosing Pedestrian (partial) opening Positive Close Mode Independent safety inputs for opening and closing beams Automatic beam test for both opening and closing beams Advanced beam alarm functions Advanced lightning/surge protection Timed courtesy light output Multiple pre-flashing modes Independently adjustable motor speed in both opening and closing directionsTM Onboard Centurion rolling code (Keeloq encryption) radio receiver with full channel mapping capability (limited to 500 buttons) Onboard ChronoGuard (patent pending)
9 Timer for timed activation of physical inputs or outputs and time-barring of physical inputs or outputs and remote controlsLightning Protection The electronic controller utilises the same proven surge protection philosophy that is used in all Centurion products. While this does not guarantee that the unit will not be damaged in the event of a lightning strike or power surge, it greatly reduces the likelihood of such damage occurring. The earth return for the surge protection is provided via the mains power supply earth. 2. General Description page 6In order to ensure that the surge protection is effective, it is essential that the unit is properly earthed. Theft ProtectionWhile care has been taken in the design of the D10/D10 Turbo to prevent unauthorized removal (theft) of the unit, an optional steel theft-resistant cage is also available for added peace of mind.
10 Page 7220V AC 10%, 50Hz24V DCBattery driven (standard capacity - 2 x 7Ah) 2A @ m/minLockable lever with key release75045%87693. SpecificationsFIGURE 1. OVERALL DIMENSIONS384mm300mm340mm (theft-resistant cage)234mm67mmTechnical SpecificationsPhysical Dimensionspage 8 Input voltageMotor voltageMotor power supplyBattery chargerCurrent consumption (mains)Current consumption (motor at rated load)Operator push force - startingOperator push force - ratedGate mass - maximumGate length - maximumGate speed (varies with load) Manual overrideMaximum numbers of operations per dayDuty cycle - mains presentOperations in standby with 7Ah battery half day full dayD10D10 Turbo220V AC +/- 10% @ 50Hz24V DCBattery driven (standard capacity - 2 x 7Ah)2A @ lever with key release75025%5837page 9 Based on 6m gate, no accessories fitted, such as infrared beamsFuse ProtectionThe following protection fuses are provided on the system.
