Transcription of Cut Cuitng - Metra Online
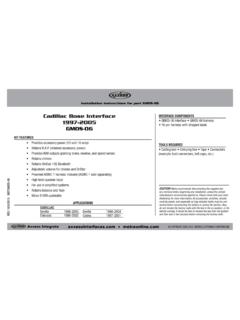
1 Attention! Let the vehicle sit with the key out of the ignition for a few minutes before removing the factory radio. When testing the aftermarket equipment, ensure that all factory equipment is connected before cycling the key to COPYRIGHT 2018 Metra ELECTRONICS CORPORATION REV. 9/28/18 INSTGMOS-MOST-02 INTERFACE FEATURESINTERFACE COMPONENTSTOOLS REQUIRED Crimping tool and connectors, or solder gun, solder, and heat shrink Small flat blade screwdriver Tape Wire cutter Zip tiesTABLE OF CONTENTSC onnections ..2-3 Installation ..3 Programming ..4 Audio level adjustment ..4GM MOST Amplifier Interface 2014-up*APPLICATIONS Provides accessory power (12-volt 10-amp) Maintains the retained accessory power ( ) feature Retains OnStar / OE Bluetooth Retains warning chimes Provides NAV outputs (parking brake, reverse, speed sense) Pre-wired ASWC-1 harness (ASWC-1 sold separately)
2 Retains the factory backup camera Used in MOST amplified applications Retains balance Micro B USB updatableCHEVROLETC orvette 2014-upImpala 2014-up GMOS-MOST-02 interface GMOST-MOST-02 harness 16-pin harness with stripped leads Backup camera harness 10-pin jumper harness*Visit for up-to-date vehicle specific the 16-pin harness with stripped leads to the aftermarket radio: Connect the Red wire to the accessory wire. Note: If installing an ASWC-1 (sold separately), there will be an accessory wire there to connect as well. Connect the Blue/White wire to the amp turn on wire. This wire must be connected to hear sound from the factory amplifier.
3 If the aftermarket radio has an illumination wire, connect the Orange/White wire to it. If also installing an ASWC-1 (sold separately), connect the Brown wire to the Brown wire in the 12-pin pre-wired ASWC-1 harness. Connect the Gray wire to the right front positive speaker output. Connect the Gray/Black wire to the right front negative speaker output. Connect the White wire to the left front positive speaker output. Connect the White/Black wire to the left front negative speaker output. Connect the Green wire to the left rear positive speaker output. Connect the Green/Black wire to the left rear negative speaker output. Connect the Purple wire to the right rear positive speaker output.
4 Connect the Purple/Black wire to the right rear negative speaker following (3) wires are only for multimedia/navigation radios that require these wires. Connect the Blue/Pink wire to the VSS/speed sense wire. Connect the Green/Purple wire to the reverse wire. Connect the Light Green wire to the parking brake the GMOS-MOST-02 harness to the aftermarket radio: Connect the Black wire to the ground wire. Connect the Yellow wire to the battery wire. Connect the Brown wire, to the Brown wire from the 16-pin harness with stripped leads. Disregard the Red wire, it will not be used in this application. Disregard the Red & White RCA jacks, they will not be used in this application.
5 12-pin pre-wired ASWC-1 harness:This harness is to be used along with the ASWC-1 (sold separately) to retain steering wheel audio controls. If the ASWC-1 is not being used, disregard this harness. If it will be used, please refer to the ASWC-1 instructions for radio connections and programming. Disregard the harness that comes with the ASWC-1. Connect the Red wire to the accessory wire. Connect the Green/Black wire, to the Green/Black wire in the 10-pin Black connector located in the steering column. (Figure A)(Figure A)Green/Black wireContinued on the next page323 CONNECTIONS (CONT.)INSTALLATIONDIN jack: Disregard the DIN jack, it will not be used in this : The relay attached to the GMOS-MOST-02 harness is only for audible turn signal clicks.
6 No extra steps are required to retain this feature, so leave the relay the backup camera harness to the aftermarket radio: If the vehicle is equipped with a factory backup camera, connect the Yellow RCA jack to the backup camera the key in the off position: Locate the radio brain and Human Machine Interface module (HMI):Corvette: Radio Brain: Passenger foot-well HMI: Left side of dashImpala: Radio Brain & HMI: Under passenger side dashboard Connect the GMOS-MOST-02 harness to the 20-pin Gray connector, and 8-pin Light Gray connector, removed from the radio brain. Connect the backup camera harness to the 12-pin Gray connector removed from the HMI module.
7 Connect the 16-pin harness with stripped leads, and the GMOS-MOST-02 harness, into the GMOS-MOST-02 interface. If the vehicle is equipped with a media player, connect the 10-pin jumper harness to the connector removed from the media player. Note: If also installing an ASWC-1, connect it after you program and test the GMOS-MOST-02, with the key in the off IS POWERE nhance your installation and fabrication skills by enrolling in the most recognized and respected mobile electronics school in our onto or call 800-354-6782 for more information and take steps toward a better tomorrow. Metra recommends MECP certified techniciansIMPORTANTIf you are having difficulties with the installation of this product, please call our Tech Support line at 1-800-253-TECH.
8 Before doing so, look over the instructions a second time, and make sure the installation was performed exactly as the instructions are stated. Please have the vehicle apart and ready to perform troubleshooting steps before COPYRIGHT 2018 Metra ELECTRONICS CORPORATION REV. 9/28/18 INSTGMOS-MOST-02 INSTALLATION INSTRUCTIONSGMOS-MOST-02 Attention! If the interface loses power for any reason, the following steps will need to be performed again. Also, if installing an ASWC-1, connect it after you initialize and test the interface/ radio, with the key in the off position. Turn the key (or push-to-start button) to the ignition position and wait until the radio comes on.
9 Note: If the radio doesn t come on within 60 seconds, turn the key to the off position, disconnect the interface, check all connections, reconnect the interface, and then try again. Turn the key to the off position, and then to the accessory position. Test all functions of the installation for proper operation, before reassembling the dash. With the vehicle and radio turned on, turn the volume up 3/4 of the way. Locate the end of the GMOS-MOST-02, where the 16-pin harness with stripped leads connects to. With a small flat-blade screwdriver, adjust the potentiometer clockwise to raise the audio level; counterclockwise to lower the audio level. Once at a desired level, audio level adjustment is LEVEL ADJUSTMENTPROGRAMMING PRECAUCI N!
10 Todos los accesorios, interruptores, paneles de controles de clima y especialmente las luces del indicador de las bolsas de aire deben estar conectados antes ciclar la ignici n. Adem s, no quite el radio de f brica con la llave en la posici n o de encendido ni con el veh culo DE INSTALACI COPYRIGHT 2018 Metra ELECTRONICS CORPORATION REV. 9/28/18 INSTGMOS-MOST-02 CARACTER STICAS DE LA INTERFASECOMPONENTES DE LA INTERFASEHERRAMIENTAS REQUERIDAS Herramienta de ponchadora y conectores, o pistola de soldadura, soldadura y termocontracci n Peque o destornillador de cabeza plana Cinta Cortacables Zip lazos INDICEC onexiones ..2-3 Instalaci n ..3 Programaci n.