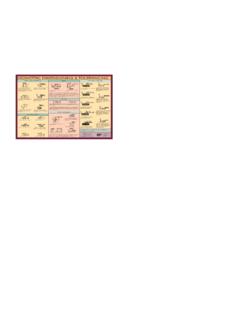
Transcription of Dimensioning and Tolerancing, Section 6, Drafting …
1 Drafting manual Section Update 56 Dimensioning and tolerancing Page 1. Update 56 A. Wilson by: Bruce Symbols February 1997*. SYMBOLS Diameter - A diameter symbol is placed in front of any GENERAL1 dimension value that is a diameter. See Figure 2. This Section is based on ASME Symbols unique to ANSI are also described for those who are contractually obligated to comply with the older standard. Symbols permit consistency in the way dimensions and tolerances are specified, and each symbol has a clearly defined meaning. Symbols take less time to apply on a drawing than would be required to state the same requirements with words. The symbols also require considerably less space.
2 See Figure 1. Figure 2. Diameter Symbol Counterbore Symbol - A counterbore symbol combined with a diameter symbol is placed in front of a specified counterbore or spotface diameter. See Figure 3. Figure 1. Equivalent Symbol and Note The symbols are presented in two groups for easier use of this Section as a reference. General Dimensioning symbols are shown first. Some of these symbols are also used in tolerance specifications. The second set of symbols are used for toler- ances. Symbol sizes are shown in the figures as values propor- tional to the letter h'. The letter h' represents the predominant character height on a drawing. If a symbol dimension is shown as , and the predominant character height on the drawing is Figure 3.
3 Counterbore Symbol to be 3mm, then the symbol dimension is ( x 3mm). Countersink - The countersink symbol combined with a Symbol proportions defined in the standard are recommen- diameter symbol is placed in front of a specified countersink dations. Some companies find it desirable to vary from the diameter. See Figure 4. recommended proportions for improved microfilm reproduc- tion capability. Symbol proportions within a company, and certainly within a single drawing, should be consistent. Symbols are not generally used in text or notes lists. Abbreviations and symbol names are used in text or notes lists. GENERAL SYMBOLS. General symbols are used with dimensions to clarify the requirement defined by a dimension value and to minimize the number of words or abbreviations placed on a drawing.
4 1. Figures in this Section were created using Auto CAD software, a product of Autodesk, Inc. and plotted on a Summagraphics (Houston Instrument Figure 4. Countersink Symbol Engineered) DMP 160 series plotter. * Supersedes issue of September 1995. GENIUM PUBLISHING. Section Drafting manual . Page 2 Dimensioning and tolerancing August 1993* Symbols Update 47. Depth - A downward-pointing arrow is used for the depth symbol, and it is placed in front of the depth value in such applications as for counterbore and hole depths. See Figure 5. Reference - Parentheses enclosing a dimension value Figure 5. Depth Symbol indicates the dimension is a reference value.
5 Dimension Origin - A circle used in place of one of the See Figure 8. arrowheads on a dimension line indicates the origin for measurement. See Figure 6. This symbol is not used as a replacement for datums and datum references. Arc Length - An arc drawn above a dimension value indicates the shown value is the distance measure along the defined arc. See Figure 9. It may be a distance measured along a curved surface or it may be a distance between two features such as holes in a curved part. Square - A square is placed in front of dimensions for square features. See Figure 7. The square symbol is used in a manner similar to the diameter symbol.
6 One dimension is adequate for a square shape when this symbol is used - eliminating the need for a second dimension. Figure 9. Arc Length * Supersedes issue of September 1984. GENIUM PUBLISHING. Drafting manual Section Dimensioning and tolerancing Page 3. Update 56 Symbols February 1997*. Slope - The slope symbol is placed at the left end of the example: slope specification. See Figure 10. The slope value is specified 3X .250-20 UNC-3A. as the amount of change per unit of length. The letter X can also be used in place of the word BY. A space is placed on each side of the letter X for this usage. example: .125 X .750. Radius - The letter R is placed in front of any value that indicates a radius dimension.
7 See Figure 12. Prior to the 1982. standard, the letter R was shown following the dimension value. Figure 10. Slope Symbol Figure 12. Radius Dimension Conical Taper - A conical taper symbol is placed in front of a taper specification. See Figure 11. The specification Controlled Radius - The abbreviation CR is defined by indicates the amount of change in diameter over a unit length the 1994 standard to indicate a controlled radius dimension. of the axis. CAUTION - This abbreviation is not defined in the 1982. standard. Spherical Radius - The letters SR are placed in front of a dimension for a spherical radius. See Fig- ure 13. Figure 13.
8 Spherical Radius Spherical Diameter - A letter S. precedes the diameter symbol, and both are placed in front of a spherical diameter Figure 11. Conical Taper Symbol dimension. See Figure 14. LETTERS - All letters used for symbols have a height Figure 14. Spherical Diameter equal to h'. Letter X - The letter X may be used to indicate a tolerancing SYMBOLS. number of times or places a feature or item is repeated. If the X. is to indicate the number of times or places, no space is shown tolerancing symbols can be categorized as being applicable to between the number of occurrences and the letter X. datum identification, form, orientation, location, profile, runout, and modifiers.
9 *Supersedes * Supersedesissue issueofofAugust 19931995. September GENIUM PUBLISHING. Section Drafting manual . Page 4 Dimensioning and tolerancing June 1996* Symbols Update 55. DATUM IDENTIFICATION SYMBOLS - These 1982 Datum Feature Symbol - The symbol shown in symbols provide a means to identify datum features. ANSI and earlier standards is a rectangle with two short dashes. See Figure 16. One dash is placed on each 1994 Datum Feature Symbol - This symbol became the side of the letter used to identify the datum feature. Depending standard in 1994 and is used widely in foreign countries on the requirement, this symbol may be attached to an exten- since it is defined by the International Standards Organization.
10 Sion line, a dimension line, a leader, a feature control frame, or See Figure 15. placed adjacent to a dimension value. Datum Target Symbol - The datum target is a circle with a horizontal line across the middle. See Figure 17. The datum identification goes in the bottom half of the symbol, and, in the case of a datum area, the size can be shown in the top half. Figure 15. 1994 Datum Feature Symbol The 1994 symbol always has a leader extending from it to the point of application. The leader includes a triangle at the Figure 17. Datum Target Symbol end. It may be filled or left open. The triangle is sometimes referred to as a suction cup, but it is correctly identified as a datum feature triangle.
