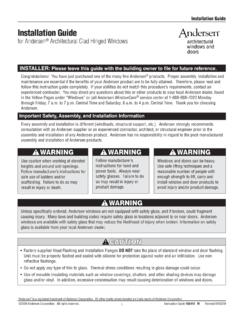
Transcription of Frame Assembly and Installation Guide
1 Side Installation FlangeHead Installation FlangeHead FlashingHead JambSill (200 Series Perma-Shield Gliding patio Door)Side JambSide Installation FlangeSide JambExterior ViewSill (400 Series Frenchwood , 200 Series Narroline , or 200 Series Perma-Shield Gliding patio Door with PG Upgrade)Component IdentificationPLUM - LEVEL - SHIMPLUM - LEVEL - SHIMPLUM - LEVEL - SHIMPLUM - LEVEL - SHIMPLUM - LEVEL - SHIMPLUM - LE(2) Side Stops(1) Stationary Panel Interlock Weatherstrip (1) Operating Panel Interlock Weatherstrip(1) Head Bracket(2) Stationary Panel Interlock Weatherstrip(2) Operating Panel Interlock Weatherstrip(2) Head Bracket2-Panel Gliding patio Door 4-Panel Gliding patio Door Stationary Sidelight Additional Parts Additional Parts Required Gliding patio Door Trim Set HardwareOptional Accessories Corrosion Resistant Screw Pack Insect Screen Sill Support Exterior Keyed Lock Auxiliary Foot Lock Interior/Exterior Grilles Oak or Maple Threshold* Identifies parts for panel Installation .
2 Frame and panels are packaged separately. Please keep remaining parts for panel Installation .*Stationary Panel Interlock Weatherstrip*Operating Panel Interlock WeatherstripClear Sealant (2902502) Andersen and all other marks where denoted are trademarks of Andersen Corporation. 2021 Andersen Corporation. All rights reserved. 0005310 B I - 0 0 Revised 02/21/21 Frame Assembly and Installation Guide Product Series: 400 Series Frenchwood , 200 Series Narroline , 200 Series Perma-Shield and 200 Series Perma-Shield with Performance Grade (PG) UpgradeProduct Type.
3 Gliding patio Doors and Stationary Sidelights(All Doors)(1) Installation Guide (1) Head Installation Flange(2) Side Installation Flanges(1) Sill (1) Head Jamb(1) Left Side Jamb(1) Right Side Jamb(1) Head Flashing(1) Clear Sealant(1) Screw Pack(s)Parts Included: Safety Glasses Level Phillips Screwdriver Caulk Gun Sealant Clamps Shims (Waterproof) Small Wood Blocks Hammer Drill/Driver Low Expanding Foam Formable Self-Adhering Flashing Straight Self-Adhering Flashing Drip Cap Foam Backer Rod J-RollerTools and Supplies Needed:Read these instructions before starting procedure.
4 For additional information visit For questions call obtener una versi n en espa ol de esta gu a, visite el sitio Pack:(Included for Performance Grade (PG) Upgrade or Impact-Resistant patio doors only)(1) Parting Stop BracketStationary Panel Installation Pack: (two packs included for 4-panel patio doors)BAGB(4 or 6) #8 x 1" Gray Screw (quantity dependent on patio door size)(5) #8 x 1" Color-Matched Screws(9 or 11) #7 x 5/8" Color-Matched Screws (quantity dependent on patio door size)(1) Stationary Panel Bracket (color-matched) Operating Panel Installation Pack.
5 (two packs included for 4-panel patio doors)BAGC(5,7,or 10) #8 x 1-1/2" Color-Matched Screw (quantity dependent on patio door size)(9 or 11) #7 x 5/8" Color-Matched Screw (quantity dependent on patio door size)(1) Dust Plug Weatherstrip(2) Panel Hole Plug (not provided with Perma-Sheild patio Doors) Lock Mechanism Installation Pack Frames are manufactured for left or right hand operation (L or R) or stationary sidelights. Door operation is as viewed from the exterior. Provide a large work area when assembling patio door Frame .
6 Cover work area with cardboard to protect Frame parts. If Frame is assembled away from the job site, attach screw pack envelopes, with remaining screws, to Frame for use when installing unit Frame and door panels on the job (2-Panel Hardware Pack)(1) #10 x 3" Security Screw(2) #8-32 x 7/8" Machine Screw(1) Lock(1) 2-Panel Door Latch Receiver(4-Panel Hardware Pack)(1) 4-Panel Door Latch Receiver or(1) LockFrame Assembly and Installation Pack: BAGA(9,13,17,or 19) #10 x 2-1/2" Color-Matched Screw (quantity dependent on patio door size)(1) #7 x 5/8" Stainless Steel Screw (only included in BAG A for 4-panel patio doors, 16' width & 8' height)(14) #10 x 2-1/2" Stainless Steel ScrewScrew Pack Contents: Remaining screw/part packs below are identified and used in panel Assembly Guide .
7 (1) #8 x 1" Stainless Steel Screw(1) Insect Screen Latch (color-matched)(1) #7 x 5/8" Stainless Steel Screw (only included in Screw Pack for 4-panel patio doors, less than 16' width & 8' height)(5) #8 x 1" Color-Matched Screw(3) #10 x 2-1/2" Gray Screw20005310 Draft1 Procedure and Product InformationIMPORTANTI mportant Safety and Product Informationfor Andersen Windows and DoorsThis is the Safety Alert Symbol used to alert you to potential injury hazards. Obey all safety messages that follow this symbol to avoid possible injury or Word and ConsequenceMajor Injury/DeathWARNINGCOULDR esult in:Minor InjuryCAUTIONCOULDR esult in:Product or Property DamageNOTICECOULDR esult in: Leave this Installation instruction with the home/building owner For additional support or help please go to: To configure Installation instructions go to: Use caution when working at elevated heights and around window and door openings.
8 Follow the manufacturers instructions for ladders and scaffolding. Failure to do so could result in injury or death. Support window or door in opening at all times until fully fastened. Failure to do so could result in window or door falling out causing injury, property or product damage. Windows and doors have small parts ( hole plugs, operator spline caps, fasteners, etc.). Small parts if swallowed could pose a choking hazard to young children. Dispose of unused, loose, or easily removed small parts. Failure to do so could result in injury.
9 Windows and doors can be heavy. Use safe lifting techniques and a reasonable number of people with enough strength to lift, carry, and install window and door products. Heavier windows and doors will require mechanical assistance. Failure to do so could result in injury, product or property damage. DO NOT lift or carry window or door by the exterior trim or extension jambs. Doing so could result in injury, product or property damage. Windows, doors, and Installation components can have sharp edges. Wear protective equipment when handling.
10 Failure to do so could result in injury. DO NOT drag, rock, cartwheel, or walk windows,doors, sash, or panels across the floor. Doing so couldresult in product or property Follow manufacturers instructions for hand and power tools. Always wear safety glasses. Failure to do so could result in injury, product or property damage. Tools Handling Installation Sealing Fastening FinishingSafety and Product Information Index Glass Protective Film Cleaning Use/Operation Joining Product Information Read this Important Safety and Product Information completely before starting.