Transcription of Lock Mechanism Replacement - Andersen Windows
1 Andersen and all other marks where denoted are trademarks of Andersen Corporation. 1996-2015 Andersen Corporation. All rights reserved. 0005233 B D - 0 0 Revised 07/08/15 Lock Mechanism Replacementfor Andersen A-Series Inswing & Outswing; 400 Series Frenchwood Hinged Inswing & Outswing Patio Doors and 400 Series Frenchwood Hinged Inswing & Outswing Patio Doors with Stormwatch ProtectionIncorrect installation may affect egress and home security. Follow instruction guide to make sure hardware is installed installation may affect egress and home security. Follow instruction guide to make sure hardware is installed questions call 1-888-888-7020. Due to ongoing product changes, updated test results and/or industry best practices, this installation procedure may change over time.
2 For updated installation guides, removal instructions and/or additional installation information, visit local authorities or waste management companies for proper recycling and/or disposal of removed window or patio leave this guide with building you for choosing Andersen . / Gracias por elegir Andersen . Read guide from beginning to end before starting installation. Read all warnings and cautions during unit installation. Check with your local building code official to identify and confirm compliance with local building code requirements. Use caution when working at elevated heights and around unit openings. Follow manufacturers instructions for ladders and/or scaffolding. Failure to do so may result in injury or manufacturers instructions for hand or power tools.
3 Always wear safety glasses. Failure to do so may result in injury and/or product Remove Trim SetEscutcheon Plate BoltsInterior HandleHex WrenchLock Mechanism Replacement - Passive PanelThis instruction guide includes instructions for replacing either the Active Panel Lock Mechanism or the Passive Panel Lock mechanisms . For Passive Panel Lock Mechanism Replacement proceed below. For Active Panel Lock Mechanism Replacement go to Page Screw Exterior Escutcheon Plate Loosen Set Screw on underside of Exterior Handle to remove Interior and Exterior Handle. Remove Escutcheon Plate Bolts and Interior Escutcheon Plate. Remove Exterior Escutcheon Plate and Handles and Escutcheon Plates when removing bolts to avoid dropping/damaging hardware.
4 Interior Escutcheon PlateGasket Exterior HandleParts Included(1) Instruction guide (1) Passive OR Active Lock Mechanism (1) Inswing Blocker Assembly (1) Outswing Blocker Assembly Tools & Supplies Safety Glasses Hex Wrench for Handle Set Screw Phillips Screwdriver Flat Blade Screwdriver Torx Screwdriver Utility Knife Locking Pliers HammerActive Panel(Operating Panel most commonly used)Passive Panel(Operating Panel with Astragal attached)Active Panel(Hinged or Operating Panel)Panel IdentificationAstragal22. Remove Hardware from Passive Panel Remove Hook Bolt Receivers, Strike Plate, and Dead Bolt Latch Receiver/Blocker using Phillips PanelA-Series Hinged Outswing, 400 Series Frenchwood Hinged Outswing and 400 Series Frenchwood Hinged Outswing Patio Doors with Stormwatch Protection Passive PanelA-Series Hinged Inswing, 400 Series Frenchwood Hinged Inswing and 400 Series Frenchwood Hinged Inswing Patio Doors with Stormwatch Protection Hook Bolt ReceiverHook Bolt Receiver with Machine Screws(units over 8" tall only)Wood screws used for all other Bolt Receiver with Machine Screws(units over 8" tall only)Wood screws used for all other PlateDead Bolt Latch Receiver/Blocker(underneath Strike Plate)
5 Hook Bolt ReceiverHook Bolt ReceiverStrike PlateDead Bolt Latch Receiver/Blocker(underneath Strike Plate)3. Remove Astragal Pull outwards to remove Astragal. If Astragal does not come out lightly, break paint or varnish seal between Astragal Trim Strip and panel using a sharp utility may be necessary to break paint or varnish seal between Astragal Trim Strip and door panel before removing Astragal. Break seal using a sharp utility PanelA-Series Hinged Outswing, 400 Series Frenchwood Hinged Outswing and 400 Series Frenchwood Hinged Outswing Patio Doors with Stormwatch Protection Passive PanelA-Series Hinged Inswing, 400 Series Frenchwood Hinged Inswing and 400 Series Frenchwood Hinged Inswing Patio Doors with Stormwatch Protection Interior ViewInterior ViewExterior ViewExterior ViewUtility KnifeUtility KnifeAstragalAstragalHook Bolt Receiver34.
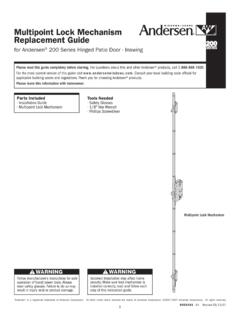
6 Remove Existing Lock Mechanism Remove and retain screws holding Lock Mechanism . Remove Lock Attach Blocker to Replacement Lock Mechanism Identify proper Blocker to use. Properly dispose of unused Blocker. Separate Blocker Cap from Blocker Pin using a pliers. Tap Blocker Pin into bottom of Lock until fully seated using a hammer. Snap Blocker Cap over Blocker MechanismBlockerFrenchwood Outswing Patio DoorBlockerFrenchwood Hinged Patio Door Blocker CapBlocker PinLocking PliersHammerBlocker Pin HoleBlocker Pin46. Install Replacement Passive Lock Mechanism Insert Lock Mechanism into door panel and secure using appropriate size Lock Mechanism #8 x 1-1/2" Screw(Frenchwood Hinged Inswing)#8 x 2" Screw(Frenchwood Hinged Outswing)oror7.
7 Reapply Astragal, Hardware and Trimset Reapply Astragal, Hardware and Trimset reversing procedure in steps 1, 2 and #8 x 5" Torx Head Screw here for 400 Series Frenchwood Hinged Inswing and Outswing Patio Doors with Stormwatch Protection OnlyUse #8 x 5" Torx Head Screw here for 400 Series Frenchwood Hinged Inswing and Outswing Patio Doors with Stormwatch Protection Only5 Lock Mechanism Replacement - Active Panel2. Remove Lock Mechanism Note orientation of Latch on Lock Mechanism . Lock position will be addressed in Step 5. Remove and retain all screws along length of Lock Mechanism . Pull Lock Mechanism out of MechanismLock Mechanism (removed)1. Remove Trimset Loosen Set Screw on underside of Exterior Handle to remove Interior and Exterior Handle.
8 Remove Escutcheon Plate Bolts and Interior Escutcheon Plate. Remove Exterior Escutcheon Plate and Gasket. Remove Cylinder Mounting Bolts, Limiting Plate, Lock Actuator, and Handles and Escutcheon Plates when removing bolts to avoid dropping/damaging hardware. Escutcheon Plate BoltsInterior HandleHex WrenchSet Screw Exterior Escutcheon PlateInterior Escutcheon PlateGasket Exterior HandleCylinderLock ActuatorLimiting PlateCylinder Mounting Bolts63. Install Replacement Lock Mechanism Insert Lock Mechanism into door panel and secure using appropriate size Point Active Lock Mechanism5 Point Active Lock MechanismActive/Passive or Passive/ActiveDoors Only ororUse #8 x 5" Torx Head Screw here for 400 Series Frenchwood Hinged Inswing and Outswing Patio Doors with Stormwatch Protection OnlyUse #8 x 5" Torx Head Screw here for 400 Series Frenchwood Hinged Inswing and Outswing Patio Doors with Stormwatch Protection Only#8 x 5" Torx Head Screw(400 Series Frenchwood Hinged Inswing and Outswing)All screws unless otherwise noted are.
9 #8 x 1-1/2" for 400 Series Frenchwood Hinged Inswing or#8 x 2" for 400 Series Frenchwood Hinged Outswing6 Point Active Lock MechanismActive/Passive or Passive/ActiveDoors Over 8 Tall Only 4 Point Active Lock MechanismActive Single DoorsOver 8 Tall Only #8 x 5" Torx Head Screw(400 Series Frenchwood Hinged Inswing and Outswing)74. Install Trim Set Reinstall Trim Set by reversing procedure in Step Check Handing of Latch and Operation of Lock Mechanism Check position of Latch. If Latch needs to be reversed, proceed with bullets below. Insert a 1/8" flat blade screwdriver into Latch Reversal Hole until it bottoms out. Apply downward pressure on screwdriver handle while pulling Latch up and out, as shown.
10 Remove screwdriver from Latch Reversal Hole. Push Latch back into Lock Mechanism Reversal HoleLatchLatchLock Mechanism HousingLatchFlat Blade ScrewdriverUpPosition Latch so that sloped portion contacts Latch Receiver first. Grasp Latch, pull outwards slightly, and rotate 180 . Lock Mechanism Replacement procedure is 0005233 B D - 0 0 Revised 04/01/15 Reemplazo de mecanismo de cerrojopara puertas para patio de los tipos: Andersen de la serie A de batiente hacia el interior y el exterior; Frenchwood con bisagras de batiente hacia el interior y el exterior de la serie 400; Frenchwood con bisagras de batiente hacia el interior y el exterior de la serie 400 con protecci n Stormwatch Su incorrecta instalaci n puede afectar la salida y la seguridad del hogar.
