Transcription of HardiePlank Lap Siding Product Description - …
1 General Product InformationTools for Cutting and FasteningGeneral InstallationRequirementsGeneral Fastener RequirementsFinishing andMaintenanceHardieTrim Boards/BattensHardieWrap Weather BarrierHardieSoffit PanelsHardiePlank Lap SidingHardieShingle SidingHardiePanel Vertical SidingESR-1844 &2290 ReportAppendix/GlossaryWorking Safely85 HardiePlank Lap Siding Product DescriptionHardiePlank lap Siding is factory-primed fiber-cement lap Siding available in a variety of styles and textures. Please see your local James Hardie Product dealer for Product availability.
2 HardiePlank lap Siding comes in 12 ft. lengths. Nominal widths from 5 1/4 in to 12 in. create a range of exposures from 4 in to 103/4 inHardiePlank lap Siding is also available with ColorPlus Technology as one of James Hardie s prefinished products. ColorPlus Technology is a factory applied, oven-baked finish available on a variety of James Hardie Siding and trim products. See your local dealer for details and availability of products, colors, and HZ5 Product line is right at home in climates with freezing temperatures, seasonal temperature variations, snow and ice.
3 HZ5 boards are the result of our generational evolution of our time-tested products. We ve evolved our substrate composition to be specifically designed to perform in conditions found in these climates. To ensure that its beauty matches its durability, we ve engineered the surface for higher performance, giving it superior paint adhesion and moisture resistance. In addition, we ve added a drip edge to the HardiePlank HZ5 lap Siding Product to provide improved water management in conditions specific to HZ5 EdgeNail LineDrip EdgeSelect Cedarmill SmoothBeaded SmoothCustom Colonial Roughsawn Beaded Cedarmill Custom Colonial Smooth General Product InformationWorking SafelyTools for Cutting and FasteningGeneral InstallationRequirementsGeneral Fastener RequirementsFinishing andMaintenanceHardieTrim Boards/BattensHardieWrap Weather BarrierHardieSoffit PanelsHardiePlank Lap
4 SidingHardieShingle SidingHardiePanel Vertical SidingESR-1844 &2290 ReportAppendix/Glossary86 Install factory ends of planks at butt OF HardiePlank LAP SIDINGEnds of planks must land over a square and torpedo level transfer the course elevationsStagger butt joints a mini-mum of 2 stud bays for 16 in. framingStarter stripStarter strip builds out Siding to the proper wall with structural sheathingJoint flashingInstall starter strip over the weather barrier and even with the bottom of the barrierINSTALL A STARTER STRIPH ardiePlank lap Siding requires a starter strip beneath the first course to set it on the proper angle and to create a proper drip edge at the bottom of the Siding .
5 Starter strips are easily made by ripping 1 in. pieces of HardiePlank Siding from full or partial bottom of the starter strip should be installed even with the bottom of the mudsill or the bottom edge of the sheathing. The strip must be installed over the water-resistive barrier, but occasional gaps should be left in the starter strip to allow any accumulated moisture behind the Siding to drain away : For accurate fastening, snap vertical chalk lines on the water-resistive barrier at the center of every stud of HardiePlank Lap SidingGeneral Product InformationTools for Cutting and FasteningGeneral InstallationRequirementsGeneral Fastener RequirementsFinishing andMaintenanceHardieTrim Boards/BattensHardieWrap Weather BarrierHardieSoffit PanelsHardiePlank Lap SidingHardieShingle SidingHardiePanel Vertical SidingESR-1844 &2290 ReportAppendix/GlossaryWorking Safely87 Pull from across the stackDo not go down the stackTIP.
6 When taking planks from the pallet installation, avoid repeating the texture pattern by working across the pallet. Two to four planks can be removed from a stack at one time. But then material should be taken from adjacent stacks, again working across the pallet. Texture repeat is typically a concern on large walls with few breaks such as windows or from across the stackDo not go down the stackThe first course of HardiePlank Siding is critical to the proper installation of the plank on the rest of the building. The first course should start at the lowest point of the house and within required clearances.
7 Special attention should be made to ensure that it s straight and level. Attention should also be paid to staggering any butt joints in the planks so that the installation is attractive while mak-ing efficient use of Use a level (4 ft. or longer) or chalked level line to be sure that the first course is level. As installation proceeds up the wall, peri-Snapped chalk line guides the first a level 4 ft. or longer level to check the first bottom edge of the first course even with the bottom of the corner trim. INSTALLING THE PLANKSEnd plank courses 1/8 in from vertical trim and fill gap with permanently flexible ALIGNMENT AT CORNERS check the level and straightness of the courses.
8 When correcting for flatness over products such as exterior insulation, use drywall shims. It is good practice to snap a chalk line every 3 to 5 courses to keep the planks straight and Position the bottom edge of the first course of Siding a minimum in below the edge of the starter strip (maintain required clearances) and secure. 3. Run the Siding to the HardieTrim board leaving a 1/8 in. gap between the Siding and trim. The bottom of the Siding should be kept even with the bottom of the trim, or if desired, the trim may extend below the bottom of the Siding .
9 But the Siding should never hang below the trim. *When installing the first course make sure ground clearances are in accordance with James Hardie requirements and those of local the best looking installation, make sure that the heights of the plank courses match on both sides of a corner. Use a framing square, speed square or a level to match up the plank heights. Check every few courses to make sure proper heights are being : To prevent damage to the drip edge, extra care should be tak-en when removing planks from the pallet, while handling, and when installing with a lap gauge.
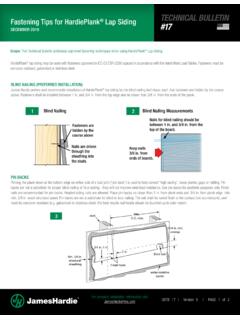
10 Planks are interlocked together on the pallet, therefore they should be removed from the pallet horizontally (side to side) to allow planks to unlock themselves from one in minGeneral Product InformationWorking SafelyTools for Cutting and FasteningGeneral InstallationRequirementsGeneral Fastener RequirementsFinishing andMaintenanceHardieTrim Boards/BattensHardieWrap Weather BarrierHardieSoffit PanelsHardiePlank Lap SidingHardieShingle SidingHardiePanel Vertical SidingESR-1844 &2290 ReportAppendix/Glossary88 BLIND NAILING (nailing through top of plank)
