Transcription of INSTALLATION INSTRUCTIONS - Bobrick Inc.
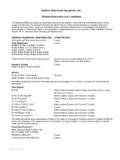
1 Wall 3" to 5-3/4" ThickAdjustable FlangeWall BoxMountingScrews (4)Spillage Tray(Sets in bottom of wall box)Adjustable FlangeDoors (2) INSTALLATION INSTRUCT IONSBOBRICK MODEL B-505 SPECIMEN PASS-THRU CABINETR ough Wall Opening11-1/2" (290mm) wide10-7/8" (275mm) high3" to 5-3/4"(75 to 145mm)recessed depthThis unit is designed to be mounted within the wall between a restroom and the test lab or other room into which the specimen is tobe received. Flanges adjust to fit from 3" to 5-3/4" (75 to 145mm) thick walls. Doors are interlocked so that when one door isopened, the opposite door is locked. Supply four (4) #10 x " ( x ) mounting screws to secure framed rough wall opening 11-1/2" wide x 10-7/8" high (290 x 275mm). one of the doors and remove the spillage o ne flange over the wall box so that holes in mountin g tabs are aligned with s lots in wall wall box and flange so that bottom of wall box is level and unit is centered in wall.
2 See diagram second flange into place, aligning tabs and screw mounting screws through wall box and flange tabs, into framing. Caution: Do not overtighten screws or rack wall the door latching mechanism to assure that both doors are unlocked when both doors are closed. Also check to see thateach doo r locks when opposite doo r is Install spillage tray inside cabinet. The spillage tray is removable for cleaning. 2006 by Bobrick Washroom Equipment, No. 505-69 Revised 7/06 Printed in the : Bobrick WASHROOM EQUIPMENT, Commerce Drive, Clifton Park, New York 12065-1350 Tel: (518) 877-7444 FAX: 518-877-502911611 Hart Street, North Hollywood, California 91605-5882 Tel: (818) 982-9600 FAX: 818-503-1102225 Bobrick Drive, Jackson, Tennessee 38301-5635 Tel: (901) 424-7000 FAX: 901-424-7800In Canada: Bobrick WASHROOM EQUIPMENT COMPANY45 Rolark Drive, Scarborough, Ontario M1R 3B1 Tel: (416) 298-1611 FAX: 416-298-6351