Transcription of INSTALLATION INSTRUCTIONS for Swinging …
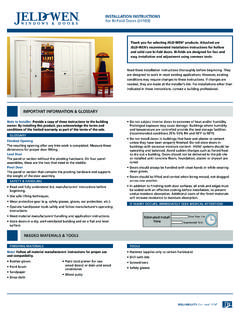
1 INSTALLATION INSTRUCTIONSfor Swinging french and Patio Doors (JII105)LANDINGST hese INSTRUCTIONS cover two sill conditions: the step-down landing and the continuous slab landing. The INSTALLATION methods vary slightly between landing construction methods have led to an increase in air and water tightness in buildings. This frequently leads to negative air pressure inside the house, which can draw water through very small openings. Our INSTALLATION method seals the door to the weather barrier (typically building wrap) and uses a sill pan to capture and drain incidental storm water from under the you for selecting JELD-WEN products.
2 Attached are JELD-WEN s recommended INSTALLATION INSTRUCTIONS for Steel, Fiberglass, Vinyl, and Wood french and Patio Doors. Read these INSTRUCTIONS thoroughly before beginning. They are designed to work in most existing applications however; existing conditions may require changes to these INSTRUCTIONS . If changes are needed, they are made at the installer s risk. For installations other than indicated in these INSTRUCTIONS , contact a building all exterior door types may be installed into every wall condition in all areas. Consult your local building code official for applicable building codes and regulations. Local building code requirements supersede recommended INSTALLATION Note!
3 Any french or patio door INSTALLATION such that the sill is higher than 35 feet above ground level or into a wall condition not specifically addressed in these INSTRUCTIONS must be designed by an architect or structural engineer. Failure to install square, level and plumb and on a flat surface (without twist or warp) could result in denial of warranty claims for operational or performance to Installer: Provide a copy of these INSTRUCTIONS to the building owner. By installing this product, you acknowledge the terms and conditions of the limited warranty as part of the terms of the PanelThe primary panel or the one that opens and locks into the other vertical trim attached to one of the panels of a french door that bridges the gap between the panels when closed to provide weather and overswing Rod (backing material)A material ( foam rod)
4 Placed into a joint primarily to control the depth of the form of exterior casing for windows and doors that serves as an aesthetic boundary between the siding and the wood framework attached to the masonry inside a window or patio door rough (mullion)A wood or metal part used to structurally join two window or door UnitTwo or more door units structurally joined HoleA drilled hole that is no larger than the body of the screw (minus the threads).IMPORTANT INFORMATION & GlOSSARyEstimated Install Time for New ConstructionFirst Time: : : Slab LandingStep-Down LandingShiplapThe layering method in which each layer overlaps the layer below it so that water runs down the Hole (weep channel)The visible exit or entry part of a water drainage system used to drain water out of a allow sufficient time to properly prepare the rough opening, install the patio door, and ensure its proper INSTRUCTIONS for Swinging french and Patio Doors (JII105)2 OPEN-STUD CONSTRUCTIONThe wall framing needs to be covered by backing support before the door can be installed.
5 The door will be mounted with the nailing fin/exterior trim flush against the applied backing backing support should be a thin (max. 1/8" thick) sheet material such as plywood or lauan. Completely surround the rough opening with the backing support as shown. Backing support must be applied before building INSTALLATION guide specifically addresses masonry/block wall, sheathed wall and open-stud WALL CONSTRUCTIONThis INSTALLATION assumes that a building professional has already properly fastened and sealed a framework of studs (often called a buck) to the concrete/masonry wall. FULLy ShEAThED WALL CONSTRUCTIONThe wall framing is covered by sheathing and the door will be mounted with the nailing fin/exterior trim flush against the sheathing.
6 This INSTALLATION assumes building wrap is properly installed prior to OPeNINGSOpen-Stud with BackingSheathed WallTrimmer studsHeaderSheathingSill areaKing studSAFETy Read and fully understand ALL manufacturers INSTRUCTIONS before beginning. Do not work alone. Two or more people are required. Use safe lifting techniques. Use caution when handling glass. Broken or cracked glass can cause serious injury. Wear protective gear ( safety glasses, gloves, ear protection, etc.). Operate hand/power tools safely and follow manufacturer s operating INSTRUCTIONS . Use caution when working at elevated & HANDlINGMATERIALS & DOOR hANDLING Make sure the operating panel is secured prior to INSTALLATION .
7 Heed material manufacturers handling and application INSTRUCTIONS . Protect adhesive surfaces from dirt, moisture, direct sunlight and folding over onto themselves. Do not put stress on joints, corners or frames. Store door in dry, well-ventilated area in vertical, leaning position to allow air circulation; do not stack horizontally or drag on the floor. Protect from exposure to direct sunlight during storage. Install only into vertical walls and when conditions and sheathing are dry. Never use solvent-based sealants on vinyl INJURy OCCURS, IMMEDIATELy SEEK MEDICAL ATTENTION!BuckINSTALLATION INSTRUCTIONS for Swinging french and Patio Doors (JII105)3 Verify the width and height of the door are each 1/2"- 3/4" smaller than the rough opening width/height, respectively.
8 Mulled units should be 3/4" smaller. Verify the rough opening is square. The (A) and (B) measurements should be the same. Maximum allowable deviation from square is 1/4".2 INSPeCT ROUGH OPeNING ABDCeVerify Square, Level, & Plumb Verify the rough opening is level and plumb (C) and (D). The maximum allowable deviation is 1/8". The rough opening sill must not be crowned or sagged (D). The exterior face of the rough opening must be in a single plane (E) with less than 1/8" twist from corner to corner. Minimum double studs should be used at all wood framed rough openings. The header must be supported by trimmer PACKAGINGR emove shipping materials such as corner covers, shipping blocks or pads.
9 Note! Be sure to remove the shipping clips from the door before beginning the PATIO DOOR Cosmetic damage Product squareness (diagonal measurements must be within 1/4" difference)1 REMOVE PACKAGING & INSPECT DOOR Correct product (size, color, grid pattern, handing, glazing, energy-efficiency requirements, etc.) Splits, cracks, holes, missing sections or other damage to the nailing fin longer than 6" and/or within 1/2" of door frame A drip cap that extends 1/8" past the end of the frame is recommended for all products; required for side-by-side mulled any of the above conditions represent a concern, or if you expect environmental conditions to exceed the patio door's performance rating, do not install the patio door.
10 Contact your dealer or distributor for #8 x 3" deck/drywall screws Non-compressible or water degradable shims Sealant (polyurethane if painted, 100% silicone if left exposed) and backer rod Closed cell polyurethane low expansion foam (Dow Great Stuff Window and Door or equivalent) Plastic drain screen with crisscross or woven pattern (sold in 6" widths to protect rain gutters) for step-down landings Sheet metal flashing or bendable vinyl sheeting for sill pan (4" wide for 2" x 4" wall) 3/8" staples for step-down landingsFor installations into a Buck:liquid applied flashing (Protecto Wrap lWM 200 or equivalent)NeeDeD MATeRIAlS & TOOlSFor installations into a stud-framed wall: JELD-WEN 6" wide self-adhesive flashing (part #08987) or equivalent (9" if required by local code) Protecto Wrap Safseal Systems 5500 spray adhesive/primer (or as recommended by the self-adhesive flashing manufacturer)Note!