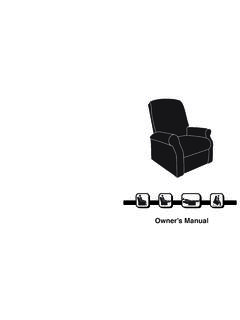
Transcription of Installation Instructions - Forward Lift
1 March 2020 by Vehicle Service Group. All rights reserved. CO11270LP60026IN60026 Rev. M CONDITIONSLift is not intended for outdoor useand has an operating ambient temperature range of41 -104 F (5 -40 C) Installation InstructionsCapacity 10,000 lbs. (4,536kg.)(400 Series Lift)IMPORTANTR eference ANSI/ALI ALIS, Safety Requirements for Installation and Service of Automotive Lifts before installing 1aFig. 1bJK44 1/2" (1130mm) MAXARM REACH23" (584mm) MINARM REACH38 1/2" (978mm) MINARM REACH58" (1473mm) MAXARM REACHLLACEFGHIBM3 Fig. 1c44 1/2" (1130mm) MAXARM REACH23" (584mm) MINARM REACH38 1/2" (978mm) MINARM REACH58" (1473mm) MAXARM REACHDJKLL4 NOTES:1.
2 ALL HEIGHT DIMENSIONS ARE WITHOUT LEVELING ) STANDARD HEIGHT LIFT ) ** ANCHORING SYSTEM TESTED TO ANSI/ALI ALCTV A POWER UNIT HEIGHT 72 1/2" (1872mm) B LIFTING HEIGHT W/ 5" EXTENSION 76 1/8" (1984mm) W/ 67 1/2" (1715mm) STROKE LIFTING HEIGHT W/ HIGH RISE CYLINDER 79 5/8" (2023mm) W/ 71" (1803mm) STROKE C MIN. LIFT HEIGHT 3 5/8" (92mm) MIN. LIFT HEIGHT W/ 3 1/2" ADAPTER 5 3/8" (137mm) MIN. LIFT HEIGHT W/ 5" ADAPTER 7 1/8" (181mm) D OVERALL FLOOR WIDTH 137" (3480mm) OVERALL FLOOR WIDTH (NARROW) 131" (3327mm) E WIDTH BETWEEN CARRIAGES 112 1/2" (2858mm) WIDTH BETWEEN CARRIAGES (NARROW) 106 1/2" (2705mm) F INSIDE COLUMNS 114 1/2" (2908mm) INSIDE COLUMNS (NARROW) 108 1/2" (2756mm) LOW HEIGHT OVERALL (HOSE NOT INCLUDED) 138 1/2" (3518mm) G HEIGHT OVERALL (HOSE NOT INCLUDED) 143" (3632mm) EXTENDED HEIGHT OVERALL (HOSE NOT INCLUDED) 166" (4216mm) FLOOR TO OVERHEAD SWITCH (LOW) 131 5/8 (3343mm) H FLOOR TO OVERHEAD SWITCH 137 5/8 (3495mm)
3 I DRIVE THRU CLEARANCE 105" (2667mm) J MINIMUM TO NEAREST OBSTRUCTION 132" (3353mm) K MINIMUM TO NEAREST OBSTRUCTION 156" (3962mm) DRIVE THRU CLEARANCE (NARROW) 99" (2515mm) L MINIMUM TO NEAREST OBSTRUCTION 72" (1829mm) M OVERHEAD HEIGHT 143" (3632mm) OVERHEAD HEIGHT LOW 137" (3480mm) MIN. LIFT HEIGHT W/ 1 3/4" ADAPTER 8 5/8" (219mm) FLOOR TO OVERHEAD SWITCH (HIGH RISE) 160 5/8 (4079mm) MINIMUM CEILING HEIGHT MINIMUM CEILING HEIGHT (EXTENDED HEIGHT) 144" (3658mm) 167" (4242mm)LIFT CAPACITY 10,000 SPEED (RISE TIME) APPROXIMATELY 45 SECONDS UNLOADEDMOTOR RATING OPTIONS 3 PHASE 208-230/460V 50-60 Hz 17 AMPS SINGLE PHASE 208-230V 60Hz 16 AMPSWEIGHT 1505 LBSMECHANICAL SAFETY LOCKS AUTOMATIC ALL POSITIONSMECHANICAL SAFETY RELEASE MANUAL ALL BOTH COLUMNSHYDRAULIC SAFETY SYSTEM AUTOMATIC ALL POSITIONSCYLINDERS TWO, ONE PER COLUMNCARRIAGE BEARINGS EIGHT PER CARRIAGE, UHMW SYNCHRONIZATION EQUALIZATION CABLES MIN.
4 BAY SIZE 12' X 24' VERIFY WITH SITE PLAN & SERVICE VEHICLES APPROXIMATELY 51 SECONDS AT RATED CAPACITY SINGLE PHASE 208-230V 50Hz 15 AMPSSWING ARM RESTRAINTS AUTOMATIC ENGAGEMENT ABOVE 2 1/2"1. Lift Location: Use architects plan when available to locate lift. Fig. 1a & Fig. 1b shows dimensions of a typical bay DO NOT install this lift in a pit or depression due to fire or explosion Latch Cable Guides: Install the latch cable conduit guide brackets to column using (1) 1/4 -20NC x 1 HHCS and 1/4 -20NC Flanged Locknut. It should go through hole nearest the edge as shown, Fig. 2. For extension please note paragraph HHCS & Flg.
5 Locknut1/2 -13x1-3/4 HHCS & 1/2 Flat Washer 1/2 -13 Nylon Locknut & 1/2 Flat Washer 1/2 -13x1-3/4 HHCS1/2 -13 Nylon Locknut & 1/2 Flat Washer Fig. 4 Note: Standard height Installation continue to paragraph 6. For extended height continue to paragraph Male Connector (Extended Height): Attach male connectors to tops of cylinders before installing the extended height column extensions see Fig. 3. 4. Column Extension (Extended Height): Column extension is installed using (2) HHCS & (2) Flg. Lock Nut on the inside of the lift column. Use (2) 1/2 -13x1-3/4 HHCS, (4) 1/2 Flat Wahser, and (2) 1/2 -13 Nylon Locknut on the outside of the column, Fig.
6 4. After the extension is installed install the latch cable guide on the outside of extension using (1) 1/4 -20NC x 1 HHCS and 1/4 -20NC Flanged Locknut, Fig. 4. Attach tie bar to column with (2) 1/2 -13x1-3/4 HHCS, (2) 1/2 Flat Washer, and (2) 1/2 -13 Nylon Locknut, Fig. 4. 3/8 NPT to 1/4 Tube Male Connector Fig. 361/2 -13NC x 4-1/2 HHCS, 1/2 Flat Washer, &Cylinder Spacer1/2 -13NC Nylon Locknut, 1/2 Flat Washer, & Cylinder Spacer3/4 -16 Hex Jam Nut3/4 -16 Hex NutPlace cylinder in this hole when using Extended Height High Rise LiftPlace cylinder in this hole when using T100295 Extended Height Kit only5.
7 Cylinder Install (Extended Height): With the extension installed the cylinder will be installed with (1) 1/2 -13x4-1/2 HHCS, (2) 1/2 Flat Washer, (2) 1/2 Cylinder Spacer, and (1) 1/2 -13 Nylon Locknut, Fig. 5. The lift carriage should now be manually raised to the bottom of the cylinder. The cylinder is then attached to the carriage using (1) 3/4 -16 Hex Nut and (1) 3/4 -16 Hex Jam Nut, Fig. 57 Use for narrow bay ElbowStandard Cable Tie Off& 5/8" Nylon Insert LocknutRemove PlugNOTE: If more than 2 horse shoe shims are used at any of the column anchor bolts, pack non-shrink grout under the unsupported area of the column base.
8 Insure shims are held tightly between the baseplate and floor after torquing (1/2" Max.)Nut Flat Washer AnchorNOTE: Use rectangular shims at inside edge of baseplate. Use constructions adhesive or silicon cement to hold shim in place. INSURE shims are held tightly between base plate and floor after torquing anchors. Fig. 66. Cylinder Fitting: Prior to standing up lift columns, install the 90 elbow fitting to the cylinder and equal-izer cable to the bottom of the carriage Fig 6. Remove plug from the top of the cylinders and install the ap-propriate fittings per Fig. 15aCAUTION Over tightening will damage fitting resulting in fluid Equalizer CablesA.
9 First, run a cable end up through the small hole in the standard tie-off plate. Fig. ) Push the cable up until the stud is out of the carriage top ) Run a nylon insert locknut onto the cable stud so 1/2 (13mm) of the stud extends out of the ) Pull the cable back down, Fig. ) Run cable around the lower sheave, then up and out of the top of the Lift Setting: Position columns in bay using dimensions shown in Fig. 1a & Fig. 1b. Place column with power unit mounting bracket on vehicle passenger side of lift. Both column base plate backs must be square on center line of lift. Notches are cut into each base plate to indicate center line of lift.
10 Use appropriate equipment to raise carriage to first latch position. Be sure locking latch is securely Concrete and Anchoring: Drill (10) 3/4 dia. holes in concrete floor using holes in column base plate as a guide. See Fig. 8 for hole depth, hole spacing, and edge distance 7 CAUTION DO NOT install on asphalt or other similar unstable surfaces. Columns are supported only by anchors in Using the horse shoe shims provided, shim each column base until each column is plumb. If one column has to be elevated to match the plane of the other column, full size base shim plates should be used (Reference FA9116 Shim Kit).