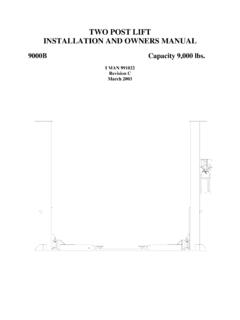
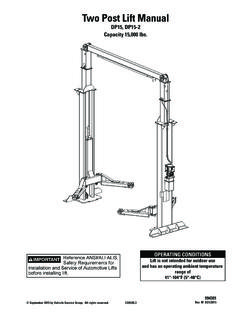
Transcription of TWO POST LIFT INSTALLATION AND OWNERS …
1 TWO post LIFT. INSTALLATION AND OWNERS manual . DP10 Series Capacity 10,000 lbs. April 2004. 994322. Rev. J. TABLE OF CONTENTS. Important Information .. 2. Section 1 owner 's manual Safety Instructions .. 3. Monthly Maintenance .. 5. Troubleshooting .. 5. Section 2 INSTALLATION Instructions Tools Required for INSTALLATION .. 8. Procedure .. 8. Section 3 Parts Breakdown Detailed Views & Parts List .. 28. Important Information: 1. Read this manual thoroughly before installing, operating, or maintaining this lift. 2. This lift is designed for indoor use only, and should not be installed in a pit or depression. 3. The floor on which the lift is to be installed must be 4- inch minimum thickness concrete, with a minimum compressive strength of 3000 psi, and reinforced with steel bar.
2 4. The lifts have specific electrical requirements as described in the INSTALLATION Instructions section of this manual . 5. This lift has a minimum ceiling height requirement as described in the INSTALLATION Instructions section of this manual . 6. Failure by the owner to provide the recommended shelter, mounting surface, electrical supply, and ceiling height could result in unsatisfactory lift performance, property damage, or personal injury. 2. 994322, Rev. J. ECN 595, April 2004. Section 1. owner 's manual Safety Instructions: 1. Do not raise a vehicle on the lift until the INSTALLATION is completed as described in this manual . 2. Anyone who will be in the vicinity of the lift when it is in use should read and refer to the following publications supplied with this lift: INSTALLATION AND OWNERS manual , I MAN 994322.
3 LIFTING IT RIGHT , ALI SM93-1. AUTOMOTIVE LIFT SAFETY TIPS , ALI-ST90. VEHICLE LIFTING POINTS FOR FRAME ENGAGING LIFTS , ALI/LP-GUIDE. SAFETY REQUIREMENTS FOR OPERATION, INSPECTION, AND. MAINTENANCE , ANSI/ALI ALOIM-1994. 3. Technicians should be trained to use and care for the lift by familiarizing themselves with the publications listed above. The lift should never be operated by an untrained person. 4. Always position the arms and adapters properly out of the way before pulling the vehicle into, or out of the bay. Failure to do so could damage the vehicle and/or the lift. 5. Do not overload the lift. The capacity of the lift is shown on cover of this document and on the lift's serial number tag. 6. Positioning the vehicle is very important. Only trained technicians should position the vehicle on the lift.
4 Never allow anyone to stand in the path of the vehicle as it is being positioned. 7. Position the arms to the vehicle manufacturer's recommended pickup points. Raise the lift until contact is made with the vehicle. Make sure that the arms have properly engaged the vehicle before raising the lift to a working height. 8. Keep everyone clear of the lift when the lift is moving, the locking mechanism is disengaged, or the vehicle is in danger of falling. 9. Unauthorized personnel should never be in the shop area when the lift is in use. 10. Inspect the lift daily. The lift should never be operated if it has damaged components, or is malfunctioning. Only qualified technicians should service the lift. Replace damaged components with manufacturer's parts, or equivalent.
5 11. Keep the area around the lift clear of obstacles. 12. Never override the self-returning lift controls. 13. Use safety stands when removing or installing heavy vehicle components. 14. Avoid excessive rocking of the vehicle when it is on the lift. 15. To reduce the risk of personal injury, keep hair, loose clothing, fingers, and all body parts away from moving parts. 3. 994322, Rev. J. ECN 595, April 2004. 16. To reduce the risk of electric shock, do not use the lift when wet, do not expose the lift to rain. 17. To reduce the risk of fire, do not operate equipment in the vicinity of open containers of flammable liquids (gasoline). 18. Use the lift only as described in this manual , use only manufacturer's recommended attachments. 19. Unusual vehicles, such as limousines, RV's, and long wheelbase vehicles, may not be suitable for lifting on this equipment.
6 If necessary, consult with the manufacturer or the manufacturer's representative. 20. The troubleshooting and maintenance procedures described in this manual can be done by the lift's owner /employer. Any other procedure should only be performed by trained lift service personnel. These restricted procedures include, but are not limited to, the following: cylinder replacement, carriage and safety latch replacement, leg replacement, overhead structure replacement. 21. Anyone who will be in the vicinity of the lift when it is in use should familiarize themselves with following Caution, Warning, and Safety related decals supplied with this lift, and replace them if the are illegible or missing: 4. 994322, Rev. J. ECN 595, April 2004. Monthly Maintenance: 1. Lubricate the four inside corners of the legs with heavy duty bearing grease.
7 2. With lift lowered check the hydraulic fluid level. If necessary add oil as described in the INSTALLATION Instruction section of this manual 3. Check carriage latch synching: Latches should click at the same time. If necessary adjust equalization cables as described in the INSTALLATION Instruction section of this manual . 4. Check tightness of all bolts. 5. Check anchor bolt tightness. If the anchor bolts are loose, they should be re-torqued to 90ft/lbs. Check the nuts for tightness every week for the first month, and every month afterwards. 6. Replace worn or broken parts with lift manufacturer's parts, or their equivalent. Troubleshooting: 7. The power unit does not run: Check electrical supply breaker, or fuse. Check for activation of the travel limit switch by a tall vehicle.
8 Check micro-switch and connections in motor control box. Check voltage to the motor. Check micro-switch and connections in the overhead switch box. 8. The power unit runs but does not raise the lift: Check the oil level. Check that the lowering valve is not stuck open. Check the connections and components on the suction side of the pump. 9. The power unit raises the lift empty, but will not lift a vehicle. Make sure the vehicle is not above the rated capacity of the lift. Make sure the vehicle is positioned properly. Clean the lowering valve by running the power unit for 30 seconds while holding the lowering valve open. Check the motor voltage. 10. Lift drifts down. Check for external leaks. Clean the lowering valve by running the power unit for 30 seconds while holding the lowering valve open.
9 Repeat this procedure three times. Clean the check valve seat. 11. Slow Lifting and/or oil foaming up. Check that oil used meets the specification in the INSTALLATION Instruction section of this manual . Tighten all suction line fittings. 12. Anchors continually work loose If holes were drilled too large relocate the lift per the INSTALLATION Instruction section of this manual . 5. 994322, Rev. J. ECN 595, April 2004. Floor is not sufficient to provide the necessary resistance, remove an area of concrete and repour as described in the INSTALLATION Instruction section of this manual . 13. Lift does not raise and lower smoothly. Reposition vehicle for a more even weight distribution. Check the four inside corners of the two legs for roughness. Any rust or burrs must be removed with 120 grit emery cloth.
10 Lubricate the leg corners with heavy duty bearing grease. Use a level to check the legs for vertical alignment both side to side and front to back. Shim the legs as necessary per the INSTALLATION Instruction section of this manual . Check the oil level. Make sure there is no air in the hydraulic lines, bleed system as described in the INSTALLATION Instruction section of this manual . 14. The lift will only lower approximately 1 , then stops. Check that the safety latch pull rods are disengaged. If after disengagement of the pull rods, one of them moves back up as the lift is lowered, the pull rod is out of adjustment and is rubbing on the leg. Adjust the rod to clear the leg. Push down on the first bend of the rod just inside the leg. Bend the rod slightly to allow it to move freely between the leg and the carriage.