Transcription of Option 1 OR - Cox Communications
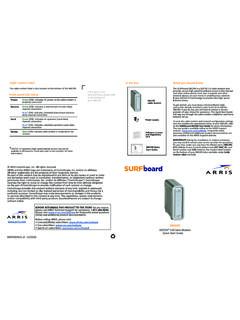
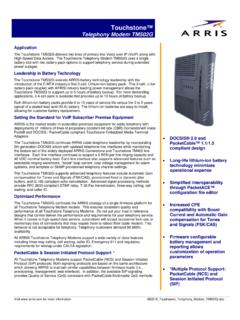
1 Cox Home Networking Setup If you have already purchased a wireless router, please use the Installation CD located in the router box. If you are unable to connect your Cox High Speed Internet service following these instructions, visit or call Cox Customer Care at 1-888-556-1193. 2011 Cox Communications , Inc. All rights Instructions431. Go to and click on My Click on Internet Tools and log in to: Set up your email account Change your account password Add secondary accounts Change secondary account passwordsCox High Speed Internet provides FREE Cox Security Suite powered by Take full advantage of your anti-virus, anti-spyware, anti-spam, firewall and parental controls Connect one end of part (C) to the Ethernet connection of part (A).2. Connect the other end of part (C) to your computer s Ethernet Connect part (B) to part (A) and plug into a wall Your Cable Modem to Your ComputerRestart Your Computer andOpen Your Web Browser 1 2 Choose Your Connection TypeGetting StartedPlease have the following available to begin the installation process:Verify Installation Kit Contents*INOUTOUTINOUTOUTINOUTOUTABCDORO ption 1 Modem Only Connection 1.
2 Connect one end of part (E) to the wall steps 2 3 to install the Filter for Cox Advanced TV Plus kits. If you did not receive a Filter, proceed to step Connect part (E) to the top of part (H).3. Connect the bottom of part (H) to the Cable In connection of part (A).OR4. Connect part (E) to the Cable In connection of part (A). Option 2 Modem & TV Connection1. Connect one end of part (F) to your wall outlet. 2. Connect the other end of part (F) to the IN connection of part (G).3. Connect the coaxial cable from your TV to the OUT connection of part (G).4. Connect one end of part (E) to the other OUT connector of part (G).Follow steps 5 6 to install the Filter for Cox Advanced TV Plus kits. If you did not receive a Filter, proceed to step Connect part (E) to the top of part (H).6. Connect the bottom of part (H) to the Cable In connection of part (A). OR7. Connect part (E) to the Cable In connection of part (A).
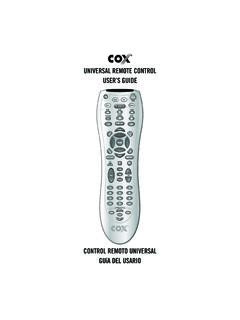
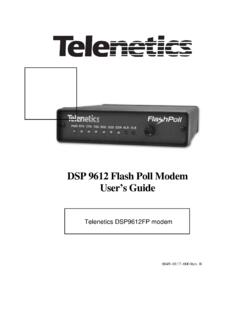
3 Cable ModemPower Cable Ethernet (or USB) Cable DO NOT uSe DuRING INSTALL: Wireless Modem Installation CDLong Coaxial Cable Short Coaxial Cable 2-Way Signal SplitterFilter: Optional part for Cox Advanced TV Plus Package customers. BCDAEFGH*Available when you self-install Cox High Speed Internet or provided by a Cox representative during the installation of IN+12 VDCBack of Part (A)AEHO ptionalOptionalFGEAHO ptional520-0062 INOUTOUT