Transcription of Pro Flight Cessna Yoke sYstem - Saitek.com
1 Pro Flight Cessna Yoke sYstemofficially licensed Cessna ProductOFFICALLY LICENSED Cessna PRODUCTSFROM saitek PRO Flight AVILABLE AT: Flight Cessna RUDDER PEDALSFLIGHT PEDALS WITH TOE BRAKESPRO Flight Cessna YOKE SYSTEMFLIGHT YOKE AND 3 LEVER QUADRANT MODUALPRO Flight Cessna TRIM WHEELOFFICIALLY LICENSED Cessna PRODUCT68-17211-37759 ENGLISHIN troductIoN 5 INStaLLING tHE Flight YokE aNd tHrottLE QuadraNt 5 drIvErS aNd SoFtwarE INStaLLatIoN For uSErS oF wINdowS xp aNd 7, 32- aNd 64-bIt 6 drIvErS aNd SoFtwarE INStaLLatIoN For uSErS oF wINdowS vISta aNd 7.
2 32- aNd 64-bIt 7 ENabLING Your coNtroLLEr IN GamES 8 proGrammING Your pro Flight coNtroLLEr wItH Smart tEcHNoLoGY proGrammING SoFtwarE 12 FraN aISIN troductIoN 17 INStaLLatIoN du maNcHE dE voL voLaNt Et du bLoc maNEttE dES Gaz 18 IINStaLLatIoN dES pILotES Et du LoGIcIEL pour LES utILISatEurS dE wINdowS xp, 32 Et 64 bItS 19 INStaLLatIoN dES pILotES Et du LoGIcIEL pour LES utILISatEurS dE wINdowS vISta Et 7, 32 Et 64 bItS 20 actIvatIoN dE votrE coNtr LEur daNS LES jEux 20 proGrammatIoN dE votrE coNtr LEur pro Flight avEc LE LoGIcIEL Smart tEcHNoLoGY proGrammING SoFtwarE 25dEutScHEINF HruNG 31 INStaLLatIoN dES Flight YokE uNd dES tHrottLE QuadraNt 31 trEIbEr- uNd SoFtwarE INStaLLatIoN F r bENutzEr voN wINdowS xp.
3 32- aNd 64-bIt 32 trEIbEr- uNd SoFtwarE INStaLLatIoN F r bENutzEr voN wINdowS vISta uNd 7 32-bIt uNd 64-bIt 33 tEStEN uNd EINStELLEN IHrES coNtroLLErS 34 auSF HrEN dEr Smart tEcHNoLoGY proGrammING SoFtwarE 41 ItaLIaNoINtroduzIoNE 45 INStaLLazIoNE dELLa cLocHE Flight YokE E dEL moduLo tHrottLE QuadraNt 45 I INStaLLazIoNE dEI drIvEr E dEL SoFtwarE pEr utENtI dI wINdowS xp a 32 E a 64 bIt 46 INStaLLazIoNE dEI drIvEr E dEL SoFtwarE pEr utENtI dI wINdowS vISta E 7, a 32 E a 64 bIt 47attIvazIoNE dEL coNtroLLEr NEI GIocHI 48proGrammazIoNE dEL coNtroLLEr pro Flight coN IL SoFtwarE Smart tEcHNoLoGY 55 ESpa oL INtroduccI N 61 INStaLacI N dEL Flight YokE Y dEL tHrottLE QuadraNt (cuadraNtE dEL acELErador)
4 61 INStaLacI N dE drIvErS Y SoFtwarE para uSuarIoS dE wINdowS xp, 32- Y 64-bIt 62 INStaLacI N dE drIvErS Y SoFtwarE para uSuarIoS dE wINdowS vISta Y 7, 32- Y 64-bIt 63actIvar EL maNdo EN LoS juEGoS 64proGramar Su maNdo pro Flight coN EL SoFtwarE dE proGramacI N Smart tEcHNoLoGY 7042-WAY ROCKER SWITCHES3 Switches combine to make 6 controls3 interrupteurs permettent de disposer de 6 commandes3 Schalter bieten zusammen 6 Steuerelemente3 interruttori combinati per realizzare 6 controlliLos 3 interruptores se combinan para ofrecer 6 mandos4-WAY ROCKER SWITCH Accurate ergonomic thumb control 3 interrupteurs permettent de disposer de 6 commandes 3 Schalter bieten zusammen 6 Steuerelemente 3 interruttori combinati per realizzare 6 controlliLos 3 interruptores se combinan para ofrecer 6 mandos8-WAY HAT SWITCHC ontrollable de vue contr lableKontrollierbarer BlickwinkelCambio di visuale
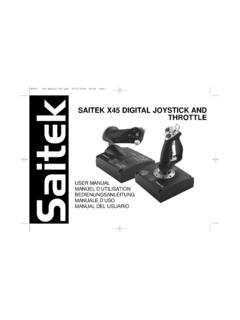
5 ControllabilePunto de vista controlableTHROTTLE/PITCH/MIXTURE CONTROLSA uthentic lever controlContr le parfait des leviersAuthentische HebelsteuerungLeva di comando autenticaAut ntica palanca de cambio2 X 2-WAY ROCKER SWITCHES2 Switches combine to make 4 controlsBoutons programmables d acc s facileLeicht zug ngliche programmierbare TastenPulsanti programmabili di facile accessoBotones programables de acceso r pidoMODE SWITCH3-Position rotary mode switchInterrupteur rotatif de s lection de mode 3 positions3-Positions-DrehschalterInterru ttore per la modalit di rotazione a 3 posizioniInterruptor de modo rotatorio de 3 posicionesGBFRDEITES//////////GBFRDEITES //////////GBFRDEITES//////////GBFRDEITES //////////GBFRDEITES//////////GBFRDEITES //////////5 ENGLISHIN troductIoNThe Pro Flight Cessna Yoke is designed to maximize realism by enabling accurate turning motion and a vast number of button controls for PC Flight simulation software.
6 saitek and Cessna have teamed up to provide you with the most authentic Flight controls for your home cockpit. This product has been built using genuine design data from the world s most popular plane manufacturer. The Pro Flight Cessna Yoke works with a wide variety of Flight simulators, and functions perfectly with other products in the Pro Flight : Realistic Cessna turning motion 8-way point of view hat switch 1 x 4-way rocker switch 5 x 2-way rocker switches 2 x single-function buttons Lever quadrant with 3 x levers and 3 x detent buttons 3-position mode switch Smart Technology (ST) Programming Software allows gamers to configure their controls to suit their preferred gaming style, and to save the configurations as personal profilesINStaLLING tHE Flight YokE aNd tHrottLE QuadraNtFirst, fix the Flight Yoke to your table or desk by inserting the prongs of the mounting clamp into the holes on the Yoke base and then tightening the screw mechanism until the Yoke is firmly attached.
7 Be careful not to over-tighten the screw as you may damage the clamp. Next, screw the mounting plate to the Throttle Quadrant using the four provided screws. You can screw the plate to one of two sides of the Quadrant depending on how you 6want to mount the Quadrant either in front of your table surface or on top of it. Please note that whichever way you choose to mount the Quadrant, ensure that as you look at the unit the rocker switches are at the bottom. Now tighten the Throttle unit clamp s screw mechanism until it is firmly attached to your table. You can also position the Throttle Quadrant on the left or right side of the Flight Yoke. Now connect the Throttle Quadrant to the Flight Yoke with the provided PS/2 connector. Your Throttle Quadrant comes supplied with additional lever knobs to configure any combination of throttle, flaps, mixture or prop pitch and you can also buy additional Quadrants to link together for more complex multi-engine aeroplane the integrated USB Hub on the side of the Pro Flight Yoke to easily connect other controllers from the saitek Pro Flight range, such as additional Pro Flight Throttle Quadrants, Pro Flight Yoke or other aNd SoFtwarE INStaLLatIoN For uSErS oF wINdowS xp, 32- aNd 64-bIt1.
8 With your computer powered on, close down any programs that are currently running, and then insert the Installation CD into your CD-ROM When the Welcome screen appears, click Next to continue. If the CD does not run automatically, select Start from the Windows Taskbar, then Run, then type D:\Setup. exe into the Run window s text entry field, and then click OK (assuming D:\ is the letter of your CD-ROM drive).3. After reading the Disclaimer, select the I accept the terms of the Disclaimer option and click Next to At the Driver Setup screen, if you haven t already done so, plug the USB cable into one of your computer s USB ports, and then click At the Driver Setup screen, click Next to test your When the saitek Controller screen appears, try out all of your controller s controls to determine if it is working properly. When you have finished, click In the following Software Setup screen, click Next and follow the on-screen instructions.
9 At this point you will be asked to install such features as the Programmable Support for Mouse, Programmable Support for Keyboard and Programmable Hotkeys (these are important components of the programming software and are required).8. If you are asked if Windows can connect to Windows Update to search for software, choose No, not at this time. Continue to click Next and Finish to accept the Upon completion of the installation, you have the option to Run Profile Editor, which will give you a view of the programming environment. If you do not wish to see the Profile Editor at this point, uncheck the box and click Finish to complete the aNd SoFtwarE INStaLLatIoN For uSErS oF wINdowS vISta aNd 7, 32- aNd 64-bIt1. With your computer powered on, close down any programs that are currently running, and then insert the Installation CD into your CD-ROM When the Welcome screen appears, click Next to continue.
10 If the CD does not run automatically, select Start from the Windows Taskbar, then Run, then type D:\ into the Run window s text entry field, and then click OK (assuming D:\ is the letter of your CD-ROM drive).3. After reading the Disclaimer, select the I accept the terms of the Disclaimer option and click Next to At the Driver Setup screen, if you haven t already done so, plug the USB cable into one of your computer s USB ports and then click At the Driver Setup screen, click Next to test your When the saitek Controller screen appears, try out all of your controller s controls to determine if it is working properly. When you have finished, click In the following Software Setup screen, click Next and a pop-up box will appear asking if you want to trust software from saitek . Click yes, and then click Upon completion of the installation, you have the option to Run Profile Editor, which will give you a view of the programming environment.


